Streamlabs Setup for Beginners: From Microphone to Live Streaming

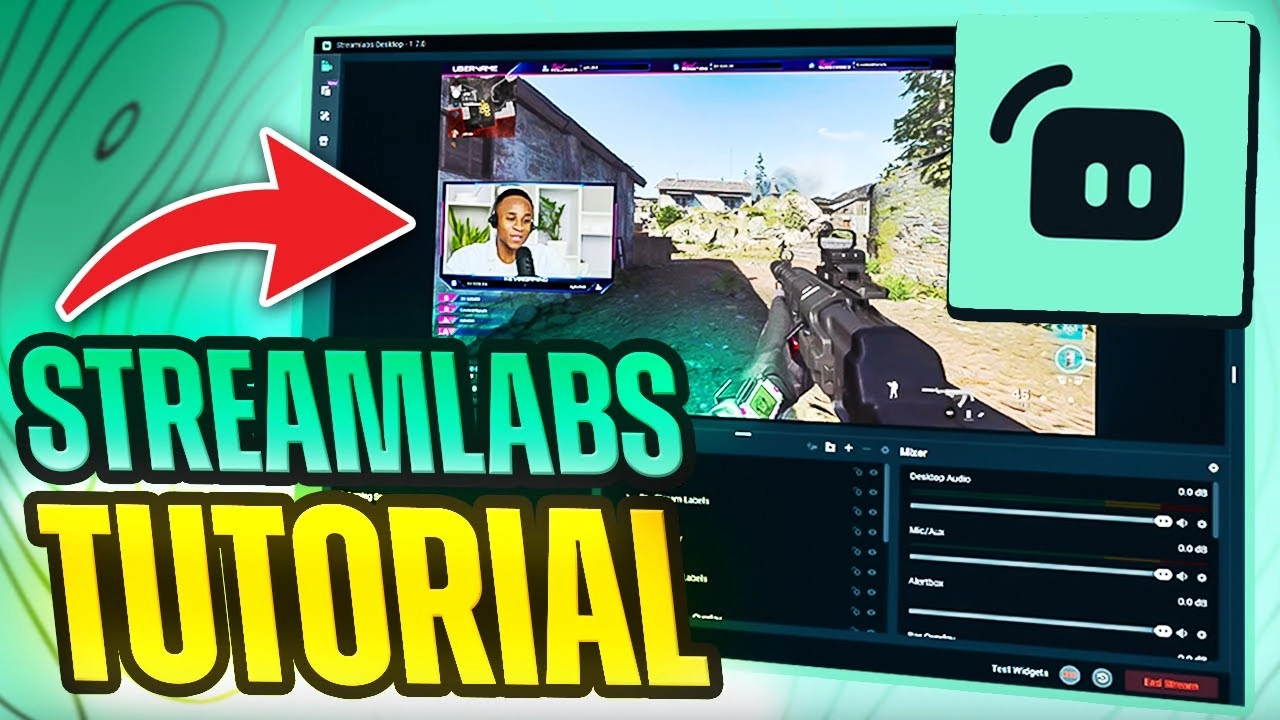
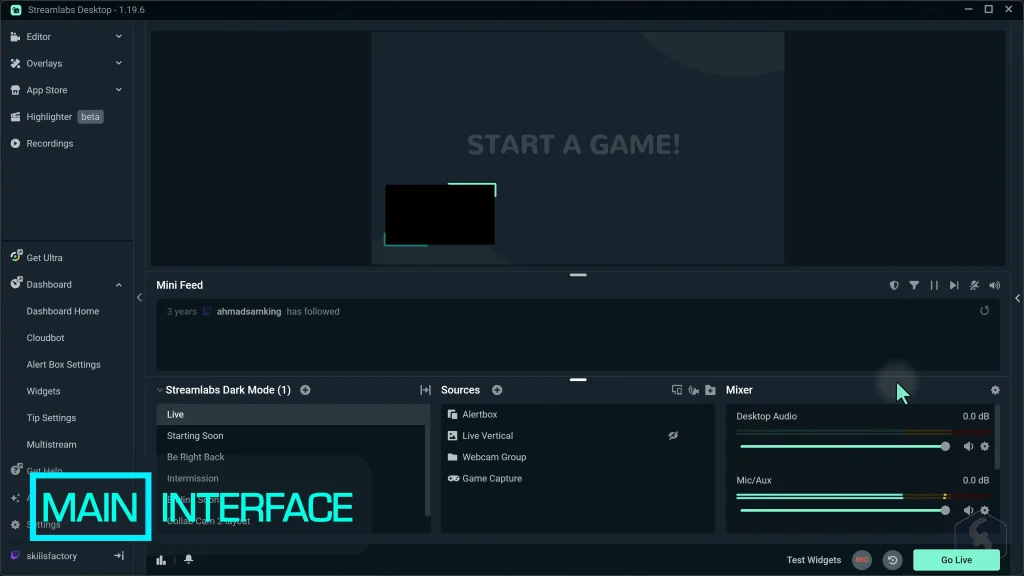
You want to start your live streams in Streamlabs Desktop. Ever opened it and wondered why going live needs so many buttons? Don’t need to be trapped in terms like “CBR” and “NVENC”. Once you know where the preview, scenes, sources, audio mixer, and stream controls live, you’re most of the way there.
This Streamlabs Desktop setup shows you what Streamlabs Desktop does and how to use it to start streaming. From the streaming equipment to the Streamlabs setup, starting your first live stream is a piece of cake!
What Is Streamlabs Desktop?
Streamlabs Desktop Explained
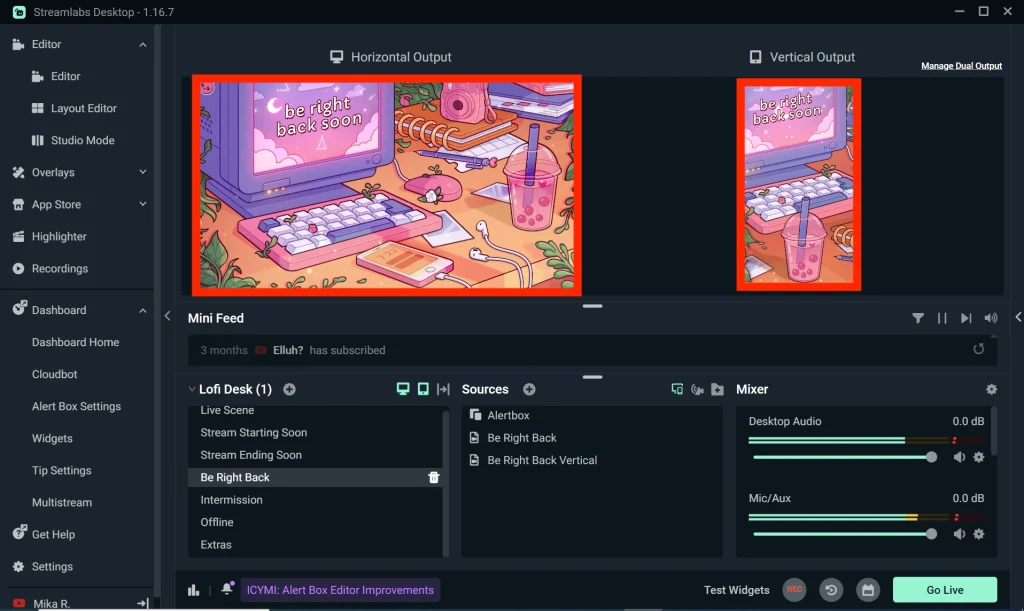
Streamlabs Desktop is free broadcasting software. It captures your game, screen, webcam, and microphone, combines them into one layout, and sends it live to platforms such as Twitch, YouTube, Kick, TikTok, and Facebook. It also records locally, with no watermarks or time limits.
It’s built on the OBS engine, so the fundamentals are solid. What Streamlabs adds is convenience: a setup wizard, one-click platform login, and built-in alerts, overlays, and widgets.
What Can You Use Streamlabs Desktop For?
The short answer: Streamlabs Desktop offers almost anything you’d want to show live, which is why it suits beginners.
- Gaming streams and live commentary: Game Capture handles full-screen games efficiently.
- YouTube tutorials, screen recordings and demos: capture your desktop or one app, and hit Record for a local copy.
- Webcam chats, presentations and creator content: combine a camera, text, images and browser sources.
- Overlays, alerts and audience interaction: free themes, alert boxes, chat boxes and goal widgets.
Streamlabs Desktop vs. OBS
Both streaming tools are free and share an engine. The difference is how much you build yourself.
| Streamlabs Desktop | OBS Studio | |
|---|---|---|
| Price | Free, optional Streamlabs Ultra subscription | Free and open source |
| First-time setup | Guided wizard, platform login, preset settings | Manual configuration |
| Overlays and alerts | Built-in themes, alert box and widgets | Added through plugins or third-party tools |
| Best for | Beginners who want an all-in-one app | Users who want to build from scratch |
New to streaming? Start with Streamlabs. You can switch later, and a Streamlabs plugin even brings its alerts into OBS. Check our Streamlabs Desktop vs. OBS guide to pick the best for you.
Streaming Setup for Beginners: What Equipment Do You Need?
Before we step into the software, prepare your streaming equipment well. You need a few essentials that work together reliably, and you can add the rest once a real problem shows up.
Essential Streaming Setup for Beginners
| Gear | Why it matters | Beginner baseline |
|---|---|---|
| Computer | Encodes your video in real time | Windows 10 or macOS 12 or later with 8GB of RAM. For demanding games, Streamlabs recommends 16GB and an 11th-gen Intel Core i5 or AMD Ryzen 5000-series CPU |
| Microphone | Clear and warm audio keeps your audience staying. | A dedicated USB mic, a few inches from your mouth |
| Headphones | You hear what viewers hear, and game audio stays out of your mic | Wired, closed-back |
| Webcam (optional) | Adds a face cam | 1080p at 30fps |
| Internet | Upload speed caps your bitrate | Wired Ethernet and at least 7.5 Mbps upload for a 6,000 kbps stream |
Picking Your Best Streaming Microphone
Condenser mics capture rich detail but pick up more background noise. Dynamic mics focus on the voice right in front of them, which helps when your keyboard, PC fans, or roommates are nearby. Learn more on our best streaming microphone list and condenser vs. dynamic microphone guide.
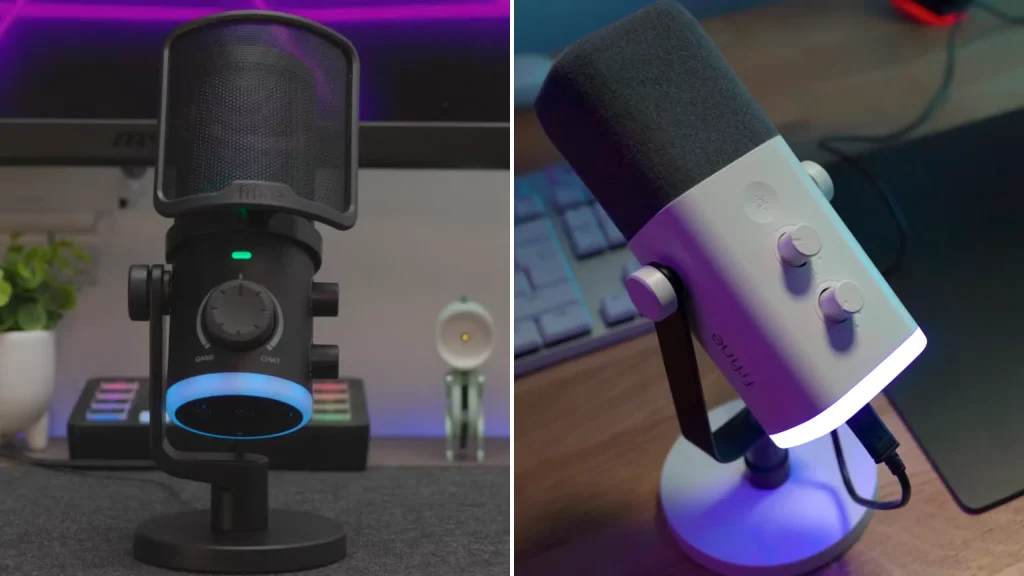
| fifine mic | Type | Connection | Best for |
|---|---|---|---|
| AmpliGame AM6 | Condenser, cardioid | USB | Quiet rooms. Its ChatMix dial balances game and voice audio on PC and Mac |
| AmpliGame AM8 | Dynamic, cardioid | USB and XLR | Noisy rooms. Start on USB with tap-to-mute and RGB, then move to an XLR mixer later |
Both plug straight into your computer over USB and show up in Streamlabs without drivers. The AM8’s XLR output gives you an upgrade path, so you won’t need a new mic when you add a mixer. Check the fifine AM6 vs AM8 guide here.
Picking Your Best Streaming Headphones
For streaming, closed-back headphones are the safe choice. They keep game sound from leaking into your mic, which is the most common cause of echo on beginner streams.
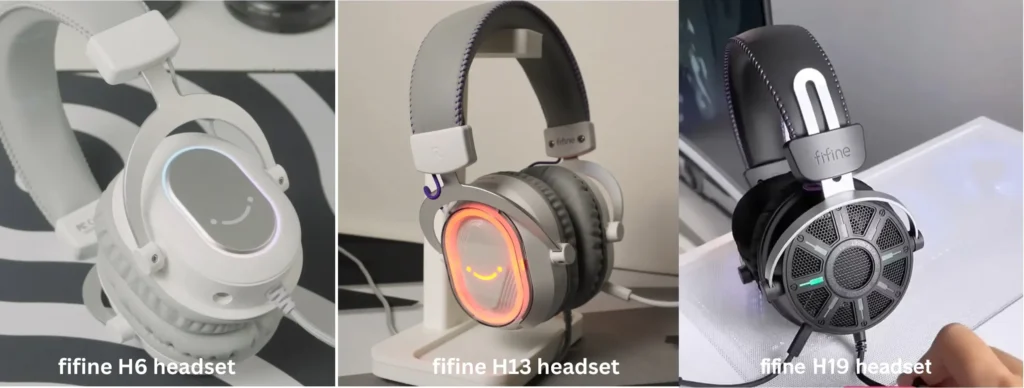
| fifine headset | Design | Best for |
|---|---|---|
| H9 Headset | Closed-back, 50mm drivers, 7.1 virtual surround, detachable mic | Streamers who use a separate mic and want solid isolation |
| H13 Headset | Closed-back, 50mm drivers, 7.1 virtual surround, RGB | Isolation plus lighting that shows up on camera |
| H19 Headset | Open-back, 53mm drivers, 7.1 virtual surround, detachable mic | Wide, natural sound for off-stream gaming. Open-back designs leak sound, so keep the volume moderate near a sensitive mic |
Optional Gear That Can Improve Your Setup
These upgrades solve specific problems. If you don’t have the problem yet, you don’t need the gear.
| Gear | What it solves | Skip it if |
|---|---|---|
| fifine BM38 Boom arm | Gets the mic close to your mouth and away from keyboard thumps | Your desk stand already puts the mic close |
| fifine D6 Stream controller | 15 customizable LCD keys for quick control with one press | You stream from a single scene |
| fifine SC3 audio mixer/ SC8 audio mixer | Connects XLR mics and puts several sources under hands-on control | You use a USB mic and one audio source |
| Lighting | Fixes a dark or grainy webcam image | You don’t use a camera |
Streaming lights often improve your webcam image more than a pricier camera. And if you plan to go XLR, budget for a mixer or interface with phantom power if your mic needs it.
8 Steps to Start Streaming with Streamlabs Setup
So, let’s dive into how to start streaming with Streamlabs. Each step builds on the last, so work through them in order.
Step 1. Download and Install Streamlabs Desktop
Download Streamlabs Desktop, run the installer and allow camera and mic access when prompted. The setup wizard then asks you to sign in. Log in with the platform you’ll stream to, such as Twitch or YouTube, and Streamlabs presets several settings for it. New to streaming? Choose Start Fresh rather than importing OBS settings.
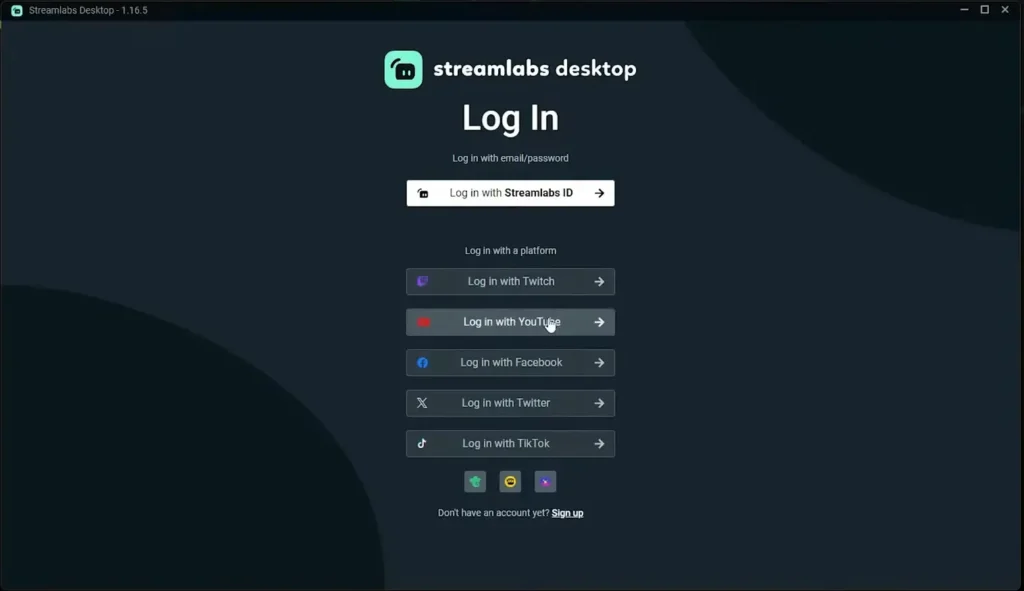
The free starter plan is enough for beginners with scenes, alerts, recording and Dual Output. If you want advanced functions, like multistreaming and premium overlays, subscribe to the Streamlabs Ultra plan, which is $189 per year.
Step 2. Connect Your Microphone and Set Up Audio Input
Plug a USB mic straight into your computer. An XLR mic goes into an audio interface or mixer first, which connects over USB.
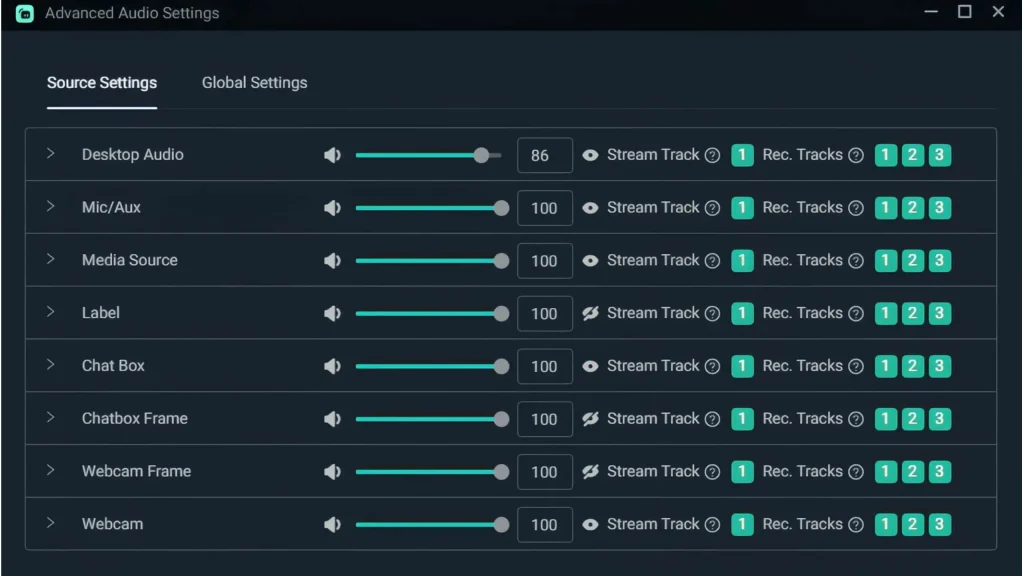
Open Settings > Audio and set Mic/Auxiliary Device 1 to your actual mic, not “Default” or your webcam’s mic. Speak normally and watch the mixer meter: aim for peaks in the yellow. Constant red means clipping, so lower the gain.
Then open Filters beside your mic and add noise suppression (RNNoise) for fan hum, a noise gate for keyboard clicks and a compressor to even out your volume. Record 30 seconds and listen back.
If your room is noisy, a dynamic mic such as the fifine AmpliGame AM8, which offers both USB and XLR, focuses on your voice rather than the room. A boom arm like the fifine BM38 keeps it a few inches from your mouth.
Step 3. Connect Your Headphones and Test Audio Output
In Settings > Audio, set Desktop Audio Device to the headphones you listen through. Everything playing there reaches your stream. Mac users need free routing software such as BlackHole to capture desktop audio.
Test each source separately: play a video and watch Desktop Audio move, then stay silent and confirm your mic barely twitches.
If you hear echo, closed-back headphones fit that by keeping sound in. Also the closed-back fifine headset H9 or H13 will seal in sound for long sessions. Read our open-back vs. closed-back headset to learn more.
Step 4. Create Your First Scene and Add Sources
A scene is a complete layout, like Starting Soon or Gameplay. Sources are the pieces inside it: game, webcam, overlays, alerts.
- Click + in the Scenes panel and name it “Gameplay.”
- Click + under Sources and choose Game Capture for games, Window Capture for one app or Display Capture for your whole screen. Display Capture shows everything, so close personal tabs first.
- Add a Video Capture Device for your webcam. Drag the corners to resize, and hold Alt to crop.
- Keep the webcam above the game in the Sources list, or it hides behind it.
- Add an Alert Box from a free theme and place it top center.
Keep it clean: a webcam, gameplay and clear audio beat flashing borders. A streaming controller can speed up scene switching later, but it’s optional.
Step 5. Configure Your Streaming Platform and Video Settings
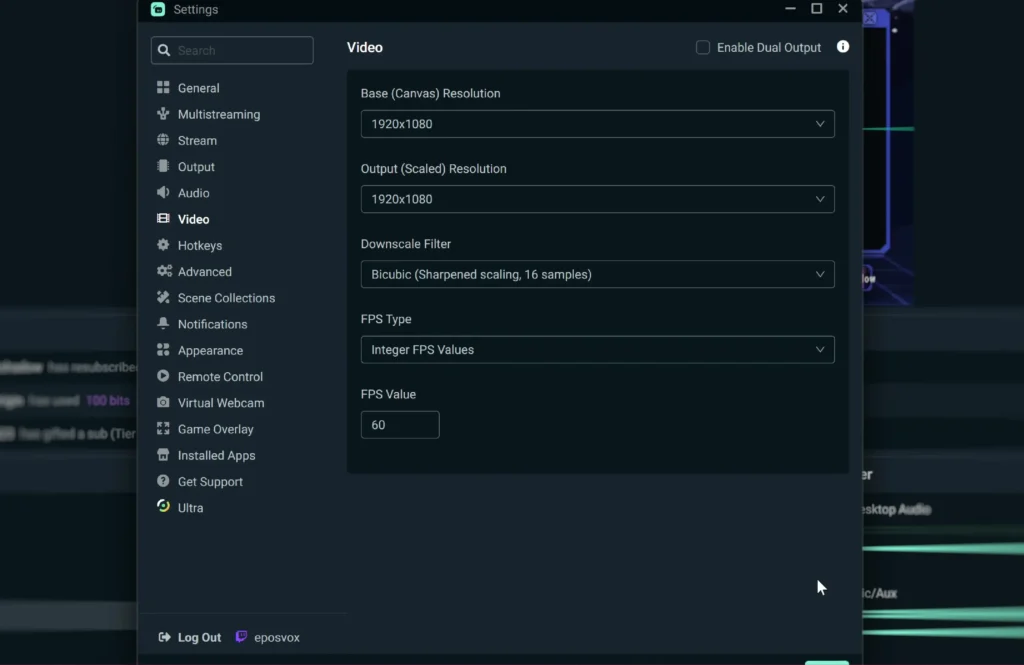
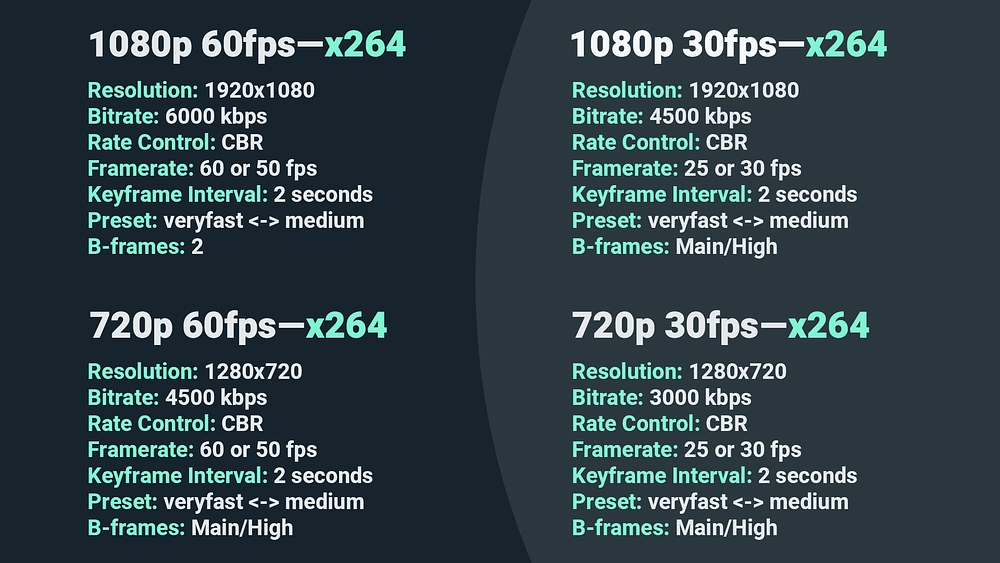
In Settings > Stream, confirm the right account is connected and can go live; YouTube, for one, requires verification first. In Settings > Video, set Base Resolution to your monitor’s and Output Resolution to 1920×1080, at 60fps for fast games or 30fps for chatting.
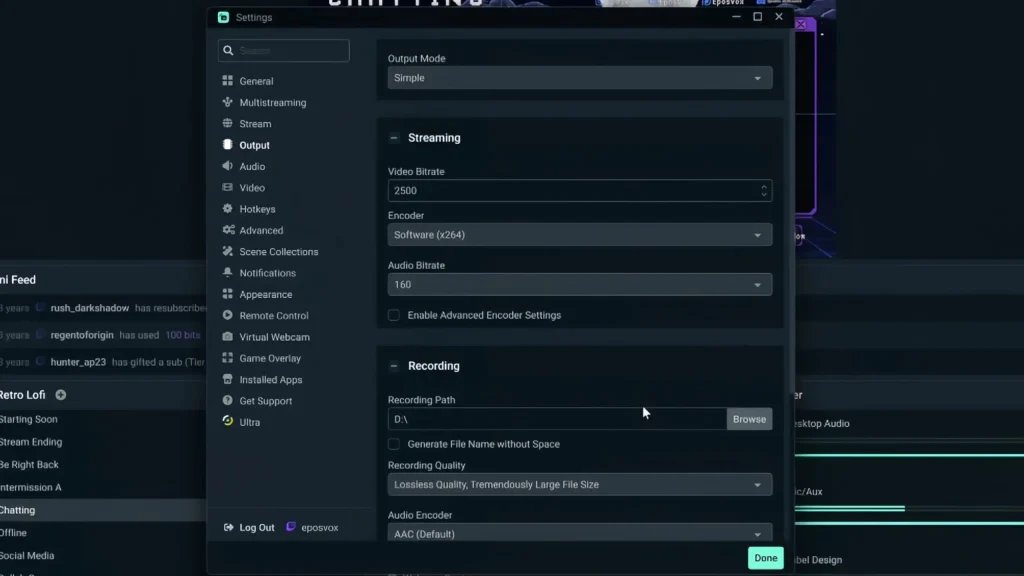
In Settings > Output, switch Output Mode to Advanced:
| Setting | Beginner pick |
|---|---|
| Encoder | NVIDIA NVENC, AMD AMF or Intel QuickSync H.264, so your GPU does the work |
| Rate control | CBR |
| Bitrate | About 6,000 kbps for 1080p60 (YouTube takes up to about 10,000) |
| Keyframe interval | 0 (automatic) |
| Preset (NVENC) | P5 or P6 |
Run a speed test and keep your bitrate under 80% of your upload: 7 Mbps up supports about 5,600 kbps. Below roughly 5,000 kbps, drop to 720p; soft beats blocky. Last, check your voice sits clearly above desktop audio.
Step 6. Connect a Stream Controller or Audio Mixer (Optional)
If you need to alt-tab mid-match to switch scenes or move to an XLR mic, this step is for you.
A fifine D6 streaming controller gives you 15 customizable keys for scene switches, mic mutes, and shortcuts. Download the fifine D6 software and connect the hotkey with Streamlabs. Check the fifine D6 Stream Controller with Streamlabs guide to set it up.
A mixer or interface powers XLR mics and puts several sources under your fingers. The signal path: microphone → XLR cable → mixer → USB → computer → Streamlabs (selected as your mic). The fifine AmpliGame SC3 audio mixer adds 48V phantom power, up to 50dB of gain, and a quick-mute button.
Step 7. Test Your Setup Before Going Live
Record a two-minute test with talking, gameplay, and silence. Play it back and check for clipping, background noise, echo, missing or black sources, and lip-sync drift. Use Test Widgets to fire a fake follow and confirm your alert shows.
Then check your title, category, and privacy; an unlisted YouTube stream makes a good dry run. Scan the preview for email tabs or Discord DMs and close them.
Step 8. Start Your First Stream and Monitor Performance
Click Go Live in the bottom-right corner, then open your channel on your phone to confirm it looks and sounds right.
While live, watch your mic meter, the dropped frames counter, and your game’s performance. If frames drop, enable dynamic bitrate under Settings > Advanced > Network. When you’re done, say goodbye and click End Stream.
After a few streams, you’ll know what bugs you most. Fix that first.
Final Checklist About Streaming Setup
- Mic selected, peaking in the yellow, filters on
- Desktop audio set to your headphones, no echo
- Scene built, webcam above capture, alerts placed
- Output at 1080p or 720p, 30 or 60fps
- Hardware encoder, CBR, bitrate under 80% of upload
- Platform connected; title, category and privacy checked
- Test recording reviewed, screen cleared of personal info
Final Verdict on Streamlabs Setup for Beginners
Streaming with Streamlabs looks complicated at first, but the core Streamlabs setup is short. Dial in your mic and headphones, build one clean scene, match your bitrate to your upload speed, and test before you go live.
Your first broadcast won’t be perfect, and it doesn’t need to be. Go live, watch the replay, and fix the one thing that bothered you most. Repeat that, and your setup grows with your channel.
FAQs
Is Streamlabs Desktop free?
Yes. The core tools are free. Streamlabs Ultra is an optional subscription for multistreaming and premium overlays.
Is Streamlabs Desktop better than OBS for beginners?
For most beginners, yes. It adds a setup wizard and built-in alerts to the OBS engine. OBS suits people who prefer building from scratch.
What bitrate should I use in Streamlabs?
Around 6,000 kbps works well for 1080p60 on Twitch. YouTube can handle about 10,000 kbps. Either way, stay under 80% of your measured upload speed.
Can I use an XLR microphone with Streamlabs?
Yes. Run it through an audio interface or mixer, then select that device as your mic in Settings > Audio. Choose the fifine AM8 USB/XLR microphone and start with easy-to-use USB mode, then upgrade to XLR mode for advanced setup.
Why is my stream dropping frames?
Usually, your bitrate is too high for your upload, or your Wi-Fi is unstable. Lower the bitrate or switch to Ethernet.
