
How to Record Gameplay with Voice in OBS (7-Step Guide)

Every time an event like the Esports World Cup 2026 rolls around, a wave of players decides this is the year they start recording. Then you hit record, play back the footage, and it’s laggy, blurry, or has no sound at all.
The good news: record gameplay with voice on top isn’t hard. It just has a handful of settings that trip up beginners. This guide walks you through the whole thing in OBS Studio — capturing your game, adding your microphone, cleaning up your sound, and dialing in recording settings that look sharp without melting your PC. By the end, you’ll have a repeatable setup you can hit record on and forget.
What You’ll Need for Recording Gameplay in OBS
You don’t need a professional studio to create great gameplay videos. Here’s the basic setup for recording clear gameplay, game audio, and voice commentary in OBS.
| Equipment | Why You Need It | Recommendation |
|---|---|---|
| OBS Studio | Records gameplay, microphone, and system audio in one place. | Free and available for Windows, macOS, and Linux. |
| Gaming PC or Console | Runs your game. Console players also need a capture card to send gameplay to OBS. | A capture card is required for PlayStation, Xbox, and Nintendo Switch. |
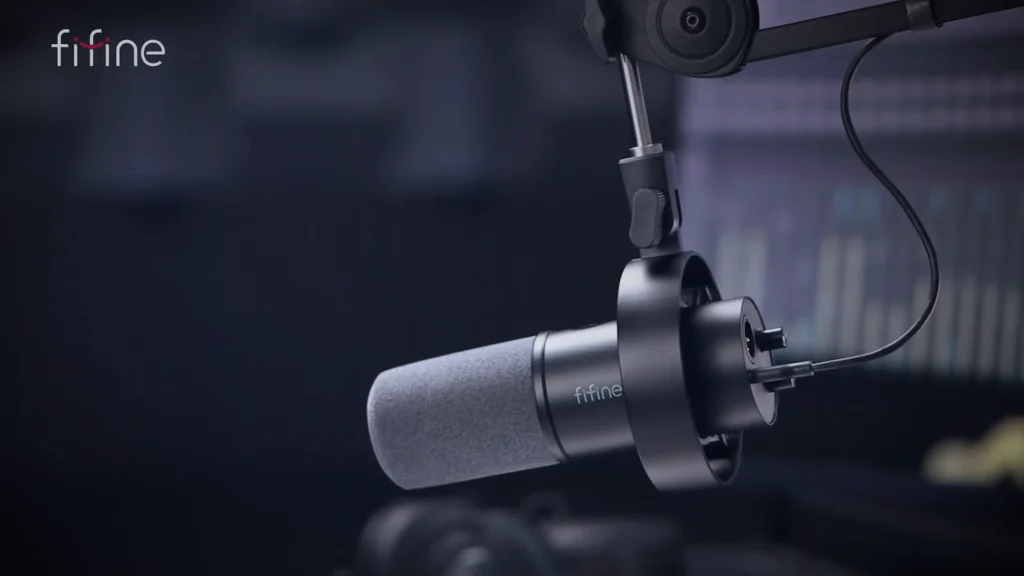
| Microphone | Clear commentary keeps viewers engaged and reduces distracting background noise. | fifine AM8 (USB/XLR for future upgrades) or fifine K688 (dynamic mic for noisy gaming setups). |
| Headphones | Prevent game audio from leaking into your microphone and help you monitor your recording in real time. | A fifine H13 closed-back gaming headset for recording and streaming. |
Once your gear is ready, you’re all set to configure OBS. If you’re still deciding on a microphone or want to learn more about gaming audio before you begin, check out our comparisons of fifine AM8 vs. K688, USB vs. XLR microphones, and when to upgrade from USB to XLR, along with our guides to soundstage vs. imaging, stereo vs. surround sound, and best gaming headsets for FPS games.
Step 1 – Install and Set Up OBS Studio
Head to obsproject.com and download the version for your operating system. Run the installer, launch OBS, and you’ll land on the Auto-Configuration Wizard. Click Cancel — it optimizes for streaming, and we’re setting up the recording by hand so you understand what each control does.
Next, set your recording location. Go to Settings → Output, find the Recording Path, and point it at a folder you’ll actually remember. A dedicated “OBS Recordings” folder saves you from digging through your drive later.
While you’re in Output, switch Output Mode from Simple to Advanced at the top. Advanced unlocks the encoder and bitrate controls we’ll need in Step 6.
Step 2 – Add Your Gameplay Source
OBS gives you three ways to capture what’s on screen, and picking the right one is the difference between clean footage and a black screen. In OBS, find the Sources dock, click the +, and you’ll see all three.
| Capture method | Best for | Watch out for |
|---|---|---|
| Game Capture | Most games — it hooks the game directly and is the most efficient option | The game must be open first, or it won’t appear in the list |
| Window Capture | Games or apps that Game Capture won’t detect | Only grabs the specific window you choose |
| Display Capture | A last resort when the other two fail | Records your entire monitor, including your desktop, if you alt-tab |
Start with Game Capture. Add it, then set the mode to Capture Specific Window and select your game (launch the game first so it shows up). You’ll also find a Capture Cursor toggle — turn it on or off depending on whether you want your mouse in the shot.
If your game leaves black bars or doesn’t fill the frame, right-click the source, go to Transform → Fit to Screen, and it’ll snap to fill the canvas.
Step 3 – Set Up Your Microphone in OBS
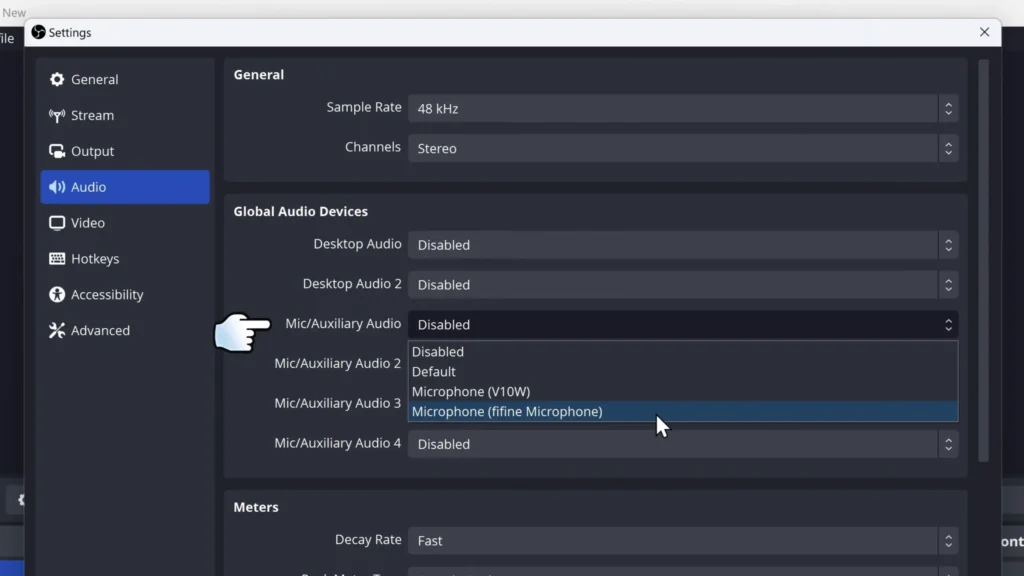
Go to Settings → Audio and select your microphone under Mic/Auxiliary Audio. Most fifine USB microphones are plug-and-play, so OBS should detect them automatically. If you’re using a USB/XLR model like the fifine K688, you can easily upgrade to an audio interface later without replacing your microphone.
Back in the main OBS window, speak at your normal volume and check the Audio Mixer. Aim for peaks between -12 dB and -6 dB to keep your voice clear while avoiding distortion.
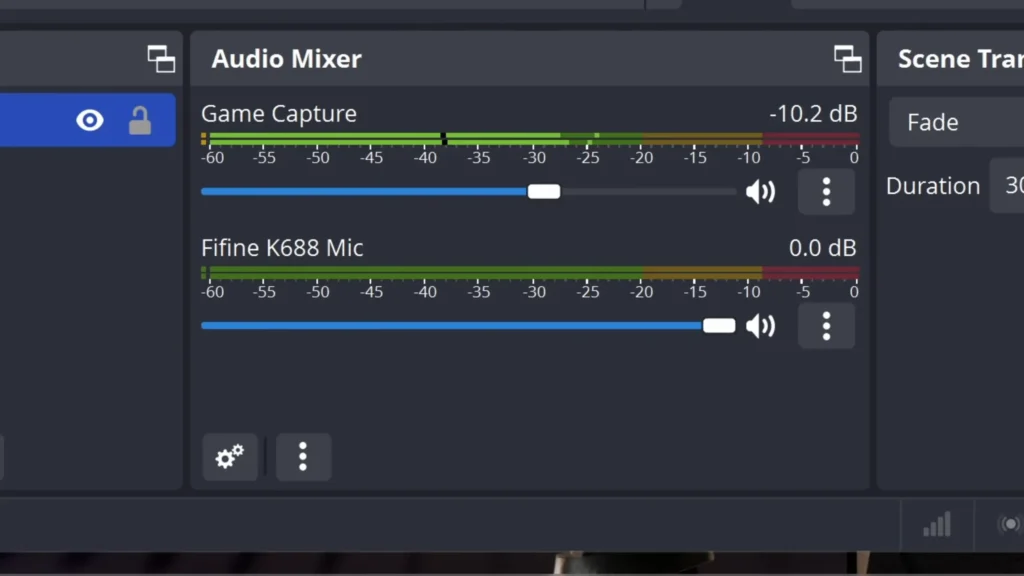
Tip: If your microphone sounds too quiet, increase the gain instead of speaking louder. Read our Microphone Gain Explained guide to learn how to set the right recording level.
Step 4 – Configure Game Audio
Game audio is captured through Desktop Audio in OBS. In Settings → Audio, set Desktop Audio to the same output device you use for your game, such as your speakers, headphones, or audio interface.
Before recording, close any apps that play sound in the background, as OBS captures all desktop audio by default. Then, check the Audio Mixer to make sure both your Microphone and Desktop Audio meters are responding.
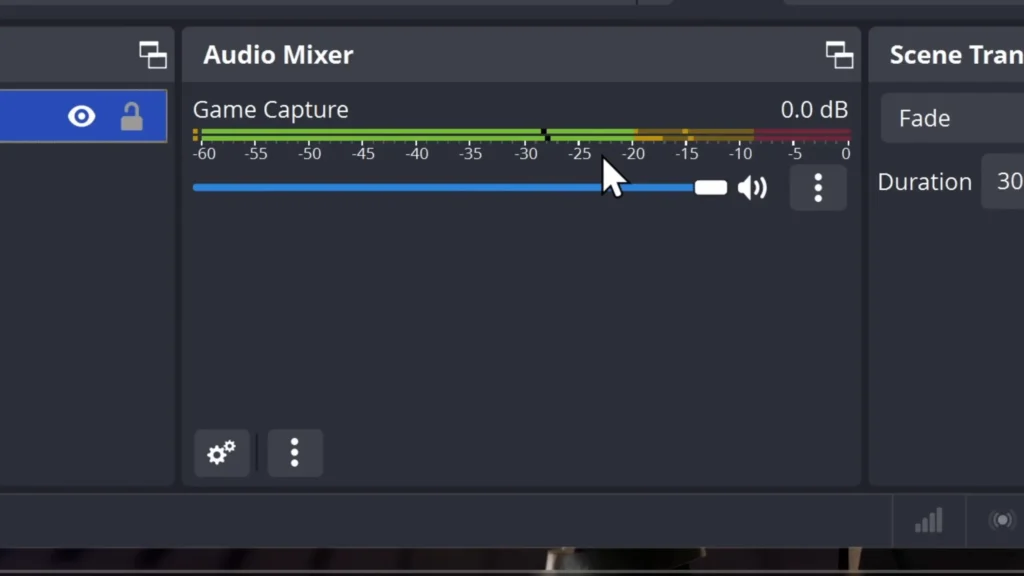
For the best listening experience, keep your game audio lower than your voice so your commentary remains clear throughout the recording.
Step 5 – Improve Voice Quality with OBS Audio Filters
OBS includes built-in audio filters that can noticeably improve your voice recordings. In the Audio Mixer, right-click your microphone, select Filters, and add these effects:
- Noise Suppression – Reduces constant background noise such as PC fans or air conditioners, making your voice cleaner.
- Noise Gate – Mutes the microphone when you’re not speaking to prevent keyboard clicks and room noise from being recorded.
- Compressor – Balances your volume so your commentary stays consistent, even when you speak louder during exciting moments.
- Limiter – Prevents audio clipping by keeping your voice below the maximum recording level, reducing distortion from sudden peaks.
These four filters are enough for most gameplay recordings and livestreams. If you want even more control, you can fine-tune your audio later in editing software, but OBS’s built-in filters provide an excellent starting point for beginners.
Step 6 – Choose the Best OBS Recording Settings
This is where footage quality is won or lost. Head back to Settings → Output (Advanced mode) and the Recording tab. Here’s a starting point you can adjust to your hardware:
| Setting | Recommended | Notes |
|---|---|---|
| Base & Output Resolution | 1920×1080 | Match your monitor. Drop the output to 1280×720 if OBS struggles |
| Downscale Filter | Lanczos | Sharpest option when scaling 1080p down to 720p |
| FPS | 60 | Use 30 for weaker PCs or games capped at 30; 25/50 for PAL regions |
| Encoder | NVENC H.264 | For any Nvidia card since the GTX 600 (2012) — uses a dedicated chip, so it won’t cost you gameplay performance |
| Encoder (alternatives) | AMD, x264, AV1 | AMD encoder for AMD cards; x264 (CPU) if you have no compatible GPU; AV1 is newer |
| Rate Control | CBR or CQP | CBR holds a constant bitrate; CQP is smarter and only spends data when needed |
| Bitrate (CBR, 1080p60) | 15,000–18,000 kbps | 8,000–9,000 still looks clean if your PC struggles; 2,500–4,500 for 720p on low-end machines |
| CQ Level (CQP) | 15 | Effectively indistinguishable; 20 is still totally usable if 15 is too heavy |
| Recording Format | MKV | Won’t corrupt if your PC crashes mid-recording — then remux to MP4 to edit |
| Audio Sample Rate | 48 kHz | Drop to 44.1 kHz only on low-end PCs |
A note on that format choice: MP4 is the format you’ll eventually edit and upload, but if OBS or your PC crashes while recording straight to MP4, the file corrupts, and you lose everything. Record to MKV to stay safe, then convert. In OBS, go to File → Remux Recordings, or turn on Automatically Remux to MP4 in the recording settings so it happens the moment you stop.
One more habit worth building: open the stats panel with View → Stats while you record. If you see lagged frames, your GPU is overloaded — lower your resolution or encoder settings. Skipped frames point to CPU strain — switch to NVENC if you can, to hand the work off to your graphics card.
Step 7 – Record a Short Test Clip First
Before you sink an hour into a ranked session, record 30 seconds and play it back. It’s the single fastest way to save yourself from re-recording everything. Check for:
- Voice clarity — clean and clear, or muffled and distant?
- Game audio balance — can you hear your commentary over the action?
- Sync — do your words line up with your mouth and the on-screen action?
- Background noise — any hum, hiss, or keyboard bleed sneaking in?
- Video quality — sharp and smooth, or blurry and stuttering?
A small test can save you if something happens. Catching it after a full match means the whole thing goes in the trash.
Recommended Gear for Better Gameplay Recordings
Rather than throw a spec sheet at you, here’s how the pieces fit into different stages of a creator’s journey.
For beginners — a USB microphone gets you a clean voice with no setup headache. The fifine AM8 microphone plugs in over USB and works out of the box, which is exactly what you want when you’re just getting started.
For growing creators — once you’re recording regularly, a USB/XLR mic like the fifine K688 recording microphone future-proofs you. Keep using it over USB today; move to XLR and an interface or mixer whenever you’re ready.
For cleaner audio control — an audio mixer like the fifine SC8 puts your sound on physical controls instead of buried in menus. That means quick gain adjustment on the fly, real-time monitoring through the headphone jack, an instant mute button, and separate control over multiple audio sources.
For comfortable monitoring — a gaming headset like the fifine H13 covers the two jobs headphones do best: catching audio issues while you record and keeping you in the game during long sessions. If you talk with teammates, it doubles as your comms without adding a second device to your desk.
Go Capture That Clutch Play
Recording gameplay with your voice comes down to a checklist: capture your game, route your mic and system audio, clean up your voice with a few filters, set a bitrate your PC can handle, and test before you commit. The last 10 percent — the part viewers actually notice — is almost always the audio. So put a little care into your mic, monitor through headphones, and let the footage speak for itself.
FAQ
Can OBS record gameplay and microphone at the same time?
Yes — that’s exactly what it’s built for. OBS captures your game through a Game Capture source and your voice through Mic/Auxiliary Audio simultaneously, and saves them in one recording. You can even split them onto separate audio tracks so you can adjust each one independently when editing.
What are the best OBS audio settings for gameplay recording?
Set your sample rate to 48 kHz, aim your mic peaks at -12 to -6 dB, and keep game audio lower so your voice reads over it. Add Noise Suppression, a Noise Gate, a Compressor, and a Limiter as filters on your mic for a cleaner, more consistent sound.
How do I record game audio and voice separately in OBS?
Open Advanced Audio Properties (the three dots in the Audio Mixer), then assign your mic to one track and your game audio to another. When you drag the recording into an editor, each source lands on its own track, so you can raise, lower, or cut one without affecting the other.
Should I use a USB or XLR microphone for OBS?
USB is simpler — plug it in and record, no extra gear. XLR gives you more control and room to grow, but it needs an interface or mixer. A USB/XLR mic like the FIFINE AM8 Series lets you start on USB and switch to XLR later without buying a new mic.
Can I record gameplay without streaming?
Absolutely. OBS records straight to your drive with no stream and no internet connection required. This guide is built entirely around offline recording — streaming is a separate mode you never have to touch.
