
How to Build a Streaming Setup From Start to Pro

Building a good streaming room isn’t about owning the most expensive gear. A good streaming setup is about choosing tools that let you show up, sound clear, and keep your audience engaged. In this guide, you’ll plan your space, pick the essentials, add accessories that earn their spot, arrange a desk that works, configure your software, and build an upgrade path you can grow into. Start where you are — you probably already have more than you think.
Streaming Setup Guide At a Glance
| Step | The one thing to remember |
|---|---|
| 1. Plan your space | Wired internet and light can matter more than room size |
| 2. Pick the essentials | Spend on audio first — a USB mic does most of the work |
| 3. Add accessories | A key light and a boom arm change your stream the most |
| 4. Arrange your desk | Keep everything you touch mid-stream within arm’s reach |
| 5. Configure software | OBS mic filters, then a test recording before you go live |
| 6. Optimize your environment | Small fixes — noise, cables, lighting — stack up fast |
| 7. Upgrade over time | Build in tiers; skip the day-one gear splurge |
Step 1 – Plan Your Streaming Space
Before you spend a cent on gear, decide where you’ll stream. Your room shapes everything that follows.
Room size and background. You don’t need a studio. One creator converted an old storage room into a working space, and viewers never noticed — because they’re looking at you, not the square footage. Think about what sits behind you, too. A few background lights or personal objects add personality without pulling focus.
Lighting. Natural light from a window can help, but it shifts through the day and fights you on cloudy afternoons. Most streamers control their own light instead, which we’ll cover in Step 3. For now, just pick a spot where you can add and aim light freely.
Power and internet. Count your outlets — a full setup pulls from several. For your connection, wired beats wireless every time. One pro runs a hardwired line straight to fiber; the rule is simple: get the fastest wired connection your computer supports and skip Wi-Fi if you can.
Noise level. A quieter room means less cleanup later. Rooms near traffic, fans, or busy households will need extra software filtering down the line, so choose the calmest space available.
Step 2 – Choose Your Essential Streaming Gear
Ignore the accessory rabbit hole for now. Five things make your work successful.
| Essential | What to look for | Starter option |
|---|---|---|
| Microphone | USB for plug-and-play; clear, unprocessed sound | fifine K669 USB microphone |
| Headphones | Reliable monitoring so you hear your own mix | fifine H9 closed-back pair or in-ear monitors |
| Webcam | Easy setup, decent low-light performance | Logitech C920, Razer Kiyo (built-in light) |
| Computer/Console | Whatever you already own that runs your software | Laptop, desktop, or even a phone |
| Streaming software | Free, beginner-friendly, room to grow | OBS Studio (free and easy-to-use), StreamYard, Riverside |
Lead with the microphone. The best microphone for streaming doesn’t mean the most expensive one. It’s the one that delivers a clear, balanced voice. As @HeelyRob puts it in his Streaming Setup Starter Pack Guide, weak audio makes viewers “click off faster than a rage quit in Dark Souls.” Start with the solid USB mic that plugs straight into your computer and sounds good with no extra hardware. When you want to update, the fifine XLR mic is a practical choice.
Headphones are easy to overlook, but monitoring is how you catch problems in real time. Musicians who stream lean hard on in-ear monitors for exactly this reason. As @ItzYaFam says: “The better we hear, the better we perform.”
For the camera, a recent phone shoots excellent quality photos. One host ran a two-hour live stream on nothing but a phone’s front-facing camera and held an audience the whole time. You genuinely already have what you need to start.
Step 3 – Add Accessories That Improve Your Setup
Once the basics work, these upgrades change the experience. Each earns its place for a reason.
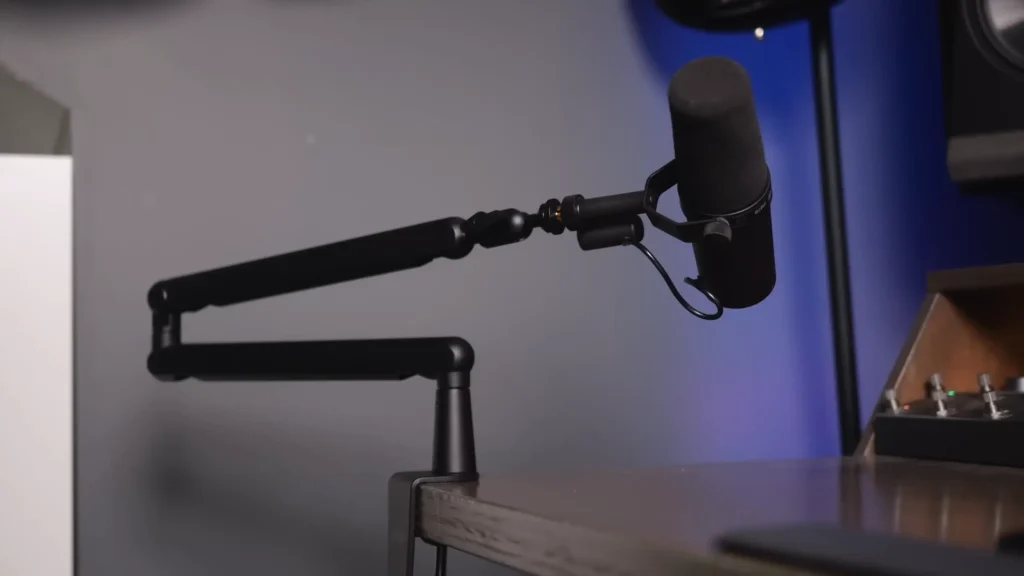
Boom arm. A low-profile microphone boom arm like fifine BM88 clears your desk and swings the mic exactly where you want it, without booming down into the frame. Some even take a camera mount, so one arm can hold a mic or a second angle.
Audio mixer. A mixer gives you real control — separate levels, sound effects, and multiple XLR inputs on one device. It becomes your single audio source for the computer, which keeps things clean when you add guests or music.
Capture card. Want to use a mirrorless camera or DSLR instead of a webcam? A capture card (like an Elgato Cam Link) turns that camera’s HDMI output into a signal your computer reads as a webcam. This is the single biggest jump in video quality.
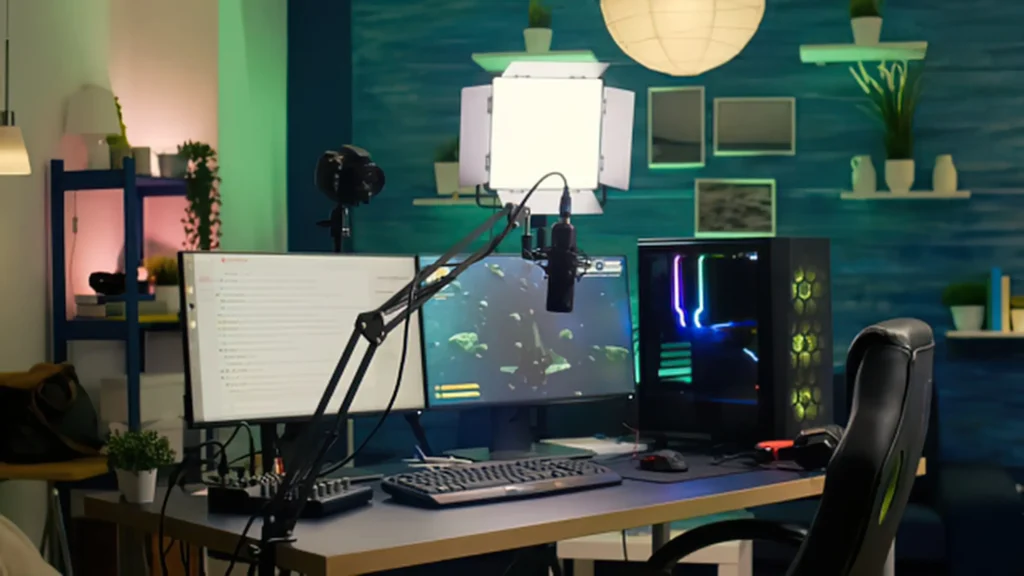
Lighting. Lighting setup matters for your streaming, too. Start with a key light that illuminates you — that’s what makes you look good on camera. Then add practical lights, the colored or RGB accents your audience actually sees, to give the scene depth.
Stream Deck (optional). A Stream Deck turns multi-step actions into one button press: switch scenes, trigger sounds, change cameras, even control lights. Curious but not committed? The free Stream Deck mobile app gives you six buttons to test the workflow first.
Cable management. Velcro straps and under-desk mounts keep cables out of frame and off the floor. It’s not glamorous, but it looks professional and cuts trip and fire hazards. Some fifine microphone boom arm build with a cable box, so you can manage the cable easily.
Step 4 – Arrange Your Streaming Desk
Now put your streaming setup together. With a workable layout, your streaming room lets everything you touch mid-stream within reach.
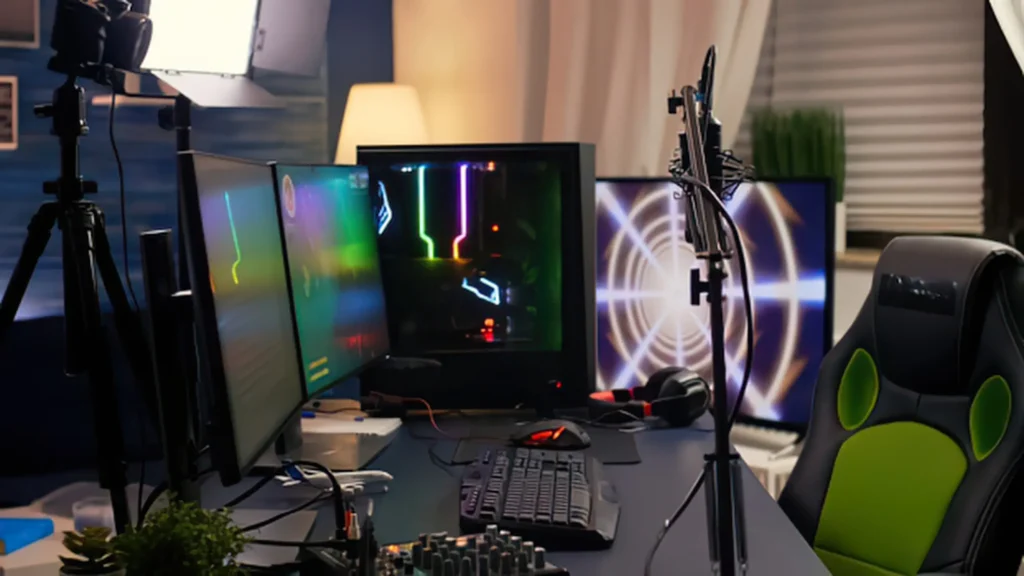
- Monitors: A multi-monitor setup lets you split gameplay, chat, and your software controls so you never miss a beat.
- Camera: Position it at eye level for a natural angle. A wide lens set close keeps you framed while still showing some background.
- Microphone: Swing a low-profile arm in from the side so the mic sits near your mouth without blocking your face.
- Lighting: Put your key light in front, slightly above and off to one side. Practical lights go behind you.
- Keyboard and mouse: Keep them front and center for quick access when you’re not using a Stream Deck.
- Mixer: Place it within arm’s reach — you’ll adjust levels constantly.
- Seating: Streams run long. A comfortable chair isn’t a luxury; it’s what lets you stay on camera without fidgeting.
Step 5 – Configure Your Streaming Software
Hardware’s ready. Now it’s time to configure your software. OBS Studio is one of the most popular tools for recording and streaming, and getting the right settings can make a big difference in both audio and video quality. Whether the best OBS settings for streaming or recording gameplay with voice in OBS, just a few steps can help your work.
- Install OBS Studio. It’s free, powerful, and the standard for a reason.
- Add your video sources. Bring in your webcam or capture card as the source so OBS can see your camera.
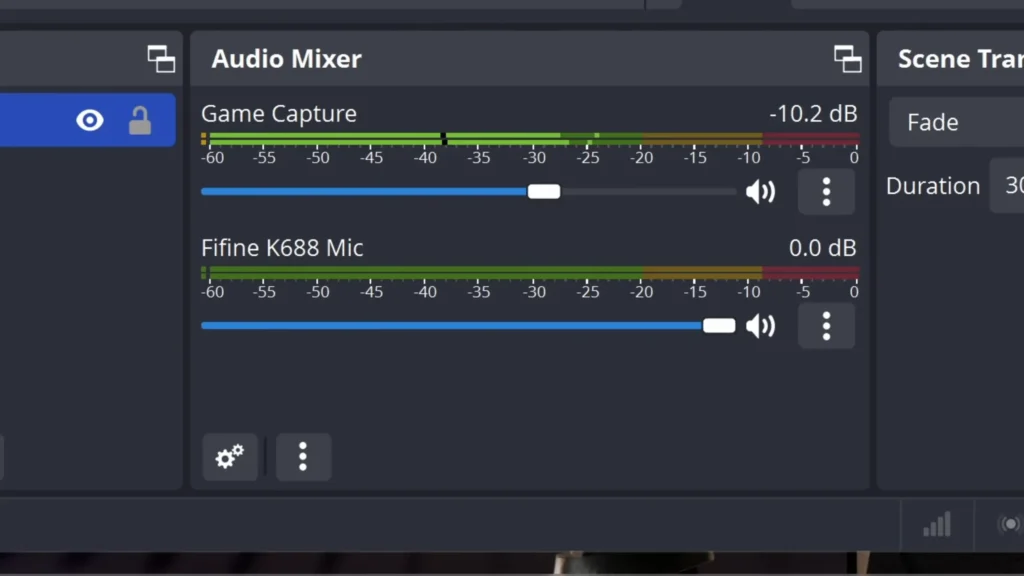
- Set up your microphone. Add the mic as an audio source, then apply filters — right-click the source, choose Filters, and add noise suppression, gain, and compression.
- Configure your game audio. Free software like Voicemeeter Banana lets you manage game sound, mic, and Discord as separate channels. There’s a learning curve, but the control is worth it.
- Test before you go live. Record a short clip, watch it back, and check your levels and framing. Streamers who rehearse first catch the problems no one wants to discover on air.
Step 6 – Optimize Your Streaming Environment
After the hardware and software setup, small tweaks add up to a noticeably better stream.
- Reduce background noise. OBS noise suppression handles hums and fans. Keep a glass of water nearby, too — it keeps your voice clear over long sessions.
- Improve room acoustics. Soft surfaces — rugs, curtains, a bookshelf — soak up echo and warm up your sound in a bare room.
- Keep your desk organized. Clean cable runs and a tidy surface read as professional the moment your camera turns on.
- Adjust your lighting. Turn individual lights on and off to see what each does. Aim your key light so you look good first, then dial in your accent colors.
- Manage your cables. Route power and data separately where you can, and secure everything so nothing tugs loose mid-stream.
Step 7 – Upgrade Your Streaming Setup Over Time
You don’t need everything on day one. Build in stages, and let each purchase solve a real problem. Creator team Ecamm (@EcammLive) sums up the whole approach in The Ultimate Must-Have Gear for Pro Live Streaming: “buy nice or buy twice.” Get the right piece the first time, and you skip the cost of replacing a cheap one later.
| Stage | Setup |
|---|---|
| Starter | USB microphone + webcam |
| Growing Creator | USB/XLR microphone + boom arm + lighting |
| Advanced | XLR microphone + mixer + capture card + multiple monitors |
At the starter stage, a plug-and-play USB mic like the fifine K669 microphone paired with a webcam gets you clean sound and video with zero fuss.
Moving into growing creator territory, a dual-connectivity mic future-proofs your rig. The fifine AmpliGame AM8 runs over both USB and XLR as a dynamic microphone, with RGB accents and low-latency monitoring, so you can start simple on USB and scale up to a mixer later. Its stronger noise rejection suits loud spaces like a gaming room. Pair it with a boom arm like the FIFINE BM88 to clear your desk and lock in mic position.
For an advanced setup, run that mic over XLR into a dedicated mixer. The fifine SC8 audio mixer turns your desk into a control station with real-time Game/Chat balancing, voice effects, customizable profiles, and optical, AUX, and USB-C connectivity across PC, PS5, Switch, and mobile. Its XLR input provides stable gain for dynamic mics and power for condensers, with a simple Dynamic/Condenser switch and ultra-low distortion under 0.2%. Add a capture card and a multi-monitor layout, and you’ve got a full professional rig.
Final Checkout Before Going Live
Now you’ve planned, built, and tuned. Before you hit that button, run this quick check:
- Mic level set and filters applied
- Camera framed and in focus
- Lighting on and aimed at you
- Internet connection is wired and stable
- A test recording was watched back
Here’s the truth every experienced streamer repeats — some version of “get your reps in.” If you’re reading this, you already have enough to start. Gear helps, but reps matter more. Your audience wants the real you, not a perfect you. So set up what you’ve got, take the leap, and go live.
FAQ
Do I need expensive gear to start streaming?
No. A recent phone, a basic USB mic, and free software are enough to go live today. One creator ran a multi-hour stream on just a phone’s front camera. Start now, upgrade later.
Should I get a USB or XLR microphone?
USB is the easiest entry — it plugs straight into your computer and sounds great. XLR offers slightly better quality and more control but needs an audio interface or mixer. A dual USB/XLR mic lets you start on USB and switch to XLR when you’re ready.
Why does audio matter more than video?
Viewers tolerate a soft image, but bad audio drives them away instantly. Most people half-watch a stream while doing something else, so they’re listening more than looking. Invest in sound first.
Wired or wireless internet for streaming?
Wired, whenever possible. A hardwired connection is far more stable than Wi-Fi, which can drop or stutter mid-stream — especially in rooms crowded with wireless devices.
Do I really need a Stream Deck?
No, it’s optional. But it collapses multi-step actions into single button presses, which makes live production far smoother. Try the free mobile app’s six buttons before buying the hardware.
