
How to Use Audacity: A Beginner’s Guide to Recording and Editing Audio

You hit record, talk for 10 minutes, press play — and hear a fan humming behind a voice that sounds miles away. Sound familiar?
Fixing that doesn’t take expensive software. The Audacity audio editor is free, runs on Windows, macOS and Linux, and covers everything a first-timer needs. In this guide, we’ll show you how to use Audacity from your first recording to your final export: the settings worth changing, the edits you’ll make most often and the mistakes that catch almost everyone early on. This is your Audacity for beginners crash course.
What Is Audacity Audio Editor?
Audacity is a free, open-source, multi-track audio editor. In plain terms, it lets you record sound, import existing audio files, trim and rearrange them, apply effects like noise reduction and export the result as a standard audio file.
People use it for podcasts, voiceovers, YouTube narration and audiobooks. If you want to record and clean up your voice without paying for software, start here. If you want fully automatic cleanup or text-based editing, paid podcast tools can save time.
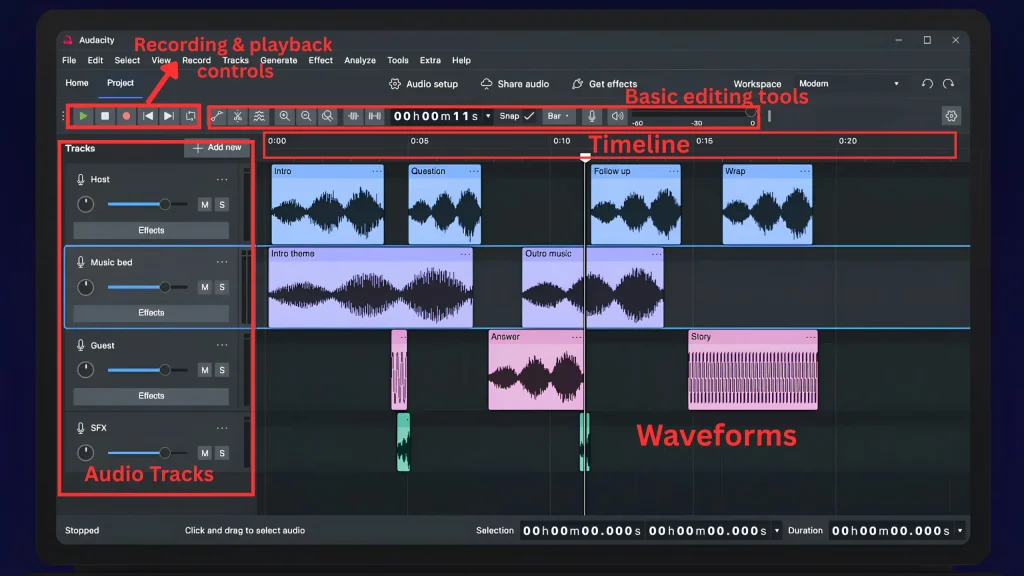
Here’s the Audacity interface and what they matters:
| Interface element | What it does |
|---|---|
| Recording and playback controls | Record, play, pause, stop and skip to start, plus level meters that show how loud your input is |
| Audio tracks | Horizontal lanes that hold your recordings. Each has its own Mute, Solo, volume and pan controls on the left |
| Waveforms | The visual shape of your sound. Tall waves are loud; flat lines are silence |
| Timeline | The ruler across the top, measured in seconds. Click it to start playback from any point |
| Basic editing tools | The Selection tool (for highlighting and cutting), Envelope tool (for drawing volume changes) and Draw tool (for fixing tiny clicks at the sample level) |
You’ll spend most of your time with the Selection tool, so don’t worry about the rest on day one.
What You Need to Get Started With Audacity
There’s no substitute for a good recording. Effects polish decent audio, but they can’t rescue a distorted or muffled take. Here’s what matters most when learning how to use Audacity for beginners.
Microphone
Your laptop’s built-in mic picks up keyboard clicks, fans and room echo. A dedicated microphone is the biggest upgrade you can make.
- USB microphones plug straight into your computer and show up in Audacity right away. A USB condenser microphone like the fifine AmpliGame AM6 keeps setup simple for voiceovers and podcasts.
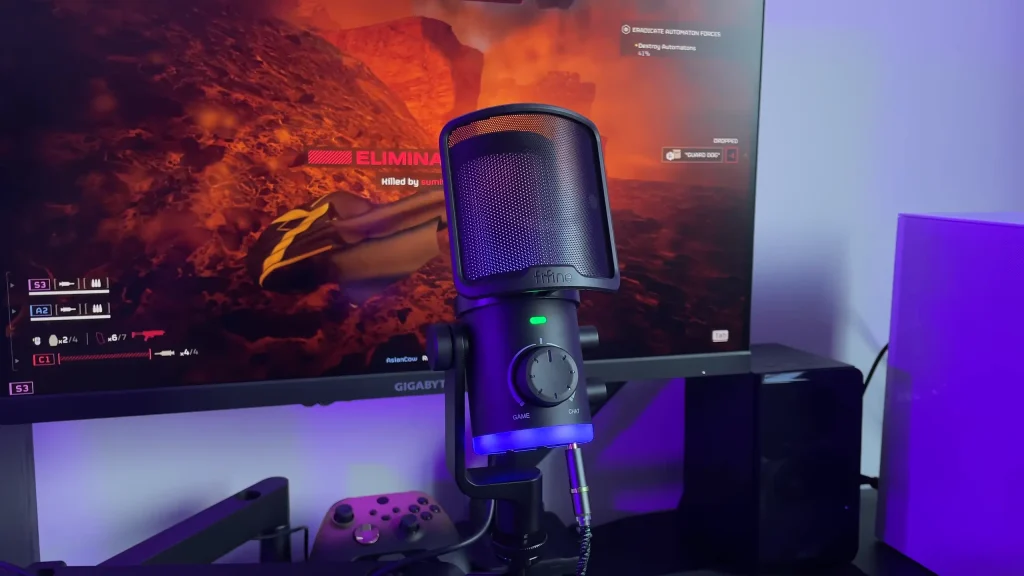
- XLR microphones need an audio interface but give you more room to grow. A dynamic XLR mic like the fifine Tank1 paired with an audio mixer like the fifine SC3 rejects more room noise than most condensers.
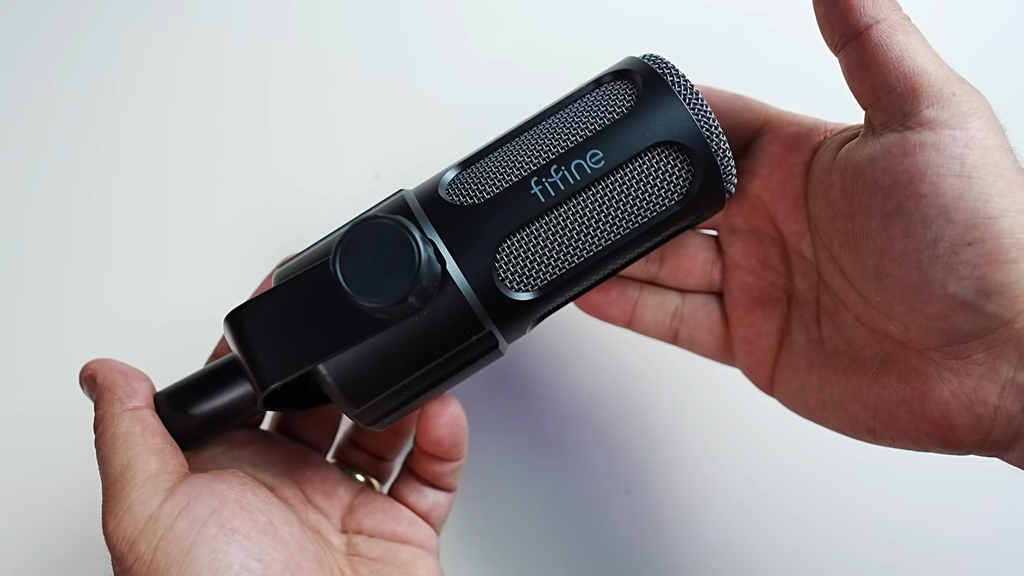
- Want one-to-solve pick? The XLR & USB microphone, like fifine AM8 and K688 USB & XLR microphone, lets you start from USB mode and upgrade to XLR mode effortlessly.
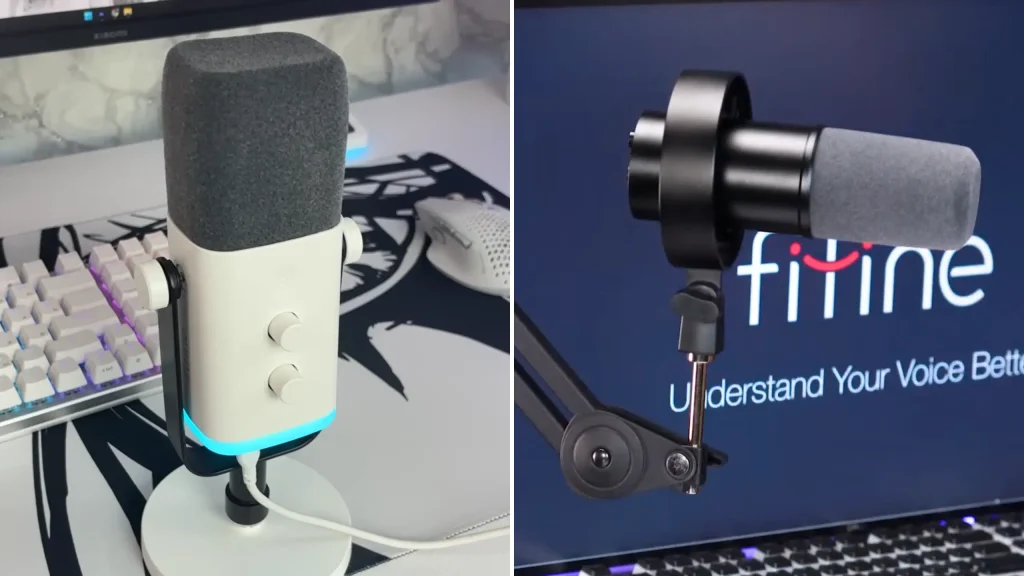
Quick heads-up: if your mic runs through an interface, Audacity lists the interface’s name, not the mic’s.
Headphones
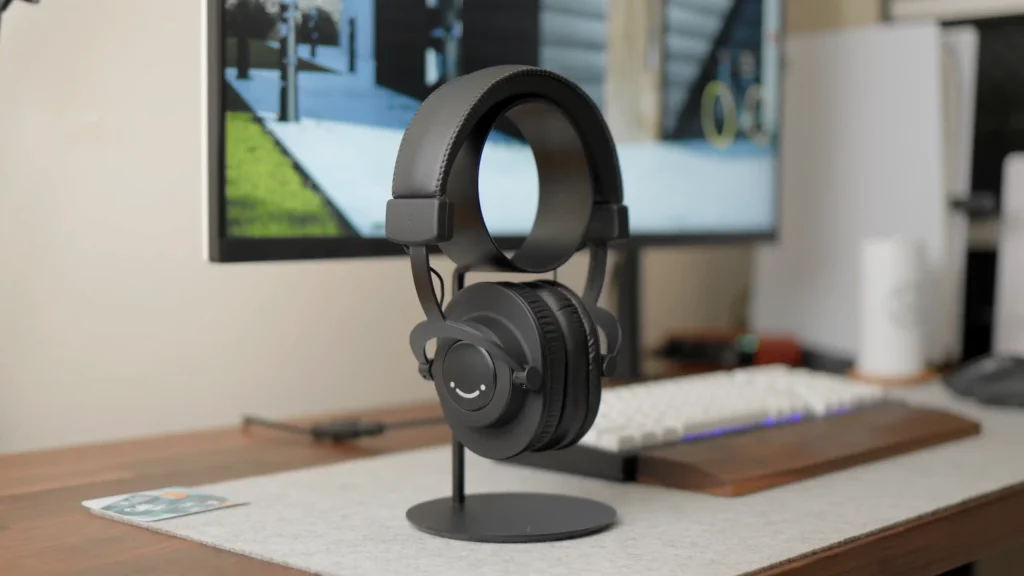
Laptop speakers hide hums, mouth clicks and hiss. Closed-back headphones let you hear what listeners will hear, so your edits and cleanup are more accurate. The fifine H8 studio headphones works well for this.
Audacity
Download Audacity for free from the official site. The newest version is Audacity 4.0 as of September, 2026.
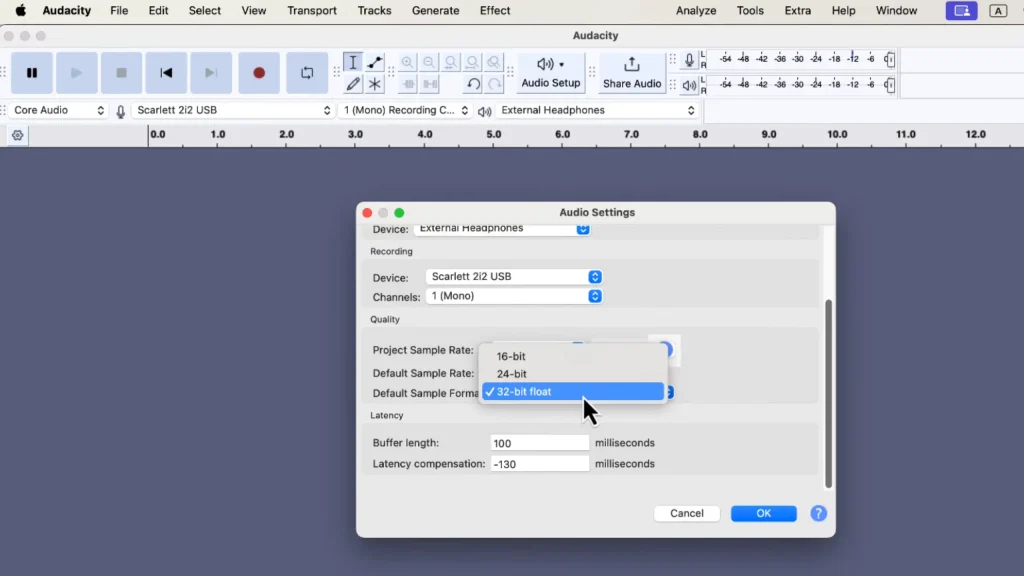
Before your first session, open Edit > Preferences > Audio Settings and check these Audacity settings. You only need to set them once:
| Setting | Recommended value | Why |
|---|---|---|
| Recording device | Your microphone or interface | Stops Audacity from recording through the wrong mic |
| Recording channels | 1 (Mono) for voice | Keeps voice centered in both ears; stereo can play in one ear only if set up wrong |
| Project sample rate | 44,100 Hz (44.1 kHz) | Standard for voice and podcasts |
| Default sample format | 32-bit float | Audacity’s default; gives effects the most headroom |
Those four settings are the core of Audacity’s best settings for recordings.
Optional audio equipment
- Pop filter: Softens hard “p” and “b” sounds.
- Boom arm or stand: Holds the mic at a steady distance so your level doesn’t drift.
- Soft furnishings: Rugs, curtains and a couch soak up echo better than a bare room.
How to Use Audacity to Record Your Voice
Now you can start your recording and here’s how to record audio in Audacity in five steps.
Step 1: Connect Your Microphone
Plug in your mic (or interface) before you open Audacity. If you plug it in afterward, Audacity may not see it. Fix that by clicking Audio Setup > Rescan Audio Devices.
Step 2: Select the Input Device
Click Audio Setup > Recording Device and choose your mic. A checkmark marks the active device.
We also recommend turning on the Device Toolbar through View > Toolbars > Device Toolbar. It keeps your selected mic visible at all times. It saves you from recording a whole session through your laptop mic by accident.
Step 3: Start Recording
Click the red Record button or press “R”. A waveform appears on a new track as you speak.
Step 4: Stop and Play Back Your Recording
Press the Spacebar or click Stop to end the take. Then:
- Press Spacebar to play and stop.
- Press “P” to pause and resume.
- Click anywhere on the timeline to play from that point.
- Hold Ctrl (Cmd on Mac) and scroll to zoom in and out.
Save your project now (File > Save Project). If Audacity crashes, you won’t lose the take.
Step 5: Avoid Clipping and Distortion
Clipping happens when your signal is too loud to capture cleanly. It sounds harsh, and you can’t fix it later.
Before recording, click the microphone icon on the recording meter and choose to start monitoring. fifine AM8 or K688 microphone features microphone monitoring functions. You can monitor what you said with the fifine H8 Studio headphones. Speak exactly as you will during the take and watch the meter:
- Aim for peaks between about -18 dB and -6 dB.
- Anything past -3 dB lands in the red zone. Turn it down.
- If your voice rarely climbs above -24 dB, it’s too quiet. Move closer or raise the gain.
Adjust gain on your mic or interface first; use Audacity’s recording slider as a backup.
Bonus Tip: Speak at a natural volume and keep a consistent distance from the microphone. Leaning in and out causes more volume swings than any setting can fix.
How to Use Audacity to Edit Audio
Here’s how to edit audio in Audacity with three basics.
Select Audio
Make sure the Selection tool (the I-beam cursor) is active. Then:
- Click and drag across a waveform to highlight a section.
- Click a clip’s name bar to select the whole clip.
- Click an empty spot in a track’s left-hand control panel to select the entire track.
Press Spacebar to hear just your selection before you change anything.
Cut Unwanted Parts
There are two easy ways to use Audacity to cut audio.
- Highlight and delete: Drag across the mistake and press Delete (or Backspace). Audacity removes it and closes the gap automatically.
- Split and remove: Click just before the mistake and press Ctrl+I (Cmd+I on Mac) to split the clip. Do the same just after the mistake. Click the middle clip’s name bar, press Delete, then drag the next clip left to fill the gap. It snaps into place.
For clean cuts, zoom in and cut on flat lines between words.
Undo Mistakes
Deleted the wrong thing? Press Ctrl+Z (Cmd+Z on Mac) to undo. Press it again to step back further.
Say you record a two-minute intro, cough at 0:40, pause for five seconds at 1:10 and restart a sentence at 1:30. Highlight each problem, press Delete and play back the joins. If a cut sounds abrupt, undo and adjust the selection. Select, delete, listen, undo: that loop is most of editing.
How to Use Audacity to Remove Background Noise
Identify the Background Noise
Common culprits include:
- Fan noise
- Air conditioning
- Computer noise
- Microphone hiss
Zoom in on a gap between sentences. Clean silence looks flat; noisy silence looks like a band of jagged squiggles. Before reaching for effects, fix the source: switch off the AC or move your mic away from your computer.
Apply Noise Reduction
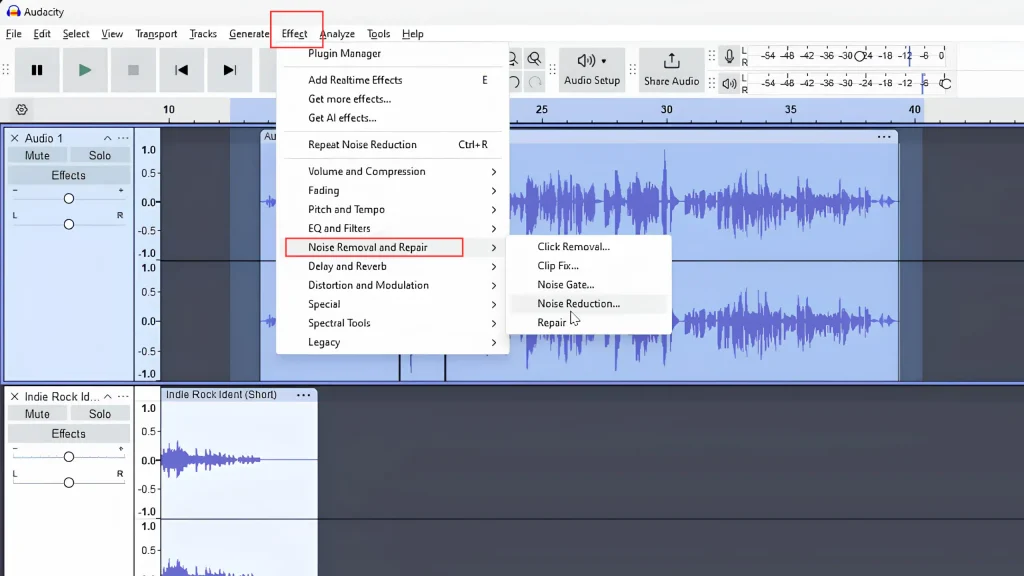
Here’s how to remove background noise in Audacity:
- Highlight a short section containing only background noise — a second or two between words is ideal.
- Go to Effect > Noise Removal and Repair > Noise Reduction and click Get Noise Profile. This teaches Audacity what your noise sounds like.
- Select the whole recording.
- Reopen Noise Reduction, adjust the settings, click Preview, then Apply.
Don’t Overdo Noise Reduction
There’s no single best noise reduction setting for every recording. Your mic, room and noise type all change the answer, so the real Audacity best noise-canceling settings are the ones you test by ear.
Start gentle. Raise the Noise reduction and Sensitivity sliders a little at a time, and leave Frequency smoothing near its default. After each pass, listen for warning signs: your voice sounding thin, robotic, or “underwater.” If you hear them, undo and dial it back. Want a better guarantee? Pick a mic for noise cancellation.
How to Make Your Audio Louder in Audacity
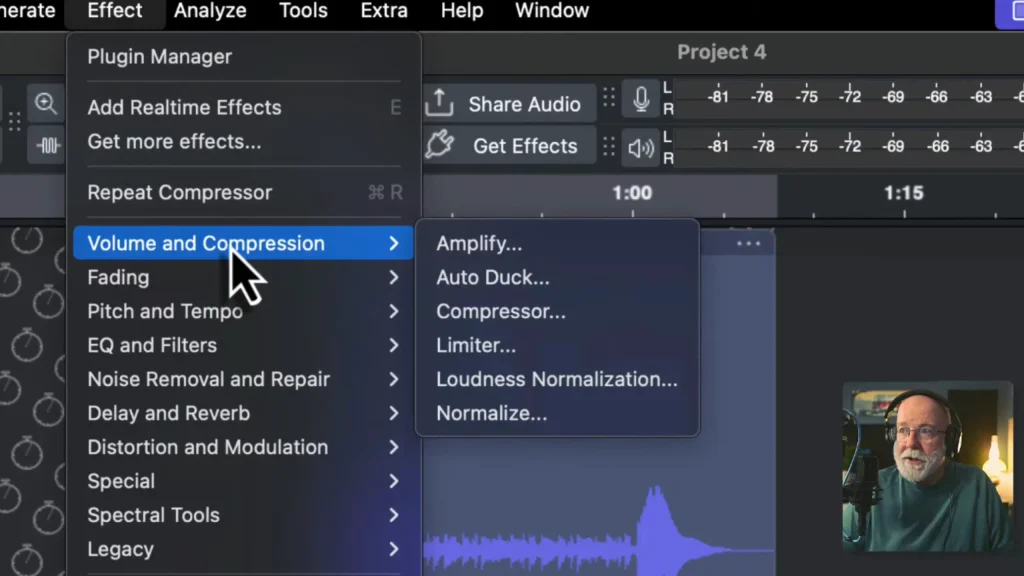
“Why is my recording so quiet?” Usually, it’s not for your volume, but the gain was too low or you sat too far from the mic. Here’s how to use Audacity to make audio louder:
| Method | Where to find it | Best for |
|---|---|---|
| Normalize | Effect > Volume and Compression > Normalize | Bringing a whole recording up to a standard level. Set the peak to -1 dB |
| Amplify | Effect > Volume and Compression > Amplify | Raising or lowering volume by a set number of decibels. Use Preview first |
| Envelope tool | Tools toolbar | Drawing volume changes on specific sections, like a quiet sentence |
| Compressor | Effect > Volume and Compression > Compressor | Evening out the gap between loud and soft moments. Try a -20 dB threshold and 3:1 ratio |
Note that Normalize raises everything by the same amount. It won’t close the gap between your quietest and loudest moments — that’s the Compressor’s job.
Two reminders for Audacity audio editing:
- Louder also means louder noise. Run noise reduction first.
- Don’t push into clipping. Keep peaks below 0 dB and leave “Allow clipping” unchecked in Amplify.
A simple order that works: Noise Reduction, then Compressor, then Normalize.
How to Use Audacity to Export Audio
Recording in Audacity doesn’t create an MP3 or WAV file. You need to export it.
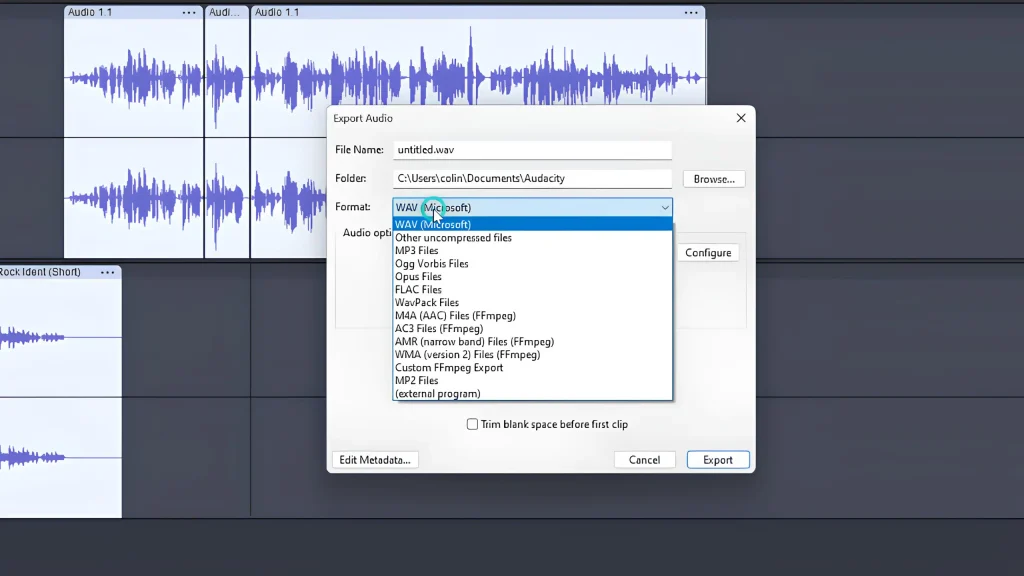
Go to File > Export Audio and choose to export to your computer. Pick a folder, name the file and select a format. Choose Entire Project to export everything, or Current Selection to export only what you’ve highlighted.
MP3 vs. WAV
| Format | Best for |
| MP3 | Sharing and uploading |
| WAV | Further editing and archiving |
MP3 files are small and play everywhere, making them the podcast standard. For voice-only content, a medium-quality preset (roughly 145 to 185 kbps) is plenty. WAV is lossless, so keep a WAV copy for re-editing or backup. Want to learn more? Explore our best audio format guide.
Save Your Audacity Project
Exporting and saving aren’t the same thing. Exporting creates a finished audio file. Saving creates an editable project.
Go to File > Save Project > Save Project As to create an .aup3 file. It stores your tracks and edits so you can pick up where you left off. Only Audacity opens .aup3 files, so export whenever you need a file to share. Save early and often.
Conclusion: Audacity Beginner Checklist
Learning how to use Audacity comes down to a few habits: get a clean recording, make simple cuts, clean up gently and export in the right format. Keep this Audacity tutorial checklist next to your mic.
Before recording
- Mic plugged in before opening Audacity
- Correct mic selected and visible in the Device Toolbar
- Mono, 44.1 kHz, 32-bit float
- Levels peaking around -18 dB to -6 dB, never in the red
While editing
- Project saved right after recording
- Cuts made on flat, silent spots between words
- Noise profile taken from pure background noise
- Noise reduction applied gently and checked with headphones
Before exporting
- Volume boosted without clipping
- Final full listen-through
- MP3 for sharing, WAV for archiving
- Final .aup3 project saved
Audacity won’t turn a bad recording into a great one, but it will polish a good one. Start with the right microphone, follow the steps above and your second recording will already beat your first. Ready to upgrade your setup? Explore fifine’s microphones and headphones.
FAQs
Is Audacity really free?
Yes. Audacity is free, open-source software for Windows, macOS and Linux.
What are the best Audacity settings for recording voice?
Use a 44.1 kHz sample rate, 32-bit float format and mono channel. Keep your peaks roughly between -18 dB and -6 dB.
Why doesn’t Audacity detect my microphone?
You likely plugged it in after opening Audacity. Click Audio Setup > Rescan Audio Devices, and look for your interface’s name if you use one. If your mic is paired with a mixer or interface, Audacity lists the mixer or interface as the input device, not the mic.
Can Audacity open M4A or MP4 files?
Audacity handles WAV, MP3 and FLAC out of the box. For M4A, WMA or MP4, install the free FFmpeg library.
What’s the difference between saving and exporting in Audacity?
Saving creates an editable .aup3 project that only Audacity can open. Exporting creates a finished audio file, like MP3 or WAV, that plays anywhere.
