
Microphone Maintenance Guide: Cleaning, Storage & Protection Tips

Your microphone sits inches from your mouth for hours at a time, collecting dust, moisture, and everything in between. A little microphone maintenance goes a long way: it keeps your recordings clean, your gear reliable, and your wallet closed. This microphone maintenance guide covers practical cleaning routines, smart storage habits, and everyday protection tips for any fifine USB or XLR microphone.
Quick Microphone Maintenance Checklist
This list takes less than five minutes to run through, and it catches most problems before they touch your audio.
Before Every Recording
- Dust off the microphone with a dry microfiber cloth
- Check cable connections at both ends
- Inspect the stand or boom arm for wobble
- Verify USB or XLR connectors seat firmly
- Remove visible fingerprints from the body
Weekly
- Clean the grille with a soft brush
- Wipe down accessories (pop filter, shock mount, boom arm)
- Organize and untangle cables
Monthly
- Deep clean accessories like foam windscreens and pop filters
- Inspect connectors for dirt or oxidation
- Check for loose hardware on stands and mounts
- Replace worn foam windscreens if the foam feels brittle or crumbly
Why Microphone Maintenance Matters
A quality microphone can last for years, but only if it’s properly maintained. Most microphones fail because of neglect rather than age. As @Full Compass puts it, the last thing you want is for an expensive mic to go “out of its factory alignment.”
The biggest threats to your microphone are:
- Dust and debris – Block sound from reaching the capsule, reducing clarity and high-frequency detail.
- Moisture – Corrodes connectors, damages internal components, and shortens your microphone’s lifespan.
- Physical impact – Can knock internal parts out of alignment, causing inconsistent performance.
Over time, poor maintenance may lead to muffled recordings, crackling, intermittent dropouts, or lower output levels. Fortunately, regular cleaning and proper storage take only a few minutes and cost far less than repairing—or replacing—a damaged microphone.
Cleaning Tips — Keep Your Microphone Sounding Its Best
How Often Should You Clean Your Microphone?
It depends on how, where, and how often you use your mic. A streamer who talks into a condenser six hours a day needs a different routine than someone who hops on Discord twice a week.
| Usage Scenario | Exterior Wipe-Down | Grille Cleaning | Deep Clean (Accessories) |
|---|---|---|---|
| Daily streaming | Daily | Weekly | Monthly |
| Weekly podcast recording | After each session | Every 2 weeks | Monthly |
| Occasional gaming | Weekly | Monthly | Every 2–3 months |
| Shared microphones | After every user | Weekly | Every 2–4 weeks |
| Outdoor recording | After every shoot | After every shoot | Monthly |
Shared mics deserve extra attention. Because a vocal mic sits so close to the mouth, germs and residue transfer easily from one user to the next. If multiple people use your setup, wipe it down between users—or better yet, give each person their own windscreen.
Clean the Exterior Safely
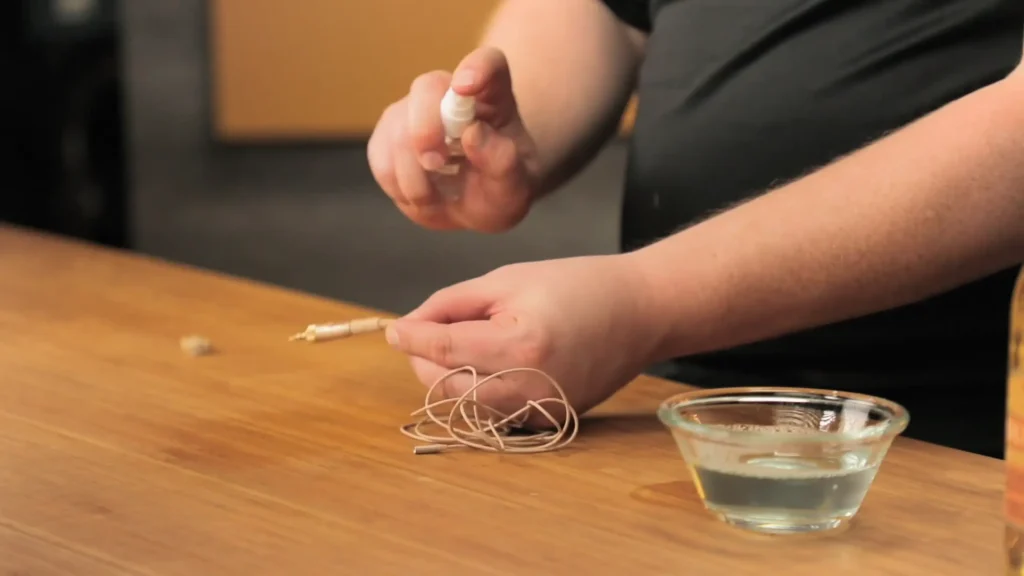
The body of your microphone is the easy part. A soft, dry microfiber cloth handles daily dust and fingerprints. For stubborn grime, slightly dampen the cloth with water or a 70% isopropyl alcohol solution, then wipe the body down.
The golden rule: never spray anything directly onto the microphone. @Sennheiser warns that spraying liquid straight at the mic can let it seep into the capsule and damage the membrane. Always spray onto the cloth first, then wipe. And always unplug the microphone before you clean it.
Cleaning the Microphone Grille and Mesh
The grille takes the most abuse. It catches dust, saliva, or makeup residue. Over time, all of that works its way into the mesh texture and starts filtering your sound in ways you never asked for.
For routine cleaning, three tools cover almost everything:
- A soft brush (a clean, soft toothbrush works) to loosen dust from the mesh
- Compressed air, used carefully at an angle and from a distance, to blow debris off the surface—never blast it straight into the capsule
- A cotton swab to reach the edges where the grille meets the body
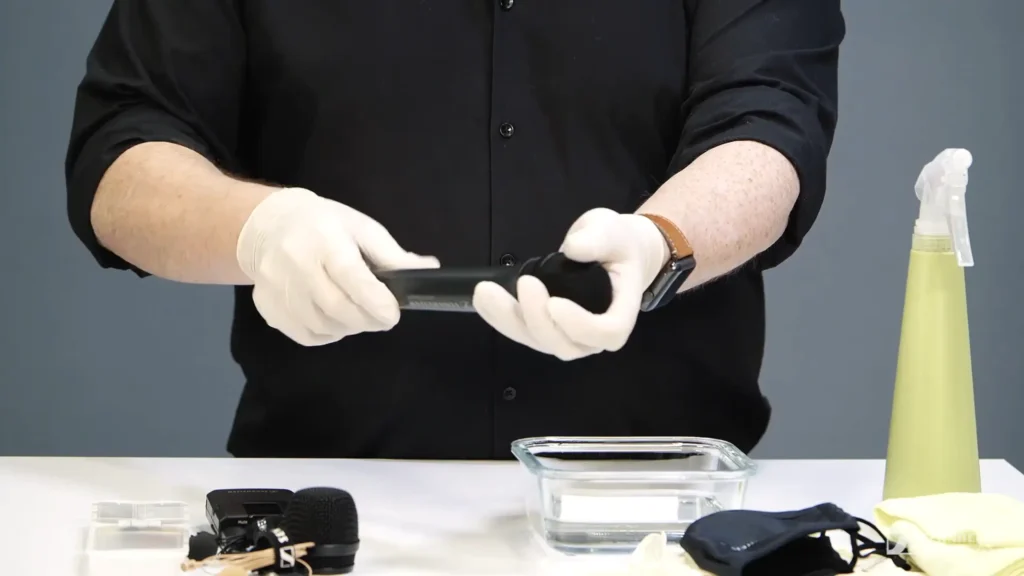
The key is to keep dust, debris, and moisture away from the microphone capsule during cleaning.
- Hold the microphone upside down while wiping the grille so loosened debris falls away from the capsule instead of into it.
- If your microphone has a removable grille, only remove it if the manufacturer recommends doing so. Avoid touching or wetting the exposed capsule, and let the grille and foam air-dry completely before reassembling.
Don’t Forget Your Accessories
Your microphone is only as clean as the gear around it. If your microphone accessories turn dusty or grimy, debris will get back onto a freshly cleaned mic.
- Foam windscreens: Wash in warm water with a splash of mild dish soap, rinse thoroughly, and let them dry completely. Never clean foam with alcohol; it breaks the material down and shortens its life.
- Pop filters: Wipe mesh pop filters with a damp cloth. Fabric filters can take a gentle hand wash.
- Boom arm: Dust the arm and wipe the joints. Grit in the joints causes creaks; your mic will happily record.
- Shock mount: Dust the elastic bands and check them for stretching or cracks.
- Cables: Wipe it with a dry or slightly damp cloth. For sticky residue from tape, a rag with a small amount of citrus-based adhesive remover works without harming the cable.
- Headphone jack: If your USB mic has a monitoring jack, a quick puff of air keeps pocket lint out of your monitoring chain.
Storage Tips — Protect Your Microphone Between Sessions
Store in a Clean, Dry Environment
The ideal storage spot is simple: room temperature, low humidity, away from windows. Direct sunlight heats components and fades finishes. A shelf or drawer in your recording room does the job. It doesn’t need to be fancy. It needs to be dry.
Prevent Dust Buildup
Dust settles constantly, and every particle that lands on the grille is a particle working its way toward the capsule. Even a clean plastic bag draped over the mic between sessions beats nothing.
Your options, from free to fancy:
- The original box. You already own it. It’s shaped perfectly. Use it.
- A dust cover. A simple cover over a desk-mounted mic takes two seconds to use.
- A protective pouch. Great for mics you move around.
- A storage case. The best option if you own multiple microphones or travel with your gear.
Protect Against Humidity
Moisture is a microphone’s quietest enemy. It corrodes connector pins, breeds mold inside foam windscreens, and over time degrades the capsule itself.
Condensation is the sneakiest form: carry a cold microphone into a warm room and water forms on—and inside—the mic instantly, the same way it fogs up eyeglasses.
Three cheap defenses:
- Silica gel packs. Toss a few into your storage box or case and replace them periodically. Save the ones that come in product packaging.
- A dry cabinet. Optional, but worth considering if you live in a genuinely humid climate.
- Patience. After moving a mic between temperature extremes, let it sit and reach room temperature before plugging it in.
Cable and Connector Care
Cables often wear out before microphones, and improper storage is usually the cause. Avoid pulling cables under tension, and coil XLR cables loosely using the over-under technique to reduce stress on the internal conductors. For more about XLR cables and proper handling, check out our XLR cable for microphones guide.
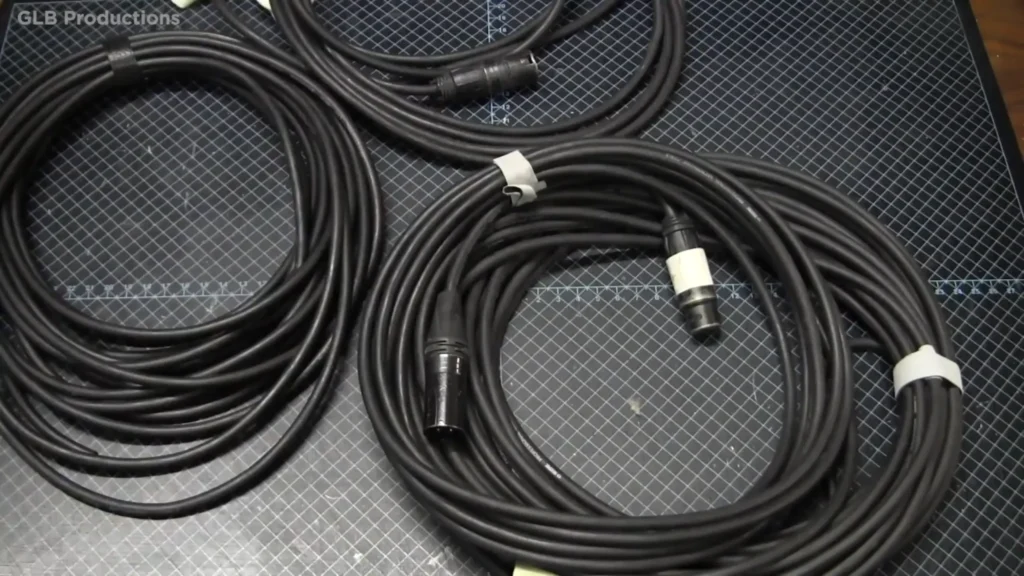
Keep both USB and XLR connectors clean by removing dust and lint regularly. Periodically inspect connectors for bent pins, corrosion, or discoloration, and use a contact cleaner on XLR pins when needed to help prevent oxidation and maintain a reliable signal.
Safe Transportation
If your mic travels, use a padded carrying case or the original box, and remove detachable accessories before packing so nothing presses against the grille in transit. Tossing a bare mic into a backpack with a laptop charger and a water bottle is asking for dented mesh and worse.
Protection Tips — Prevent Everyday Damage
Keep Food and Drinks Away
Coffee and microphones share a desk in almost every streaming setup, and that’s exactly the problem. One knocked-over mug, one sweating water bottle soaking through to your cable, one energy drink sacrificed to a clutch moment in ranked—any of these can end a microphone instantly. Keep liquids on a separate surface, or at a minimum, on the opposite side of your desk from your gear.
Reduce Accidental Drops
Most microphone damage happens in a single second of gravity. Prevention is mechanical:
- Install your boom arm properly, with the clamp fully tightened on a solid desk edge
- Tighten all adjustment knobs so the arm can’t sag or swing into a wall
- Use a stable, weighted desktop stand if you’re not using an arm
- Manage cables so nobody snags one and pulls the whole rig down
Use the Right Accessories
Microphone accessories aren’t upsells—they’re armor. Each one absorbs damage that would otherwise reach the microphone:
- A pop filter blocks plosives and, just as importantly, catches saliva before it reaches the grille.
- A foam windscreen acts as a physical barrier against moisture and dust—which is exactly why pros insist you never clean or use a bare mic when the foam can take the hit instead.
- A shock mount isolates the mic from desk bumps and vibration.
- A boom arm keeps the microphone off the desk, away from spills and accidental knocks.
- A dust cover protects it during the 90% of its life it spends not recording.
Protect the Connectors
Connectors are the handshake between your mic and your recordings. Treat USB ports gently—inserting a cable at an angle wears the port loose over time. Keep XLR pins clean and straight; a single bent pin means no signal. Never unplug any cable by pulling on the cable itself—grip the connector housing. And give connectors a quick visual inspection every month or so. Crackles and dropouts almost always start here.
Conclusion
Microphone maintenance isn’t complicated, and it isn’t time-consuming. A quick wipe before recording, a weekly grille brush, and a monthly accessory wash add up to maybe fifteen minutes a month.
The pro tips? Keep moisture away from the capsule, keep dust off the grille, and store the mic covered in a dry spot. Build those three habits into a simple routine now, rather than waiting for muffled audio or a crackling connector to force the issue. Your microphone, whether fifine USB or XLR microphone, will repay you every time you hit record.
FAQ
How often should I clean my microphone?
Wipe the exterior before or after each session, brush the grille weekly if you record daily, and deep clean accessories like windscreens and pop filters monthly. Shared microphones should be wiped down after every user.
Can I use alcohol wipes to clean my microphone?
Yes—on the metal body and grille. Use a 62–70% isopropyl alcohol solution, which disinfects more effectively than higher concentrations. Never use alcohol on foam windscreens, as it deteriorates, or on rubber cable jackets, which it dries out and cracks.
Should I cover my microphone when I’m not using it?
Absolutely. A dust cover, pouch, or the original box prevents the slow dust buildup that muffles sound over time. An uncovered mic on a desk collects debris every single day.
Can humidity permanently damage a microphone?
Yes. Prolonged humidity corrodes connectors, grows mold in foam, and can degrade the diaphragm. Store your mic with silica gel packs, avoid damp rooms, and let a cold mic reach room temperature before use to prevent condensation.
What’s the best way to store a USB or XLR microphone?
In a dry, room-temperature space, away from sunlight, kitchens, and bathrooms—ideally in its original box or a padded case with a silica gel pack. Coil cables loosely and store them without tension.
