7 Effective Tips for Noise Reduction in Home Recordings
Recording at home means working around unavoidable noise. But that doesn’t disqualify you from making something great. What matters is the performance and the smart choices you make around it.
The right microphone, an audio interface, headphones, and capable software will save you hours of frustration. Even your linen closet can pull its weight for noise reduction. The most effective approach to noise reduction starts with capturing clean audio in the first place, and that’s exactly what we’re going to dive into.
Quick Tips Overview
- Tip #1 – Know what kind of noise you’re fighting
- Tip #2 – Treat your room with what you already own
- Tip #3 – Point your mic away from the noise, not the wall
- Tip #4 – Stop chasing the gain myth
- Tip #5 – Listen to your room with fresh ears
- Tip #6 – Set up a noise gate to clean the gaps
- Tip #7 – Mind your cables, power, and ground loops
Tip #1: Know What Kind of Noise You’re Fighting
“Noise” is a catch-all word that hides three very different problems. Each one has a different fix. The same tool or method to fix all of them may end up sounding worse after processing than before.
The three common types of amateur recordings:
- Room reflections – the echo, slap, and ring that bare walls and hard floors throw back at your mic. This shows up as distance, hollowness, or a slight smear behind every word.
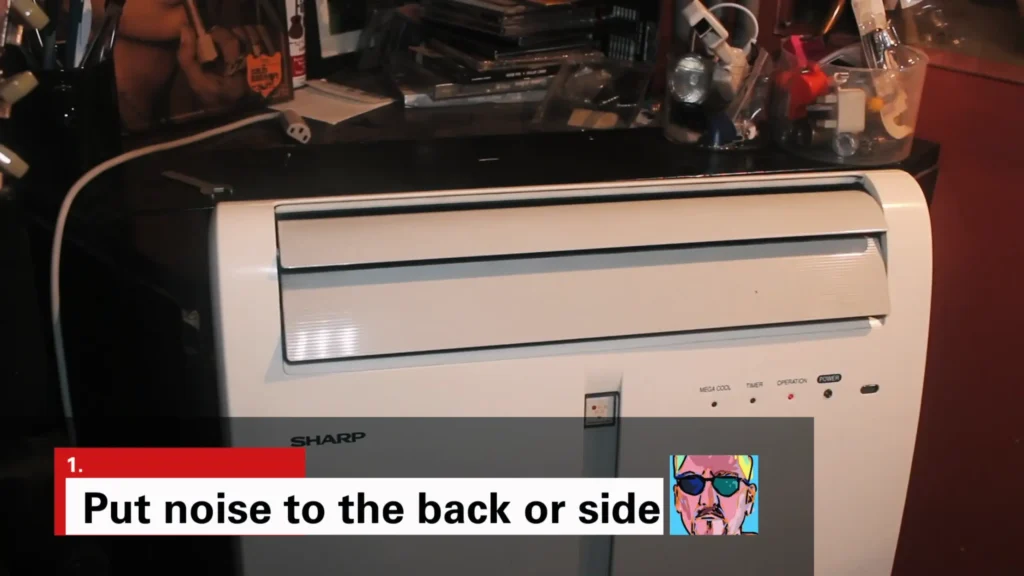
- The din – the constant low-level rumble of life happening around you. Distant traffic, an AC unit, a fridge compressor, a neighbor’s TV. It rarely peaks, but it’s always there.
- Event noise – the one-off interruptions. A dog barking, a car horn, a door slamming, a kid yelling, a delivery truck reversing into your driveway right as you nail the chorus.
What to do: Room reflections need treatment. Din needs source reduction and a noise gate. Event noise needs coping and patience. If you’re hearing all three, prioritize room treatment first. Reflections are the only kind of noise you can never fully remove in post.
Pro tips:
- If you’re hearing all three, prioritize room treatment first. Reflections are the only kind of noise you can never fully remove in post.
- For event noise, track in chunks rather than end-to-end. Compiling a verse is easier than compiling a whole song.
- Modern DAWs make comping painless. Logic’s Take Folders and Pro Tools’ Playlists let you flip between takes in seconds.
Tip #2: Treat Your Room With What You Already Own
Reflections from bare walls and a hard ceiling stick to your recording forever. Once you commit echo to the file, no plugin will fully strip it out, and you lose what @Steve In The Mix calls “that feeling of closeness from the vocal.”
What to do: Hang blankets, thick comforters, or duvets on the walls around your recording spot. Don’t skip the ceiling, as it bounces sound just as much as the walls. Add a rug under your chair to kill floor reflections. You can also record inside your closet. Clothes are excellent absorbers, and the small space limits how far reflections can travel.
Pro tips:
- Drape blankets over mic stands or chairs and arrange them in a horseshoe in front of and beside your mic. Concentrate your treatment on the front and sides.
- A pile of pillows or cushions wedged into a corner kills more flutter echo than you’d think.
- A bookshelf packed full and uneven works as a natural diffuser. Move one near your recording spot if you have one.
- Don’t aim for a totally dead room. A little air sounds natural — only the slap and ring need to go.
Tip #3: Point Your Mic Away From the Noise, Not the Wall
A cardioid microphone hears clearly from one side and rejects sound from the back. The pattern is shaped like a heart — that’s where the name comes from. Use that to your advantage instead of fighting it.
@Steve In The Mix run a test about recording vocals in a noisy environment. He tested an AC unit on fan mode behind his cardioid mic. He can clearly hear the fan in the room, but the recording came out clean. The cardioid pattern simply rejected what was behind it.
So, aim the back of your mic at whatever you don’t want to hear. Position yourself so your voice or instrument hits the front of the capsule, and the noise lands in the rejection zone behind it.

Pro tips:
- Don’t sing or speak straight into a wall. The reflection bounces right back into the front of the mic, and you record both your voice and its echo.
- Get closer to the source. Try to use the Proximity Effect. Close-miking changes the balance of direct sound to reflected sound dramatically.
- Dynamic vs condenser mic? Go for a small-diaphragm condenser for acoustic guitar, while a dynamic mic for daily recording.
- Check your mic’s pickup pattern. Many USB mics have switchable patterns: cardioid, omnidirectional, bidirectional, and stereo. A cardioid is your friend in a noisy room. Omni picks up everything; only use it when the room sounds great.

Tip #4: Stop Chasing the Gain Myth
A common myth says that cranking the gain higher reduces reflections and makes the mic “focus” on what’s close to it. It doesn’t.
@In The Mix ran a side-by-side test: he recorded the same room at 55 dB of gain and again at 25 dB, then boosted the quiet take by 30 dB in post. The two recordings sounded virtually identical. Same noise floor, same reverb, same hum. As he put it, trying to make your mic “listen to a smaller area” by changing the gain is “almost always absolutely nonsense.”
What to do: Set a healthy level. Peaks around -12 dB to -6 dB give you a signal to work with and headroom to spare. Gain doesn’t equal the volume. Don’t push gain hoping it’ll isolate your voice.

Pro tips:
- Live sound and analog tape are different. There, gain staging matters — boost a quiet signal later, and the hiss comes with it.
- If your mic sounds noisy at a sensible gain, the problem is the room, the cable, or the mic — not the gain knob.
- For a podcast or voiceover, watch your peaks during a few seconds of your loudest delivery. That’s where clipping hides.
Tip #5: Listen to Your Room With Fresh Ears
When you stay in your space for about 10 minutes, you may stop the fridge, the AC, and the traffic. But the mic doesn’t. Engineers call this “ambient blindness,” and it’s the reason your tracks sound clean in real time and noisy on playback.
@Sweetwater recommended going into your room, opening up a live mic, and listening through headphones.y You’ll be surprised at the sounds you’ve been ignoring for months.
What to do: Put up a mic, plug in your headphones, hit record on a silent take, and just listen. You’ll catch things that have been hiding in plain sight, the click of a thermostat, the whine of an old monitor, and the hum of a mini-fridge in the corner.
Pro tips:
- Schedule sessions for quieter parts of the day. Early morning and late evening usually beat the afternoon traffic crawl.
- Outside noise harder to control? Pause when the garbage truck rolls by. Plan vocal takes between sirens, not during them.
- A small fridge in the recording room is one of the most common silent killers. It hums under everything until the moment you hear it on playback and can’t unhear it.
- Computer fans ramp up under load. Close unused tabs and apps before tracking.
Tip #6: Set Up a Noise Gate to Clean the Gaps
A gate doesn’t remove noise from your performance. It removes it from the silence between phrases. The noise is most noticeable during quiet moments, so cleaning the gaps gives you most of the benefit with minimal artifact.
What to do: Insert a gate plugin on your vocal or instrument track. Most DAWs ship with a solid stock gate — Ableton‘s is excellent, REAPER, and GarageBand all include serviceable ones. Set the four key controls like this:
- Threshold – Raise it until the in-between noise disappears, but make sure your softest words still trigger the gate. Set it too high and your quiet syllables get chopped off.
- Attack – Set fast (under 1 ms) so the gate opens quickly when you start a phrase. The slow attack on the vocals sounds soft and weird.
- Release – Short enough to close on gaps, slow enough to keep the natural tails of words intact. Start around 100 to 200 ms and adjust by ear.
- Hold – Leave at the default until you know it well. It keeps the gate open for a set time after the signal drops below the threshold, useful for sustained notes that briefly dip below it.
Pro tips:
Don’t lean on the gate alone. Manually editing out long silent sections is faster and cleaner than tweaking thresholds for an hour. Top-and-tail your tracks first, gate second. Also, toggle the gate on and off during playback. If you can’t hear a difference except in the quietest gaps, you’ve set it right.
Tip #7: Mind Your Cables, Power, and Ground Loops
Hum and buzz often come from your wiring. Cheap cables, ground loops, dirty AC power, and tangled cable runs all dump noise into your signal before it ever reaches the recording.
What to do: Run AC power cables on one side of your desk and signal cables on the other. Where they have to cross, cross at a 90-degree angle to minimize transfer. Keep wall-wart power supplies and laptop chargers far from your audio cables.
Pro tips:
- Avoid “widow makers“. Those three-prong to two-prong adapters that defeat the ground pin. Use proper ground-loop isolators from brands like Morley, Ebtech, Behringer, or Radial instead.
- Power conditioners from Furman, SurgeX, Black Lion, or Radial clean up dirty AC and protect your gear from spikes.
- Bypass lighting dimmers when tracking, or replace cheap ones with high-quality units. LED bulbs on a dimmer can be especially noisy.
- USB cables have shielding, too. A cheap USB cable between your mic and computer can introduce noise that the mic itself wouldn’t.
Noise Reduction Tools Worth Knowing
| Tool | What It Does | When You Need It |
|---|---|---|
| Cardioid mic (FIFINE K669 and K688) | Rejects sound from the back, captures from the front | Every recording session |
| Pop filter and shock mount | Kills plosive bursts and isolates the mic from desk thumps | Vocal and podcast tracking |
| Acoustic blankets or panels | Absorb reflections in front of and around the mic | Untreated rooms with hard surfaces |
| Stock DAW noise gate | Removes noise between phrases | Vocals or speech over a noisy room |
| Power conditioner (Furman, SurgeX, Black Lion, Radial) | Cleans incoming AC to reduce hum and protect gear | Persistent hum or buzz you can’t trace |
| iZotope RX or similar repair software | Surgical removal of noise, hum, reverb, and clicks | Last-resort rescue work on important recordings |
If you’re new to starting a record in your home, a cardioid USB mic, a pop filter, two thick blankets, and your DAW’s built-in gate will get you 80 percent of the way there. Add a power conditioner if you have unexplained hum, and a noise repair plugin only when you need to salvage something.
The Final Call
You don’t need a perfect room to make something great. Pick one tip, try it on your next session, and listen to the difference. Once you master the noise reduction, your home recording experience will be successful in half.
Don’t let that stand in the way of your creativity. From the recording environment, to the suitable gear and the effective tools, you’ll learn it from your practice. Even your microphone placement will take your audio quality to the next level.
FAQs
Will recording at a higher gain reduce noise?
No. Gain boosts your signal and the noise underneath it equally. The myth that cranking gain “isolates” your voice has been tested side-by-side and proven wrong. Focus on the room, mic placement, and your cables instead.
How loud should I set my recording levels?
Aim for peaks around -12 dB to -6 dB. That gives you a strong signal with headroom for the loud moments. If you’re peaking near 0 dB, you’re risking clipping for no real benefit in the digital domain.
Can I fix a noisy recording in post?
Sometimes. Tools like iZotope RX can save a track that would otherwise be unusable, but every repair costs you a little quality and time. It’s always cheaper to track clean than to clean up later.
Do I need a noise gate on every track?
No. Use one when there’s a clear noise floor between phrases — vocals, dialogue, podcasts, voiceover. For instruments with sustained notes or natural decay, a gate often does more harm than good by chopping off tails. Reverb tails and gates don’t get along.
Is a USB mic or an XLR mic better for noisy environments?
Both can work. Be it a USB mic or an XLR mic, the pickup pattern matters more. A cardioid USB mic with smart placement beats a poorly-positioned XLR mic every time. XLR gives you more flexibility down the line, but it’s not magic.