
Microphone Placement Guide: Distance, Angle, and Position
Great audio doesn’t demand a studio. Most of the time, it comes down to where you put the mic. A capsule placed 4 inches off-axis will outperform a $2,000 microphone aimed poorly. Once you master the microphone placement, your audio jumps a level without spending another dollar.
Here, we’ve covered the fundamentals you’ll actually use, from the core principles to the real scenario setups that you may trip up on. Let’s dive into it.
Microphone Placement: The 3 Core Principles
Every solid recording boils down to three variables. Nail these, and you’re 90% of the way there.
1. Distance — Clarity vs. Noise
Closer mics sound cleaner. When you move the mic away from your mouth, you crank up the gain to compensate. That extra gain amplifies everything: your voice, your HVAC, and even the keyboard clicks. So the closer your mic from your mouth, the less the gain is, and those problems shrink with it.
@Marcus Hutzel demonstrates this in his microphone placement tutorial: a mic mounted on top of a webcam sounds distant and washed-out, while the same mic on a boom arm overhead sounds direct and focused. The only change is the distance.
Most pros keep their mic between 4 and 6 inches from their mouth. Voice-over coach @Jay Myers Voiceove has a trick for it, thumb on his lower lip, fist extended; that’s his 5-to-6-inch check every session.
The exact measurement isn’t the point. Consistency is. Once you find your ideal distance, don’t change it randomly.
One term worth knowing: the proximity effect. The closer you get to a directional mic, the more low-end it picks up. Use it on purpose, closer for warmth, slightly farther for a thinner, brighter tone.
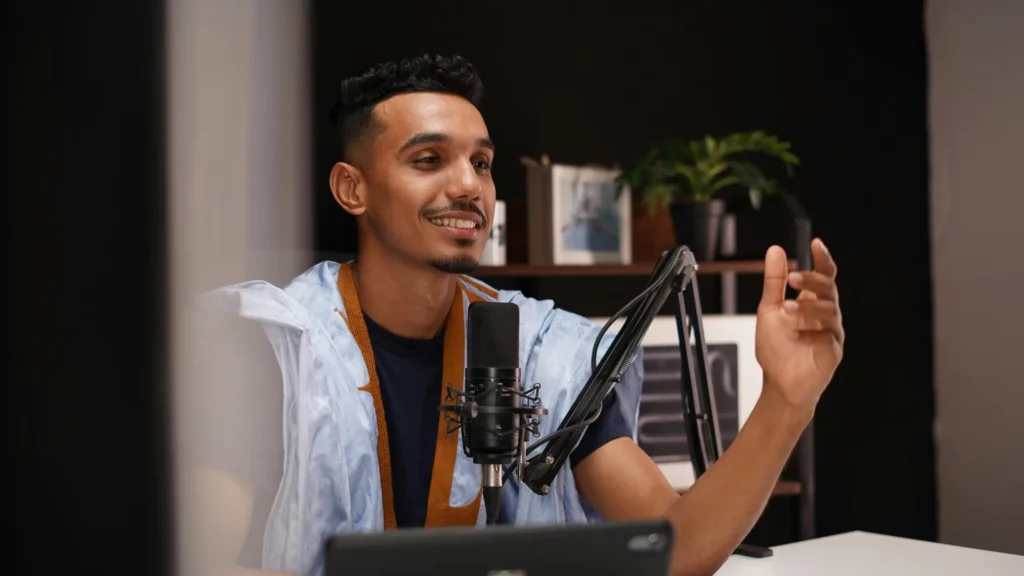
2. Angle — Controlling Plosives and Harshness
Pointing the mic straight at your mouth is the number-one cause of those nasty “p” and “b” pops. Your breath slams the diaphragm dead-on. The mic distorts, and the sound is muddy.
Fix: angle the mic about 45 degrees off-axis so you speak across it. Your breath shoots past the capsule instead of hitting it, and plosives mostly disappear.
Can’t angle the mic because of your setup? A pop filter does the same job by dispersing air bursts before they reach the capsule. Either the mesh-metal kind or the pantyhose-style nylon works; both catch the burst and let the sound through.
3. Position — Tone and Consistency
Position is where the mic lives relative to your body — above, below, level, or off to the side. Usually, your voice resonates in three spots: your chest (low, warm), your throat (midrange), and your nasal cavity and mouth (bright, cutting).
- Mic above, angled slightly down → captures more chest resonance → warmer, fuller
- Mic below, angled slightly up → captures more nasal and mouth sound → brighter, more bite
- Mic level or off to the side → balanced, natural
If your voice is already nasal, don’t point the mic at your nose — go low and angle up toward the throat to balance it. If your voice is deep and consonants get lost, angle slightly up for more articulation.
Like the distance, the consistency is the points. Your listeners notice when tone shifts session to session, even if they can’t name what changed.
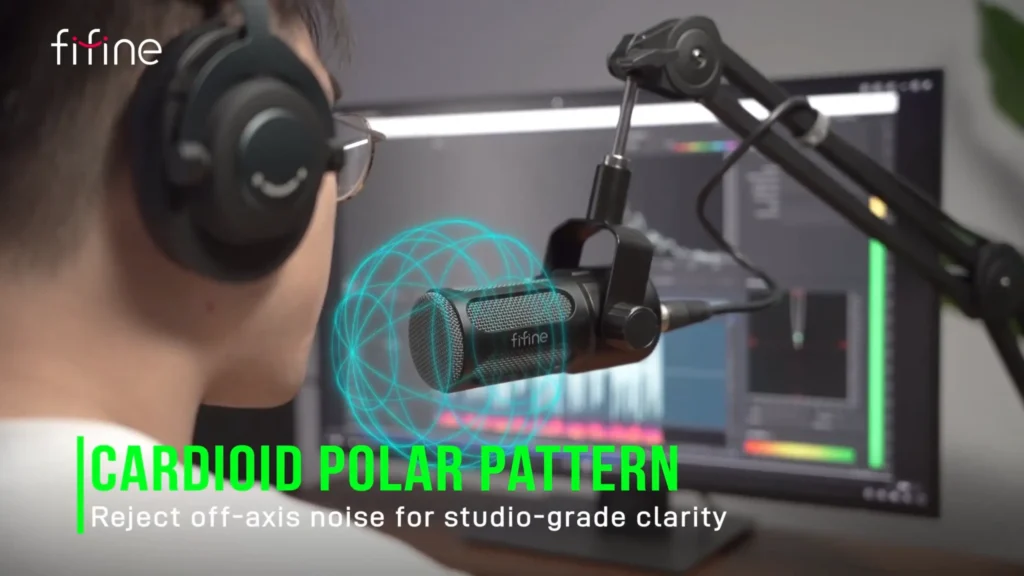
How Microphone Polar Patterns Affect Placement
Polar patterns describe where a mic picks up sound. Commonly, the polar pattern will decide your microphone position directly.
| Pattern | Picks up | Best for |
|---|---|---|
| Cardioid | Front only | Solo vocals, podcasts, streaming |
| Omnidirectional | All directions | Room tone, multiple voices, interviews |
| Bidirectional | Front and back | Two people facing each other |
| Shotgun | Narrow forward beam | Video, noisy environments |
- Cardioid is the workhorse. When in doubt, start here. Keep your mouth in front of the capsule, and you’re set.
- Omnidirectional picks up everything, including every ceiling fan and keyboard click. Only reach for it in a treated space or when you actually want ambience.
- Bidirectional is made for face-to-face interviews on one mic. Angle it so both speakers hit the front and back — not the sides, which are dead zones.
- Shotgun mics are laser-focused. They work at greater distances but need to be pointed precisely at the mouth or chest.
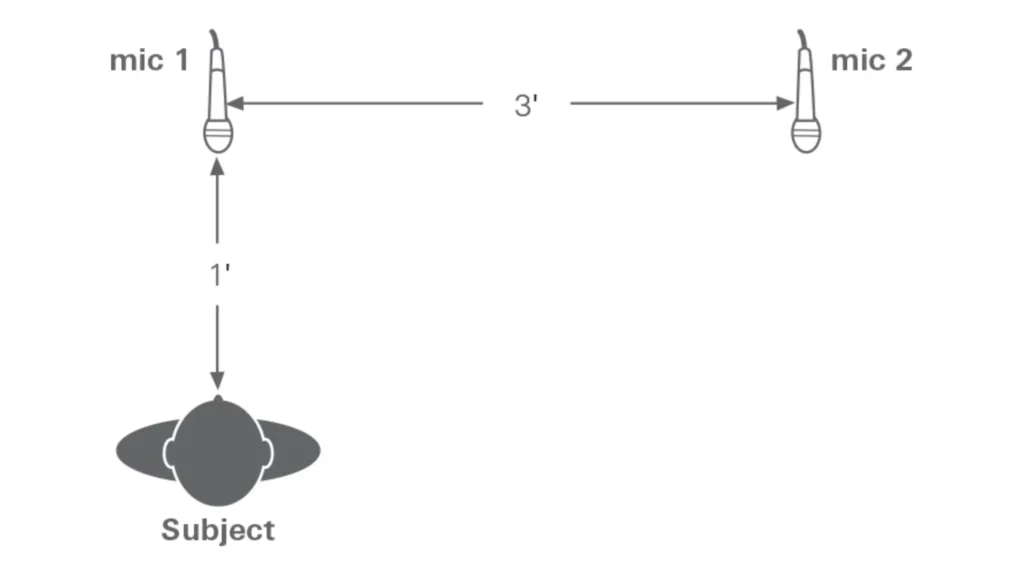
Multiple Microphones: The 3:1 Rule
Using two mics at once? The second one should be at least three times farther from the first source than the first mic is. If Mic 1 sits 1 foot from a speaker, Mic 2 should sit at least 3 feet from that same speaker.
The reason it works is about keeping bleed between mics quiet enough that it doesn’t fight your main signal. Treat it as a starting point, then trust your ears. As @Mario DiSanto puts it, the 3:1 rule is a general rule of thumb, not a law. Listen back, adjust, and prioritize what sounds good.
Scenario Placement: Real-World Setups
| Scenario | Usage | Mic Type | Placement | Distance |
|---|---|---|---|---|
| Podcasting | Spoken voice | Dynamic or cardioid condenser | 45° off-axis, at mouth height | 4–6 in |
| Streaming / Gaming | Voice + movement | Dynamic on boom | Overhead, angled down | 2–4 in |
| Interviewing | Two speakers | Bidirectional or dual cardioid | Between speakers or one each | 6–8 in |
| Video / Vlogging | Voice out of frame | Shotgun or lavalier | Slightly above or below the mouth | 6–12 in / 6 in |
| Vocal recording | Singing | Large diaphragm condenser | Slightly above or below mouth | 6–12 in with pop filter |
Podcasting
A dynamic mic like FIFINE K688 rejects room sound and handles plosives well. Keep it close, angled 45 degrees off your mouth. If your room is untreated, a dynamic is more forgiving than a large diaphragm condenser, which captures every bit of detail — good and bad.
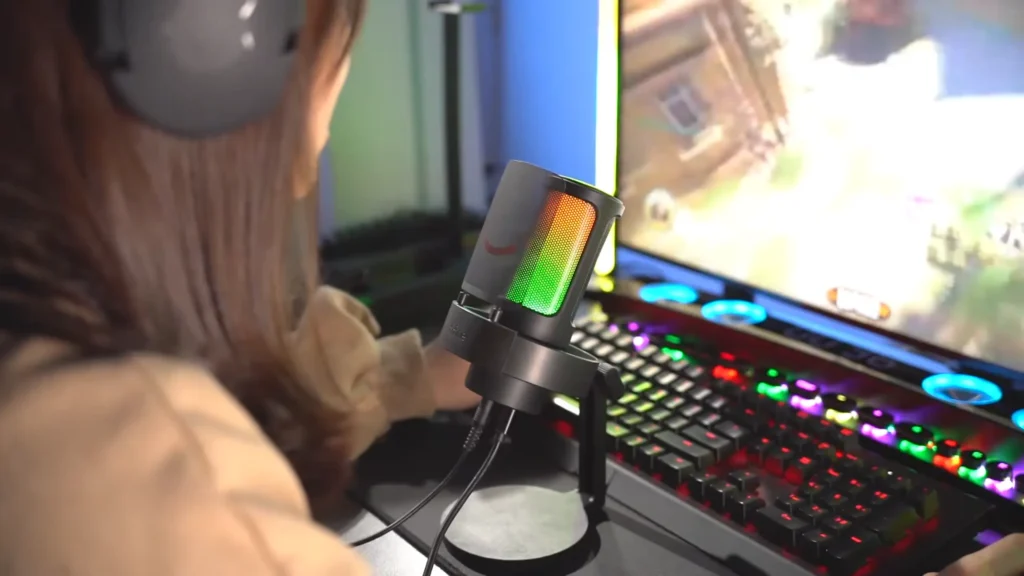
Streaming and Gaming
You’ll move: leaning forward during a clutch moment, slumping back when chatting, turning to check a second monitor. A boom arm mounted above the desk, angled down at 45 degrees, keeps the mic in range even when your posture shifts. It also clears the desk for your keyboard and mouse.
Interviewing
For two people sharing one mic, a bidirectional pattern is cleanest. For a more polished remote-feel sound, give each speaker a cardioid and apply the 3:1 rule to minimize bleed.
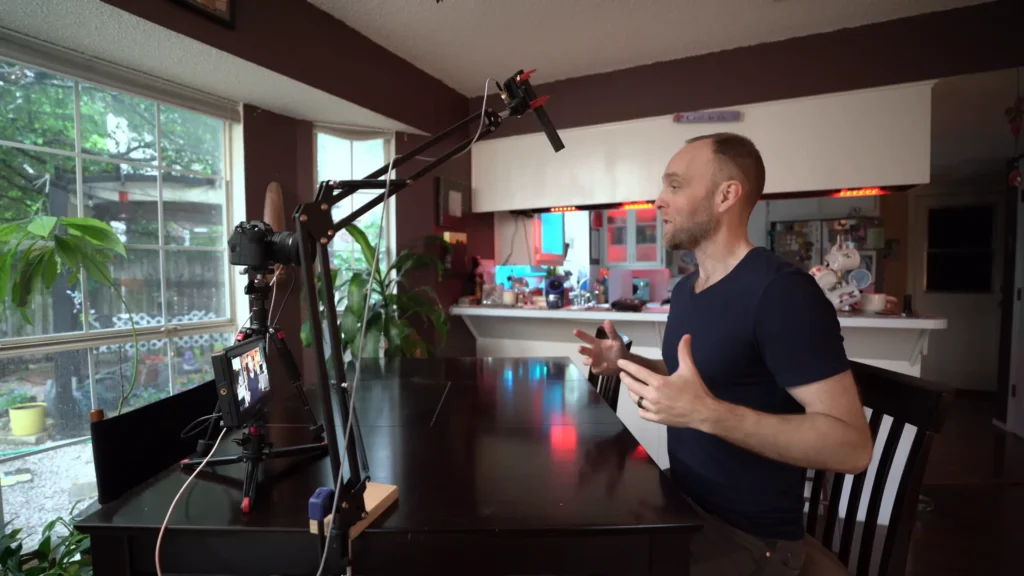
Video and Vlogging
If the mic can’t be on camera, a shotgun on an overhead boom is the move. Point it at the chest, not straight down at the top of the head. For run-and-gun work, a lavalier clipped about 6 inches below the chin gets consistent audio without ever appearing in the shot.
Vocal Recording
Start 6–12 inches out with a pop filter. Large diaphragm condensers pick up nuance, which makes room treatment critical. If you don’t have a booth, @Cato Zane recommends literally recording inside a closet full of clothes as “it’ll absorb a lot of sound”.
5 Steps to Place Your Microphone Quickly
Step 1: Place the mic about 15 cm (6 inches) from your mouth.
Use the thumb-to-fist trick — thumb on your lower lip, fist extended — for a quick measurement without a ruler. The goal isn’t millimeter precision; it’s hitting that same spot every session so your sound stays consistent.
Step 2: Angle the mic about 45° off-axis.
Position it so you speak across the capsule rather than straight into it. This one tweak reduces plosives dramatically and stops your breath from distorting the diaphragm.
Step 3: Adjust the height.
Place the mic slightly above or slightly below your mouth line, then angle the capsule back toward your mouth. Above gives you a warmer chest tone; below captures more brightness and articulation. Pick the option that balances what your voice already has too much of.
Step 4: Test the audio.
Record a sentence loaded with hard consonants — “The purple parrot picked a peck of pickled peppers” works fine. Listen back on headphones and check for three things: plosive pops, background room echo, and whether your voice sounds full or thin.
Step 5: Fine-tune.
Move an inch closer for more warmth and presence, or an inch back if the low end feels bloated. Drop the gain if you hear room noise creeping in, and nudge the angle if pops show up. Small changes compound — one pass of adjustments is usually enough to dial it in.
@Jay Myers Voiceover shared in his tutorial that the mic “can be upside down, it can be to the side”. As long as the capsule points at your mouth in some orientation, it’ll pick you up. The rest is experimentation.
Sum It Up: Set Up a Right Microphone Placement
You just picked up the single skill that most gear problems aren’t actually gear problems, it’s for the microphone placement. Now the work is practice: record, listen, adjust, repeat. Every voice and every room rewards a slightly different sweet spot, and the only way to find yours is to try. Start by checking your microphone placement, share your before-and-after clips in the comments, or tag us with your setup.
FAQ
How far should my mic be from my mouth?
Four to six inches for most cardioid mics used in podcasting, streaming, and voice-over. Singing or louder sources can move out to 6–12 inches.
Should the mic be above or below my mouth?
Either works. Above sounds warmer and fuller; below gives you more brightness and intelligibility. Keep the capsule angled toward your mouth, whichever you choose.
Why do I still get pops even with a pop filter?
You’re probably speaking directly into the mic. Angle the capsule 45° off-axis — a pop filter alone can’t catch everything.
Does room treatment matter more than placement?
They matter together. You can’t fix bad placement with treatment, and you can’t fix a harsh room with perfect placement. But close mic distance helps with both — it’s the cheapest form of “treatment” you’ll ever use.
What’s the best mic for an untreated room?
A dynamic mic. It picks up less room detail than a large diaphragm condenser, which makes it far more forgiving when your space isn’t acoustically treated.