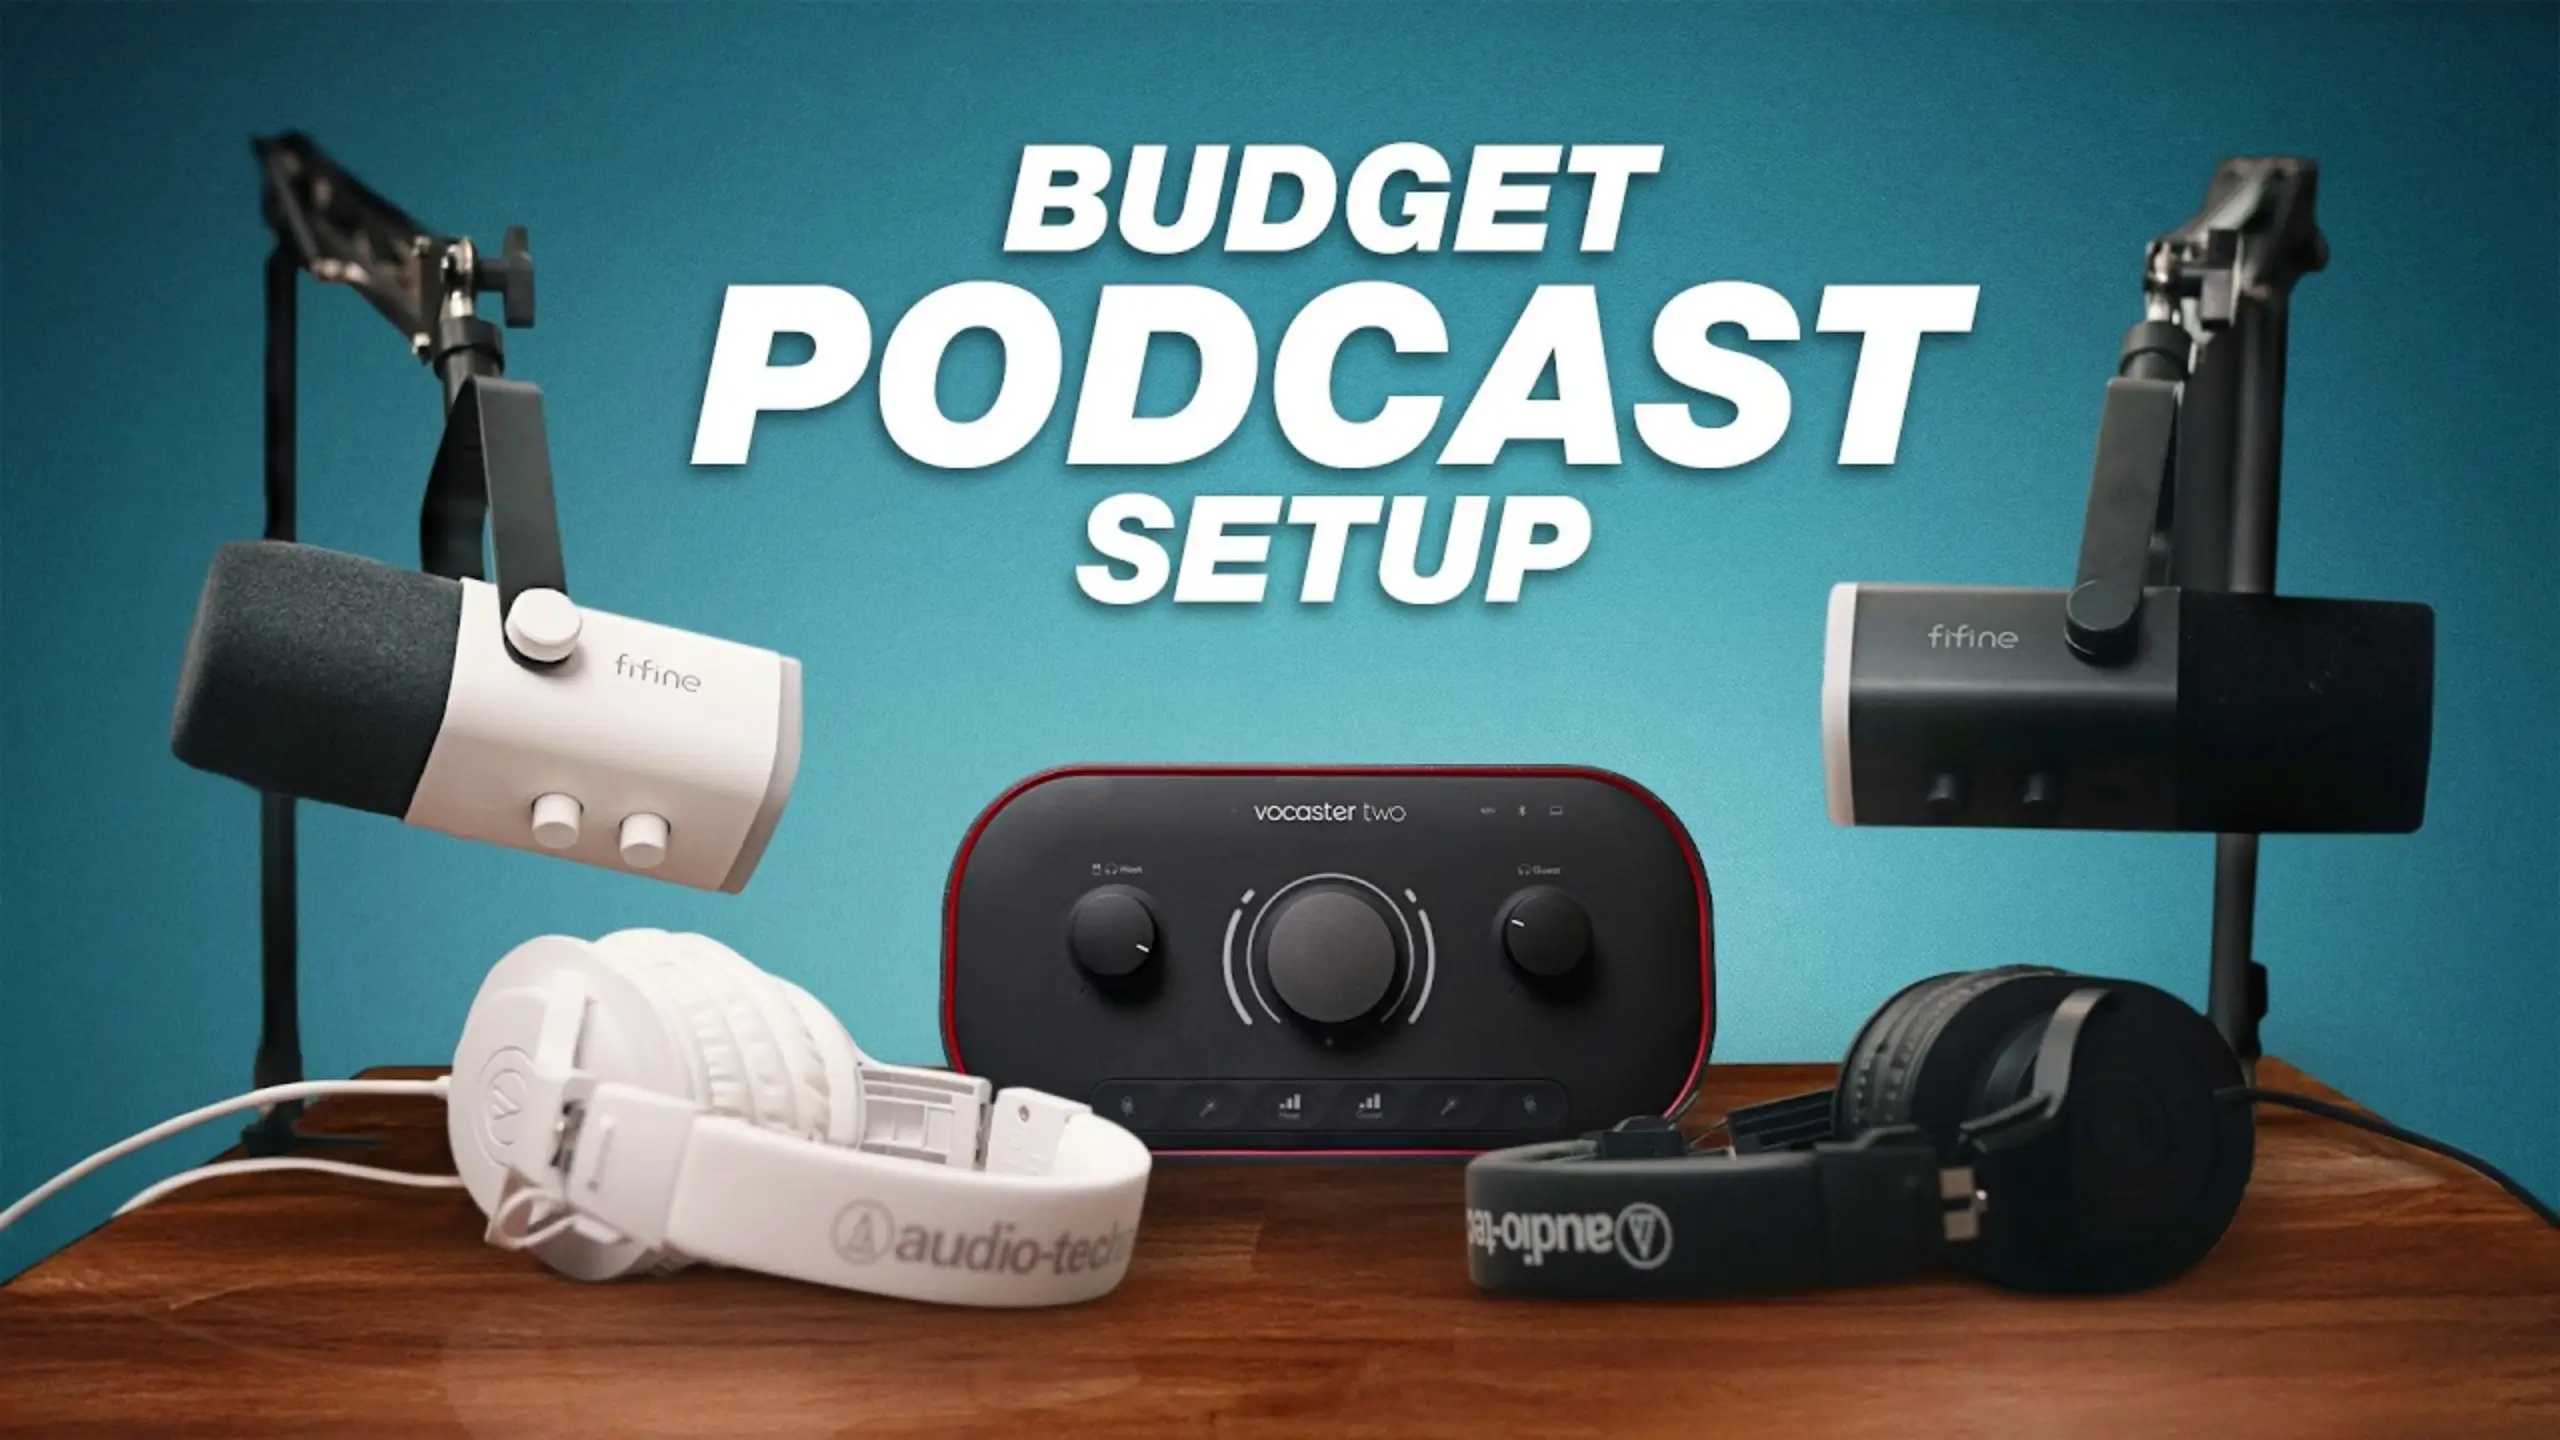
Best Podcast Setup for Beginners: 8 Picks for Every Budget
The number one killer of new podcasts isn’t a lack of ideas. It’s overcomplicating the setup. For a podcast beginner, you don’t need the professional and expensive gear. After testing and comparing eight products across microphones, audio interfaces, mixers, and headphones, we’ve figured out the best podcast setup for beginners. Here is what we found.
FIFINE AmpliGame AM8 – Best Budget Microphone
Pros
- Dual USB-C and XLR connectivity
- Desktop Stand included in the box
- Strong background noise rejection
- Tap-to-mute with LED indicator
- Remarkably competitive at $57
Cons
- RGB lighting won’t appeal to all podcasters
- On-mic controls only work via USB
- Requires a separate XLR cable for XLR use
| Sound Quality | 8.5 / 10 |
| Ease of Use | 9.5 / 10 |
| Build Quality | 8.5 / 10 |
| Value for Money | 10 / 10 |
| Upgrade Path | 9.0 / 10 |
| Overall | 9.2/ 10 |
The FIFINE AmpliGame AM8 is a dynamic cardioid microphone with a 50Hz–16kHz frequency response. Dynamic capsules are the right call for untreated rooms — they reject off-axis sound from keyboards, AC units, and street noise far better than condenser mics.
What makes the AM8 genuinely stand out is its dual connectivity. Start with USB-C plugged for zero-effort recording. When you’re ready to level up, switch to XLR for a semi-pro signal chain. The @Think Media team tested the AM8 directly against the $500 Shure SM7B on Zoom calls and reported that no one could tell the difference. That kind of value-per-dollar is hard to argue with.
The included desktop arm is a small detail that saves $25–$40 you’d otherwise spend separately. It lets you position the mic at the right distance (2–6 inches from your mouth) without cluttering your desk with a bulky stand.
Shure MV7+ – Best USB/XLR Hybrid Microphone
Pros
- Onboard DSP with digital pop filter and denoiser
- Auto Level Mode for consistent recording
- USB-C and XLR dual output
- MOTIV Mix app for granular control
- Customizable LED touch panel
Cons
- $249 is a significant investment for beginners
- DSP only available in USB mode
- Prone to plosives without careful positioning
| Sound Quality | 9.5 / 10 |
| Ease of Use | 9.0 / 10 |
| Build Quality | 9.5 / 10 |
| Value for Money | 7.5 / 10 |
| Upgrade Path | 9.5 / 10 |
| Overall | 9.0 / 10 |

Shure designed the MV7+ as a spiritual successor to the SM7B — the mic you’ll find in nearly every professional podcast studio. The Shure MV7+ borrows that warm, full-bodied low-end character but wraps it in a hybrid USB/XLR package that doesn’t demand an expensive audio interface to sound great.
The real selling point is the software layer. Through the MOTIV Mix desktop app, you can shape your tone signature, dial in compression, toggle the built-in denoiser, and set up the digital pop filter — all without opening a DAW. For podcasters who record into Riverside, Squadcast, or even GarageBand, this effectively eliminates post-production.
Multiple podcast creators recommend the MV7+ as their go-to, and it consistently appears in “intermediate” and “pro” setup tiers. If your budget allows $249 and you want one mic that handles everything from solo recording to XLR interface chains, this is the one.
RØDE PodMic USB – Best Plug-and-Play Microphone
Pros
- Built-in APHEX voice processing via USB
- Headphone output with volume control
- Internal pop filter and shock mount
- Works with iOS and Android devices
- Seamless RØDE Connect / Central integration
Cons
- No on-mic gain control
- Heavy at 937g — needs a sturdy arm
- XLR output bypasses built-in processing
| Sound Quality | 9.0 / 10 |
| Ease of Use | 9.5 / 10 |
| Build Quality | 9.0 / 10 |
| Value for Money | 8.0 / 10 |
| Upgrade Path | 8.5 / 10 |
| Overall | 8.8 / 10 |
Do you want one cable and no hassle for your podcast? RØDE PodMic USB microphone is your right-hand.
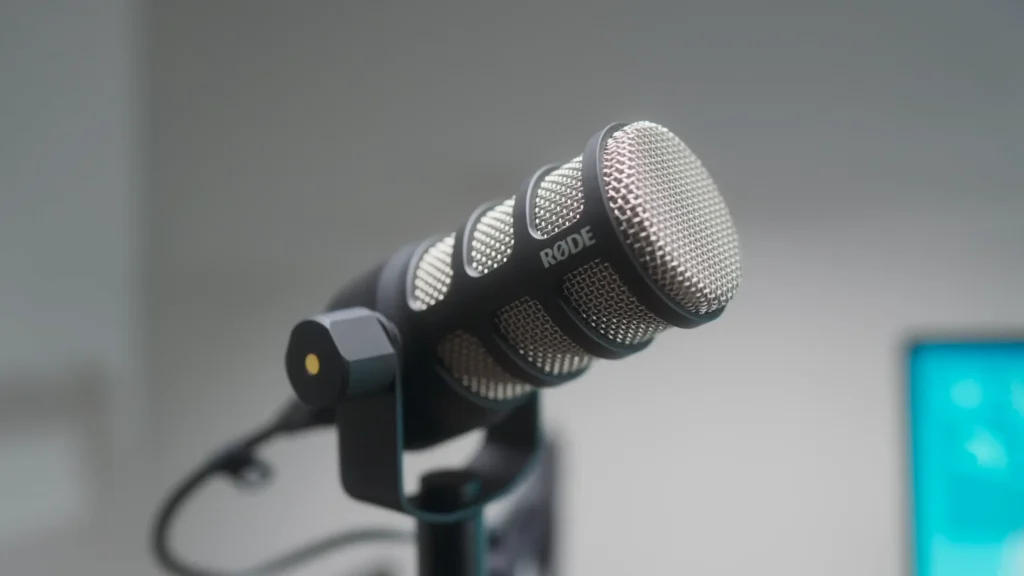
Plug the USB-C cable into your computer or phone, open RØDE Connect, and you’re recording with studio-style processing active. The APHEX engine adds subtle aural exciter and compression effects that make voices cut through without sounding harsh.
All-metal construction and a weight of over 1kg mean that handling noise is minimal. The integrated swing mount lets you tilt and position the capsule without an external shock mount or adapter. Pair with RØDECaster Duo, a complete two-person setup is ready for you.
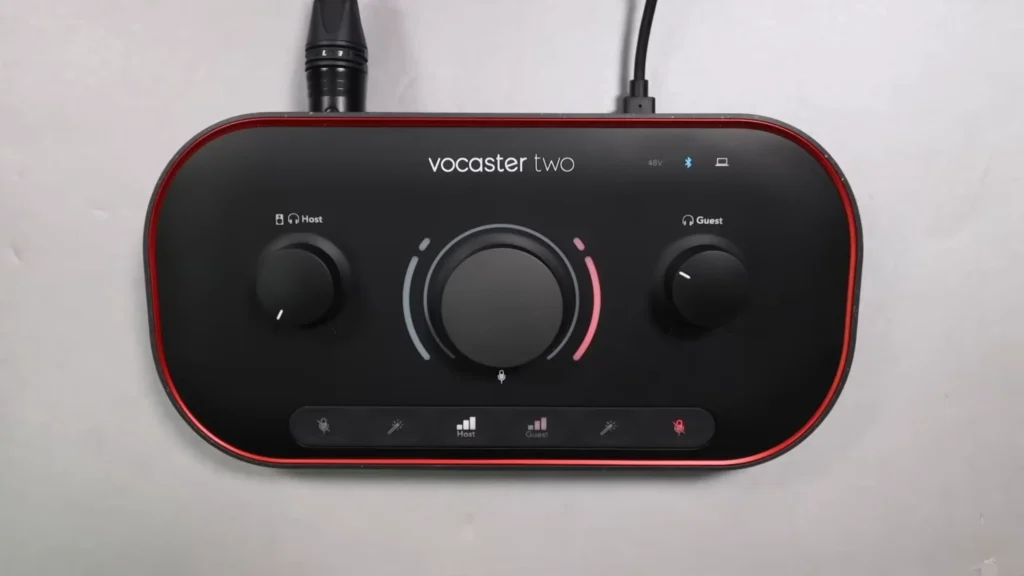
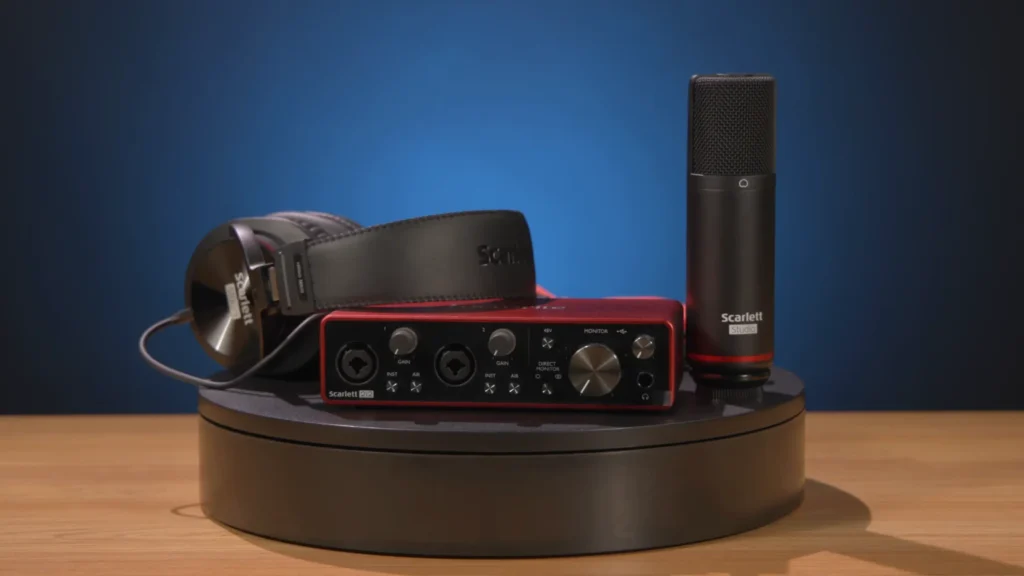
Focusrite Vocaster Two – Best Audio Interface for Podcasters
Pros
- 70dB gain — powers any dynamic mic
- Auto Gain and Enhance buttons
- Two XLR inputs + two headphone outs
- Bluetooth + TRRS phone connectivity
- 3.5mm TRS camera output
Cons
- No built-in recording (requires computer)
- No sound pads or fader controls
- Vocaster Hub software is basic
| Sound Quality | 9.0 / 10 |
| Ease of Use | 9.5 / 10 |
| Build Quality | 8.5 / 10 |
| Value for Money | 9.5 / 10 |
| Upgrade Path | 8.5 / 10 |
| Overall | 9.1 / 10 |
The Vocaster Two is considered by many to be the best podcast-specific interface at any price. It’s built exclusively for voice — the Auto Gain button literally sets your input levels for you, and the Enhance button applies EQ and compression tailored for spoken word.
Two XLR inputs with matching headphone outputs make this a natural fit for two-person shows. The rear panel houses Bluetooth connectivity (for phone-in guests), a TRRS input for smartphones, and a TRS camera output for feeding audio directly into a video camera.
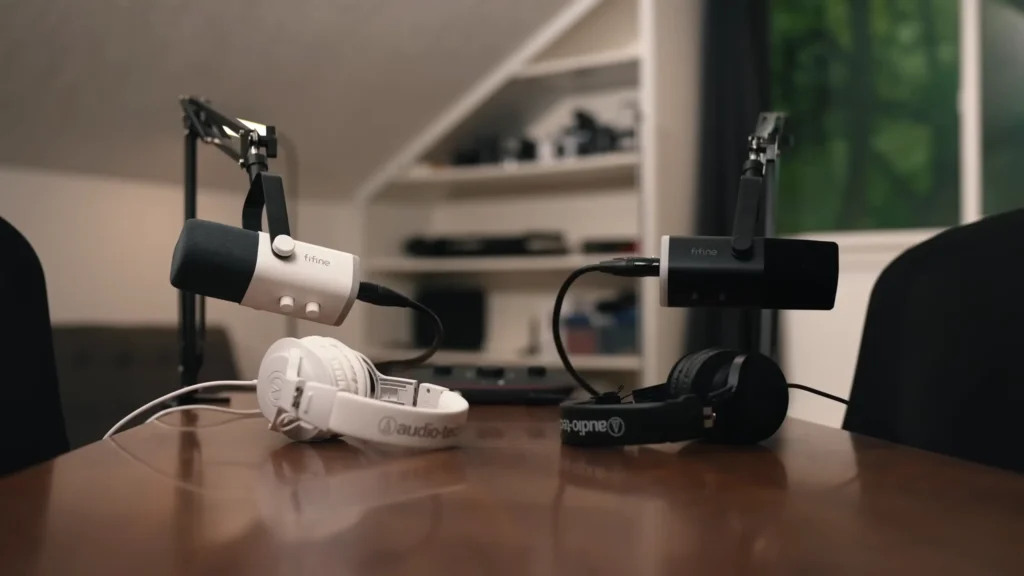
The companion Vocaster Hub software gives you a visual overview of your input levels and basic mixing controls. For most beginners, it covers the essentials. Pair this with two FIFINE AM8 microphones, and you’ve built a complete two-person podcast studio for under $215.
RØDECaster Duo – Best All-in-One Mixer
Pros
- Records directly to microSD — no computer needed
- Touchscreen with setup wizard
- Six-pad soundboard for intros and effects
- Four broadcast-quality faders
- Bluetooth + dual USB-C connectivity
Cons
- ~$499 is steep for a beginner budget
- Only 2 XLR inputs (limits in-person guests)
- Learning curve for all the features
| Sound Quality | 9.5 / 10 |
| Ease of Use | 8.0 / 10 |
| Build Quality | 9.5 / 10 |
| Value for Money | 7.5 / 10 |
| Upgrade Path | 9.5 / 10 |
| Overall | 8.7 / 10 |
The RØDECaster Duo is the compact sibling of the Pro II, shaving the footprint from 12×10 inches down to a square 9×9. It keeps the same Revolution Preamps, the same APHEX processing, and the same touchscreen interface — you’re only losing two XLR inputs and two headphone jacks.
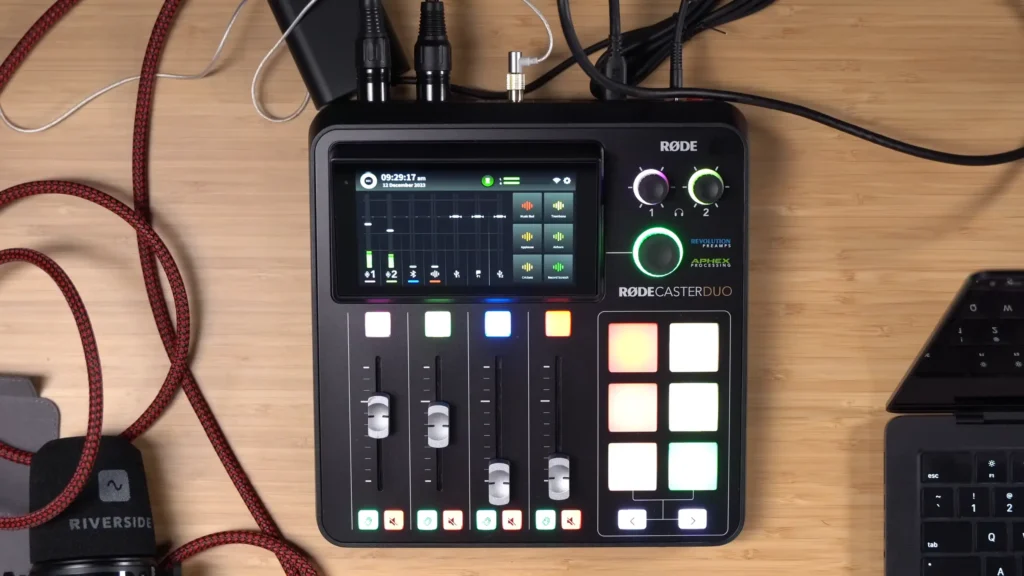
The killer feature is standalone recording. Hit record, talk, stop. Your files are on the microSD card, ready to edit. During recording, the physical faders let you adjust levels in real time, and the smart pads can trigger intro music, sound effects, or transition stings live.
If you’re hosting a two-person podcast, RØDECaster Duo would be your ideal setup. For solo podcasters who record remote interviews, one XLR handles the local mic while the second USB-C port handles a computer connection for Riverside or Zoom.
RØDECaster Pro II – Best Pro Mixer
Pros
- 4 XLR inputs for multi-guest shows
- 4 headphone jacks
- SD card recording (no computer needed)
- Smart pads with music/effects triggering
- Top-tier preamps
Cons
- ~$699 is a serious investment
- Large desk footprint (12×10 inches)
- Feature depth can overwhelm new users
| Sound Quality | 9.5 / 10 |
| Ease of Use | 7.5 / 10 |
| Build Quality | 9.5 / 10 |
| Value for Money | 7.0 / 10 |
| Upgrade Path | 10 / 10 |
| Overall | 8.9 / 10 |
The RØDECaster Pro II is the benchmark all-in-one podcast mixer. It records to an SD card, mixes live audio with broadcast-quality faders, and includes smart pads that let you hit an intro button, fade music out with the fader, and start your show.
For shows with more than two in-person hosts, it’s really the only game in town at this price tier. Each of the four channels gets independent APHEX processing, and you can route audio between two USB-C-connected devices, Bluetooth, and the physical inputs simultaneously.

Focusrite Scarlett 2i2 – Best Budget Audio Interface
Pros
- Industry-standard reliability
- 2 XLR/TRS combo inputs
- Works with any DAW or recording app
- Excellent driver support on Mac and PC
Cons
- No podcast-specific features (no auto-gain)
- No Bluetooth or phone connectivity
- Slightly less gain than the Vocaster Two
| Sound Quality | 9.0 / 10 |
| Ease of Use | 8.0 / 10 |
| Build Quality | 9.0 / 10 |
| Value for Money | 8.5 / 10 |
| Upgrade Path | 8.0 / 10 |
| Overall | 8.5 / 10 |
The Focusrite Scarlett 2i2 is mentioned in nearly every podcast setup recommendation as the default “good interface.” It has two XLR inputs, two headphone outputs, and gets out of your way. The preamps are clean and quiet, and the drivers are bulletproof on both Mac and PC.
Where it falls short against the Vocaster Two is in podcast-specific convenience. There’s no auto-gain button, no enhance toggle, no Bluetooth for phone guests, and no camera output. You’re getting a clean, honest audio interface.
For podcasters who also record acoustic instruments or plan to use the interface for music production, the Scarlett’s versatility is a genuine advantage.
Audio-Technica ATH-M20x – Best Starter Headphones
Pros
- Clear, accurate monitoring at $49
- 10-foot cable with quarter-inch adapter
- Comfortable for hour-long sessions
- Closed-back design reduces bleed
Cons
- Non-detachable cable
- Minimal sound isolation compared to M50x
- Plastic build feels less durable
| Sound Quality | 8.0 / 10 |
| Ease of Use | 9.0 / 10 |
| Build Quality | 7.5 / 10 |
| Value for Money | 9.0 / 10 |
| Upgrade Path | 7.5 / 10 |
| Overall | 8.3 / 10 |
Headphones are essential for monitoring your audio in real time — hearing how you actually sound, catching background noise in time, and communicating with guests. The ATH-M20x is Audio-Technica’s entry-level studio monitor, and it holds up well for podcast use.
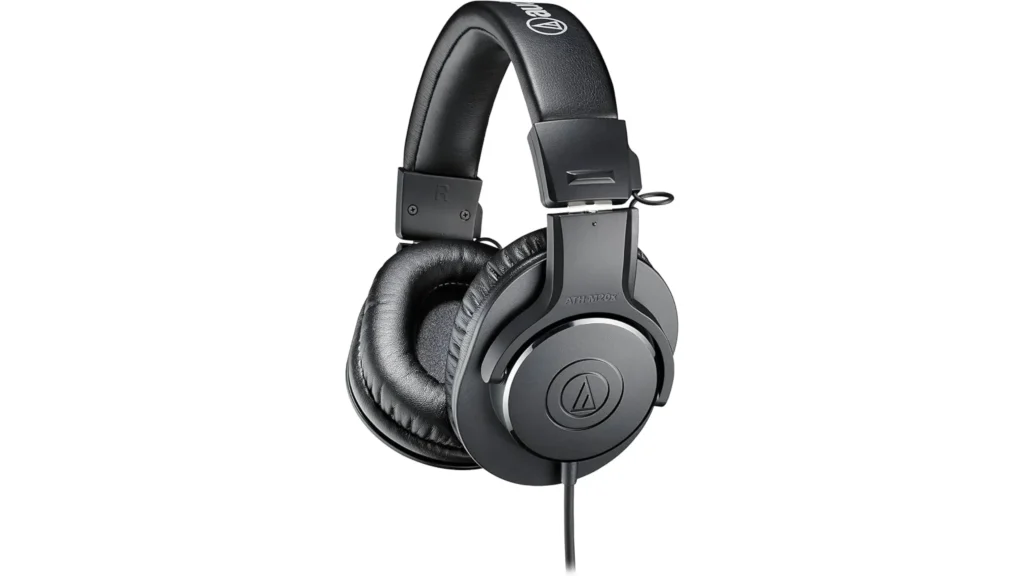
Don’t overlook the 10-foot cable. It allows you to position your audio mixer on another desk while keeping your recording space clean. The included quarter-inch adapter screws onto the 3.5mm jack, so you can plug directly into the headphone outputs on the Vocaster Two or RØDECaster Duo without hunting for adapters.
If you want to spend more for better isolation and a detachable cable, look at Audio-Technica’s ATH-M50x (~$149) or the RØDE NTH-100 (~$119). But at $49, the M20x is hard to beat for a first pair.
What to Look For in a Podcast Setup
Gear lists are only useful if you know what to prioritize. Here are the five criteria that matter most when building a beginner podcast setup, whether the best microphones or the audio interface for podcasting.
1. Microphone Type: Dynamic vs. Condenser
Dynamic microphones are the standard recommendation for podcasting. They pick up sound primarily from directly in front of the capsule and reject noise from the sides and rear. Condenser microphones are more sensitive and capture a wider frequency range, but that same sensitivity picks up every sound in your room. Unless you’re recording in an acoustically treated space, stick with a dynamic.
2. Connectivity: USB vs. XLR (or Both)
USB mics plug directly into your computer with zero extra gear. XLR mics require an audio interface or mixer to convert the analog signal to digital.
Tips: start with USB if you’re a solo podcaster or buy a mic that offers both USB and XLR, like FIFINE AM8, Shure MV7+, RØDE PodMic USB. You’re not replacing it when you add guests or upgrade your signal chain later.
3. Audio Interface vs. All-in-One Mixer
An audio interface (like the Vocaster Two or Scarlett 2i2) converts your XLR mic signal to digital and sends it to your computer for recording. A mixer (like the RØDECaster Duo or Pro II) does that same job but adds built-in recording, soundboard pads, physical faders, and processing — without needing a computer at all.
For most beginners, an interface plus free recording software (GarageBand, Audacity) is the smarter play. You’ll spend less and learn the fundamentals.
4. Headphones: Why They Matter
Monitoring headphones let you hear exactly what’s being recorded in real time. Closed-back headphones prevent audio from leaking into your mic, which matters especially during two-person recordings. You don’t need expensive cans to start — even Apple AirPods work for basic monitoring — but dedicated studio headphones give you a much more accurate picture of your audio.
Quick Recap
For the absolute best value, our overall winner is the FIFINE AmpliGame AM8 paired with the Focusrite Vocaster Two. For a solo podcast with the simplest possible workflow, the Shure MV7+ is the single-purchase solution. Want more advanced setups like live music triggers or no-computer recording? The RØDECaster Duo, paired with two RØDE PodMic USB mics, is the “buy it once, never think about it again” setup.
Whatever tier you choose, remember to keep going once you start your podcast. The best podcast setup isn’t essential for beginners; it’s the consistency that matters more. Hit and keep moving.
FAQs
Do I need an audio interface if my microphone has USB?
No. A USB mic connects directly to your computer and handles the analog-to-digital conversion internally. An audio interface becomes necessary when you want to use XLR connections, connect multiple microphones, or gain more control over your signal chain.
What free software can I use to record a podcast?
GarageBand (Mac) and Audacity (Mac/PC/Linux) are the two most popular free options. Both support multi-track recording, basic editing, and export to standard audio formats. For remote recording with a guest, platforms like Riverside record each participant locally at full quality.
Should I start with an audio-only or video podcast?
Record video from day one, even if you only publish audio initially. Video podcasts are growing rapidly on YouTube, and having footage gives you material for short-form clips on social platforms. You don’t need a dedicated camera — a smartphone or laptop webcam works to start. You can check the details about audio podcast vs video podcast.
What’s the cheapest complete podcast setup I can build?
A single FIFINE AmpliGame AM8 ($57) connected via USB to your computer, plus a free recording app like Audacity, gets you started for under $60. Add a pair of earbuds you already own for monitoring, and you have everything you need for a solo podcast.
How close should I sit to my microphone?
For dynamic microphones, position your mouth 2–6 inches from the top of the capsule. Closer gives you a warmer, fuller sound (proximity effect). Further away sounds thinner but picks up less mouth noise. Experiment to find the sweet spot for your voice.