How to Set Your Microphone Gain Properly (Beginner Guide)
Most beginner audio problems trace back to a single moment — the second you set your gain. Microphone gain is one of those foundational skills that separates amateur-sounding audio from recordings that actually hold up. When you get a plug-and-play mic, you may skip gain staging entirely. But a proper adjustment can help your audio sound better. That’s what we’ll cover in this guide, from the audio signs to setup in various scenarios.
What Is Microphone Gain?
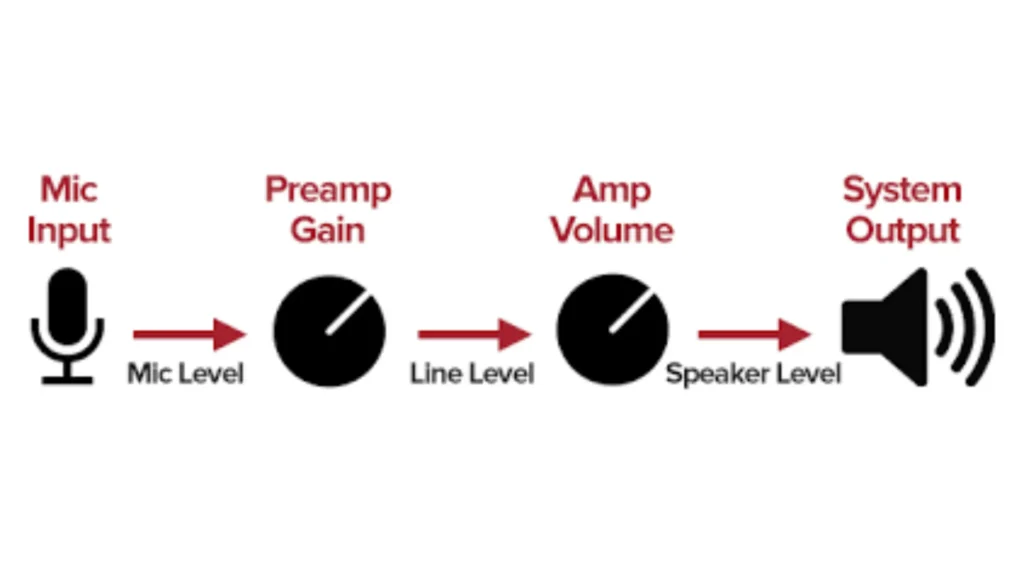
Gain is the amount of amplification applied to your microphone’s raw signal before it reaches your recording software. Microphones, especially dynamic mics, output a weak electrical signal on their own. That signal needs a boost from a preamp to reach line level, the strong, usable signal your software actually works with.
The preamp lives inside your audio interface (think Focusrite Scarlett or Universal Audio Apollo Twin) or inside your USB mic itself. Either way, the gain control is the dial that decides how aggressively the preamp amplifies your signal.
Without enough gain, your recording barely registers on the meter, and noise creeps in the moment you boost it. With too much gain, your signal slams the digital ceiling and clips. The goal is the middle ground. Strong enough to sit cleanly above the noise floor, restrained enough to leave headroom for unexpected peaks.
Microphone Gain vs. Volume: What’s the Difference?
Many users always get tossed about the microphone gain vs volume. They do different things at different points in your signal chain.
| Gain | Volume | |
|---|---|---|
| What it controls | Input signal strength (pre-recording) | Output signal strength (post-recording) |
| Where it acts | At the preamp, before the signal is recorded | At the fader, after the signal is captured |
| Effect on noise | Amplifies the mic signal and any preamp noise together | Raises or lowers everything already recorded |
| Effect on clipping | Too much gain causes irreversible digital clipping | Turning the volume up on a clean recording won’t clip the original |
| When to adjust | During setup, before you hit record | During mixing or playback |
| Analogy | How wide do you open the faucet | How big a glass do you pour into |
The key takeaway: gain shapes the recording itself, and volume just changes how loud you hear it afterward. Crank the volume on a clean track? No harm done. Crank gain past the limit during recording? You’ve damaged the file permanently.
Identify Your Microphone Gain
Before you start adjusting anything, it helps to recognize when your gain is off. Here are the telltale signs.
Signs Your Mic Gain Is Too Low
- You can barely see the waveform in your DAW after recording. The signal hardly registers on the track.
- Background hiss becomes obvious when you boost the recording to a usable level. You’re essentially turning up the noise floor alongside your voice.
- Your audio sounds thin or distant, even though you’re positioned close to the mic.
The Myth: Record quietly and plan to boost the lever later. It’s possibly technical, but we don’t recommend it. Every preamp has a baseline noise floor, a baseline level of electronic noise that’s always present. Recording too quietly puts your voice close to it. Boost the signal afterward, and you boost the noise right alongside.
Signs Your Mic Gain Is Too High
- Your meter constantly slams into the red (0 dB) while you’re speaking or performing at normal levels.
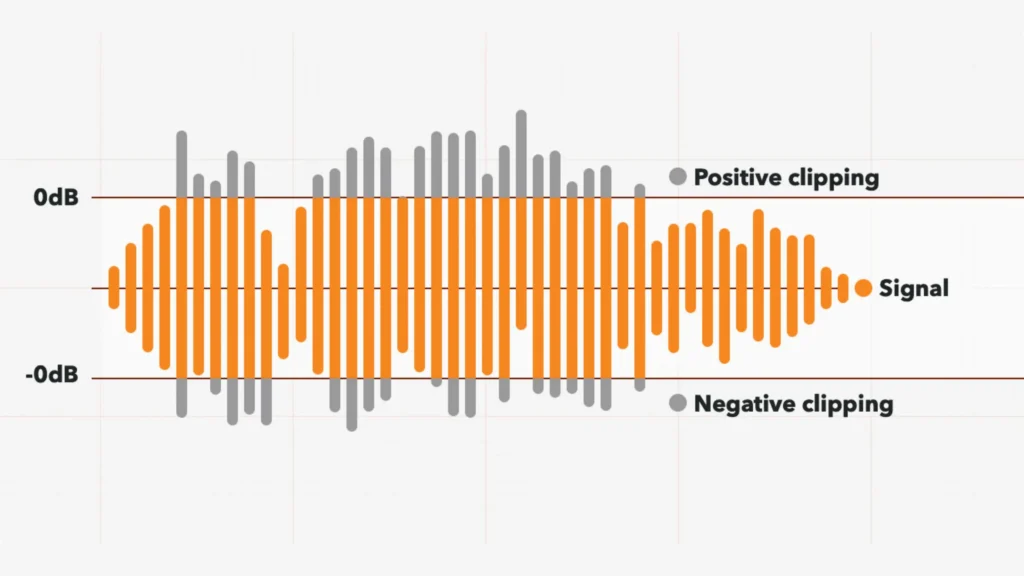
- The waveform looks “flat-topped” — squared off at the peaks instead of showing natural curves. That’s clipping.
- You hear crackling, crunching, or harsh distortion on playback.
The Real Problem: Clipping
Clipping happens when your input signal exceeds the maximum level your analog-to-digital converter can handle (0 dB full scale). The converter literally can’t represent anything above that ceiling, so it chops off, or “clips”, the top of your waveform.
When clipping exists, you’ll hear the harsh digital distortion. It’s totally different from the warm and musical saturation. Furthermore, a clipped recording can’t be fixed. No plugin and no amount of post-processing will restore the original waveform data that was lost.
That’s why a common rule for recording progress is: when in doubt, record slightly too quiet, never too loud. A quiet take has options. A clipped take has none.
How to Set Microphone Gain Properly
Step 1: Position Yourself at the Right Distance
Before you touch the gain knob, establish your distance from the mic. A good rule of thumb is about six inches from your mouth to the microphone capsule, roughly the span between your thumb and pinky finger.
The microphone placement directly affects how much signal reaches the mic. If you adjust gain before locking in your position, you’ll end up chasing your levels every time you shift in your seat.
One important note: if you need to get louder during a take, keep your six-inch distance and turn down the gain; don’t back away. Backing off introduces more room reflections and weakens the proximity effect.
Step 2: Set Your Target Level
Open your DAW or recording software and watch the input meter. Your target is an average peak level around -12 dB. This gives you a strong signal well above the noise floor while leaving plenty of headroom for louder moments.
This ideal range is your meter’s green levels climbing solidly into the mid-range without ever touching the red. If your DAW shows numerical peak values, aim for peaks around -12 dB during normal speech or performance.
Step 3: Perform Naturally — Don’t Just “Check, Check”
Here’s a mistake almost everyone makes: they set their gain while speaking quietly into the mic (“testing, one two, one two”) and then start the actual performance at a completely different energy level.
Run through your actual material at the energy level you’ll use during the take. If you’re a singer, hit the loud chorus. If you’re a streamer, react like you would during a clutch moment. The whole point is matching gain to reality, not to a polite mic check.
Step 4: Adjust the Preamp While Watching the Meter
With your source performing naturally, slowly turn up the preamp gain. You’re looking for:
- Average peaks landing near -12 dB
- Occasional louder peaks staying well below 0 dB
- No moments where the meter touches red
If the signal slams the top, back the gain off. If it barely registers, push it up. This is a feedback loop, not a one-shot calibration.
Step 5: Do a Test Recording and Listen Back
Hit record for 30 to 60 seconds of natural performance. Play it back. Listen for:
- Any moments of distortion or clipping
- Audible background hiss or noise
- Whether the overall level feels balanced and consistent
If something’s off, adjust the preamp and run another test.
Step 6: Keep an Eye on Levels During the Session
Gain isn’t a “set and forget” situation, especially with live performers. Energy levels shift. Singers get louder in the chorus. Podcast guests lean in or lean back. Keep one eye on your meter throughout the recording and don’t hesitate to make small adjustments between takes if needed.
How to Adjust Gain on Different Microphone Setups
USB Microphones
USB mics are designed for simplicity, and most handle gain in one of two ways:
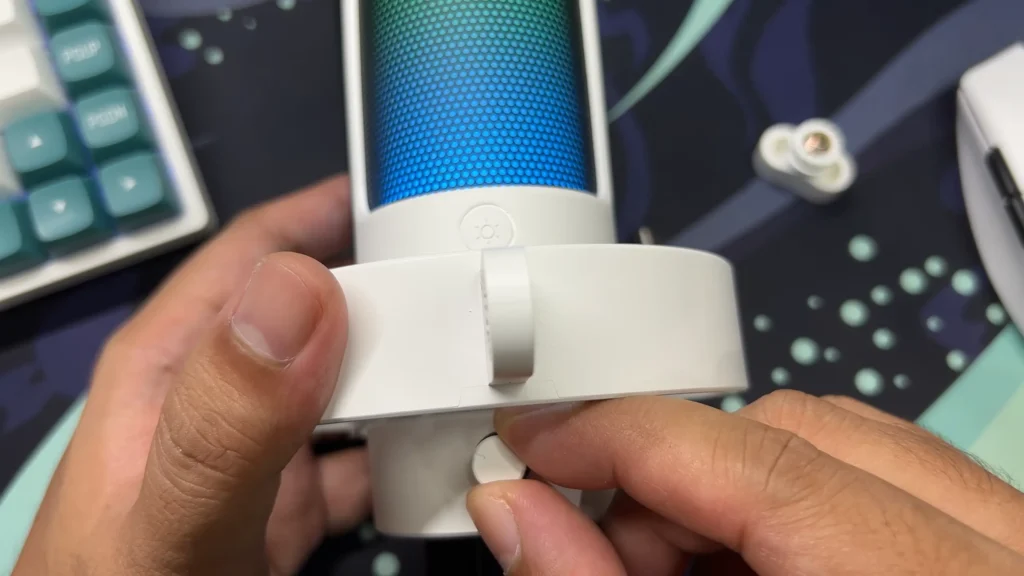
- Built-in gain knob: Many USB mics (like the FIFINE AmpliGame A8) have a physical gain dial right on the mic body. Turn it while monitoring your input meter in your recording software, following the same -12 dB target.
- OS-level input adjustment: If your USB mic doesn’t have a hardware gain control, head to your system sound settings. On Windows, go to Settings > System > Sound > Input, and adjust the input volume slider. On macOS, open System Settings > Sound > Input and move the input volume slider. These software controls function as your gain stage.
USB setups are beginner-friendly because the preamp and converter are built into the mic itself. For streaming, gaming, and casual podcasting, they get the job done.
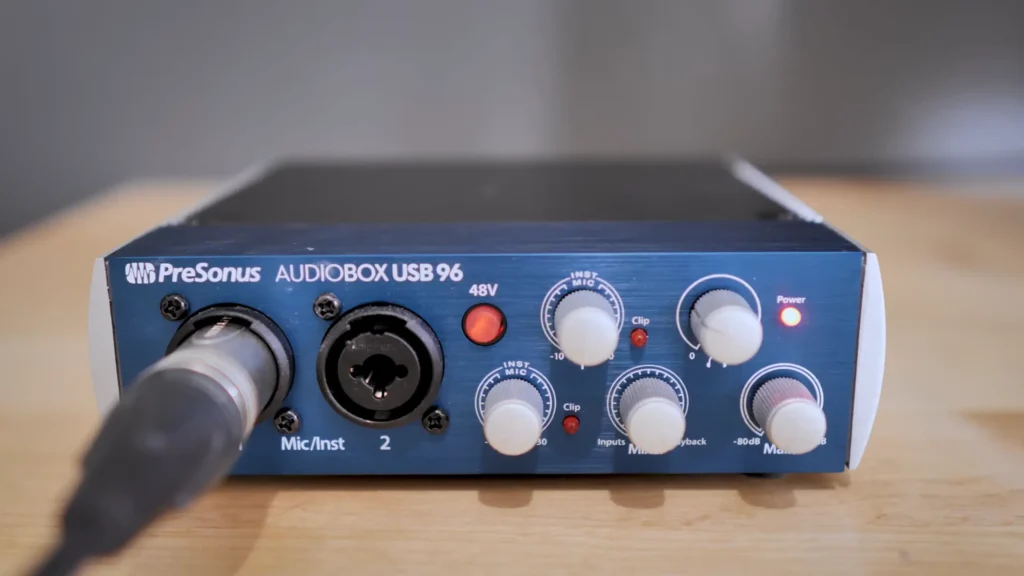
XLR Microphones + Audio Interfaces
XLR mics plug into an external audio interface, and the interface’s preamp handles gain duties. Here’s what to keep in mind:
- Dynamic mics need more gain. Mics like the Shure SM7B or FIFINE Tank1 have lower output levels by design. You’ll need to crank the preamp harder to hit your target level.
- Condenser mics are more sensitive. They produce a hotter signal out of the box, so you’ll typically set your interface gain lower, not overdrive them with loud sources.
- Watch for phantom power. Condenser mics require 48V phantom power, which you’ll need to enable on your interface. Dynamic mics don’t need it (and while it won’t damage most dynamics, it’s good practice to only enable it when needed).
With an XLR setup, you get finer gain control and generally cleaner preamps, which translates to better signal quality and more flexibility, especially for professional or semi-professional work.
Best Gain Settings for Different Uses
Different recording scenarios call for slightly different gain strategies. Here’s a practical reference:
| Use Case | Recommended Average Level | Key Considerations |
|---|---|---|
| Podcasting | -12 dB to -10 dB | Multiple speakers may need individual gain settings. Leave headroom for laughter and crosstalk. |
| Live Streaming | -12 dB to -8 dB | Streams run in real time with no second take. Set conservatively and test with your game audio or music playing simultaneously. |
| Gaming / Discord | -15 dB to -10 dB | You’ll likely get loud during intense moments. Keep extra headroom. Noise gates and suppression in your software can help with keyboard noise. |
| Singing / Vocals | -18 dB to -12 dB | Vocal dynamic range is huge. Set gain during the loudest part of the song, not the quiet verse. Extra headroom is critical. |
| Voiceover / Narration | -12 dB | Voiceover is usually consistent in volume. The -12 dB target works almost perfectly out of the box. Maintain a steady six-inch distance. |
A few universal tips that apply across the board:
- Record at 24-bit depth. The bit depth matters. 24-bit CD quality has 256 times more resolution than 16-bit CD quality. Even moderate-level recordings retain excellent fidelity.
- Err on the quiet side. A slightly quiet recording is an easy fix. A clipped recording is not.
- Monitor with headphones. Your speakers may not reveal subtle noise or distortion that closed-back headphones will catch immediately.
Conclusion
Setting the microphone gain isn’t complicated, but it does ask for intentionality. Get into position, perform at real-world volume, watch your meter, aim for around -12 dB on average, and never let the signal touch red. That’s the entire workflow.
Take five minutes before your next session to actually dial in your levels instead of eyeballing them. The version of you doing the editing later will thank you.
FAQs
What dB should my mic gain be at?
Aim for an average peak level of around -12 dB on your input meter. This gives you a strong, clean signal with enough headroom to handle sudden loud moments without clipping.
Can I fix gain issues after recording?
You can boost a quiet recording to some extent, but you’ll also amplify any background noise baked into the signal. Clipping from a gain set too high, on the other hand, cannot be repaired — that audio data is permanently lost.
Why does my mic sound noisy even with the gain set correctly?
Try reducing gain slightly, moving away from noise sources, and making sure your recording environment is treated for sound.
Should I record at 16-bit or 24-bit?
Always record at 24-bit if your interface supports it. 24-bit recording offers vastly more dynamic range and resolution, which means you don’t need to push your levels as hot to capture high-quality audio.
Is it better to record too quiet or too loud?
Too quiet, every time. A soft recording can be brought up during mixing with manageable noise tradeoffs. A recording that clips at 0 dB is permanently distorted, and there’s no getting that waveform back.