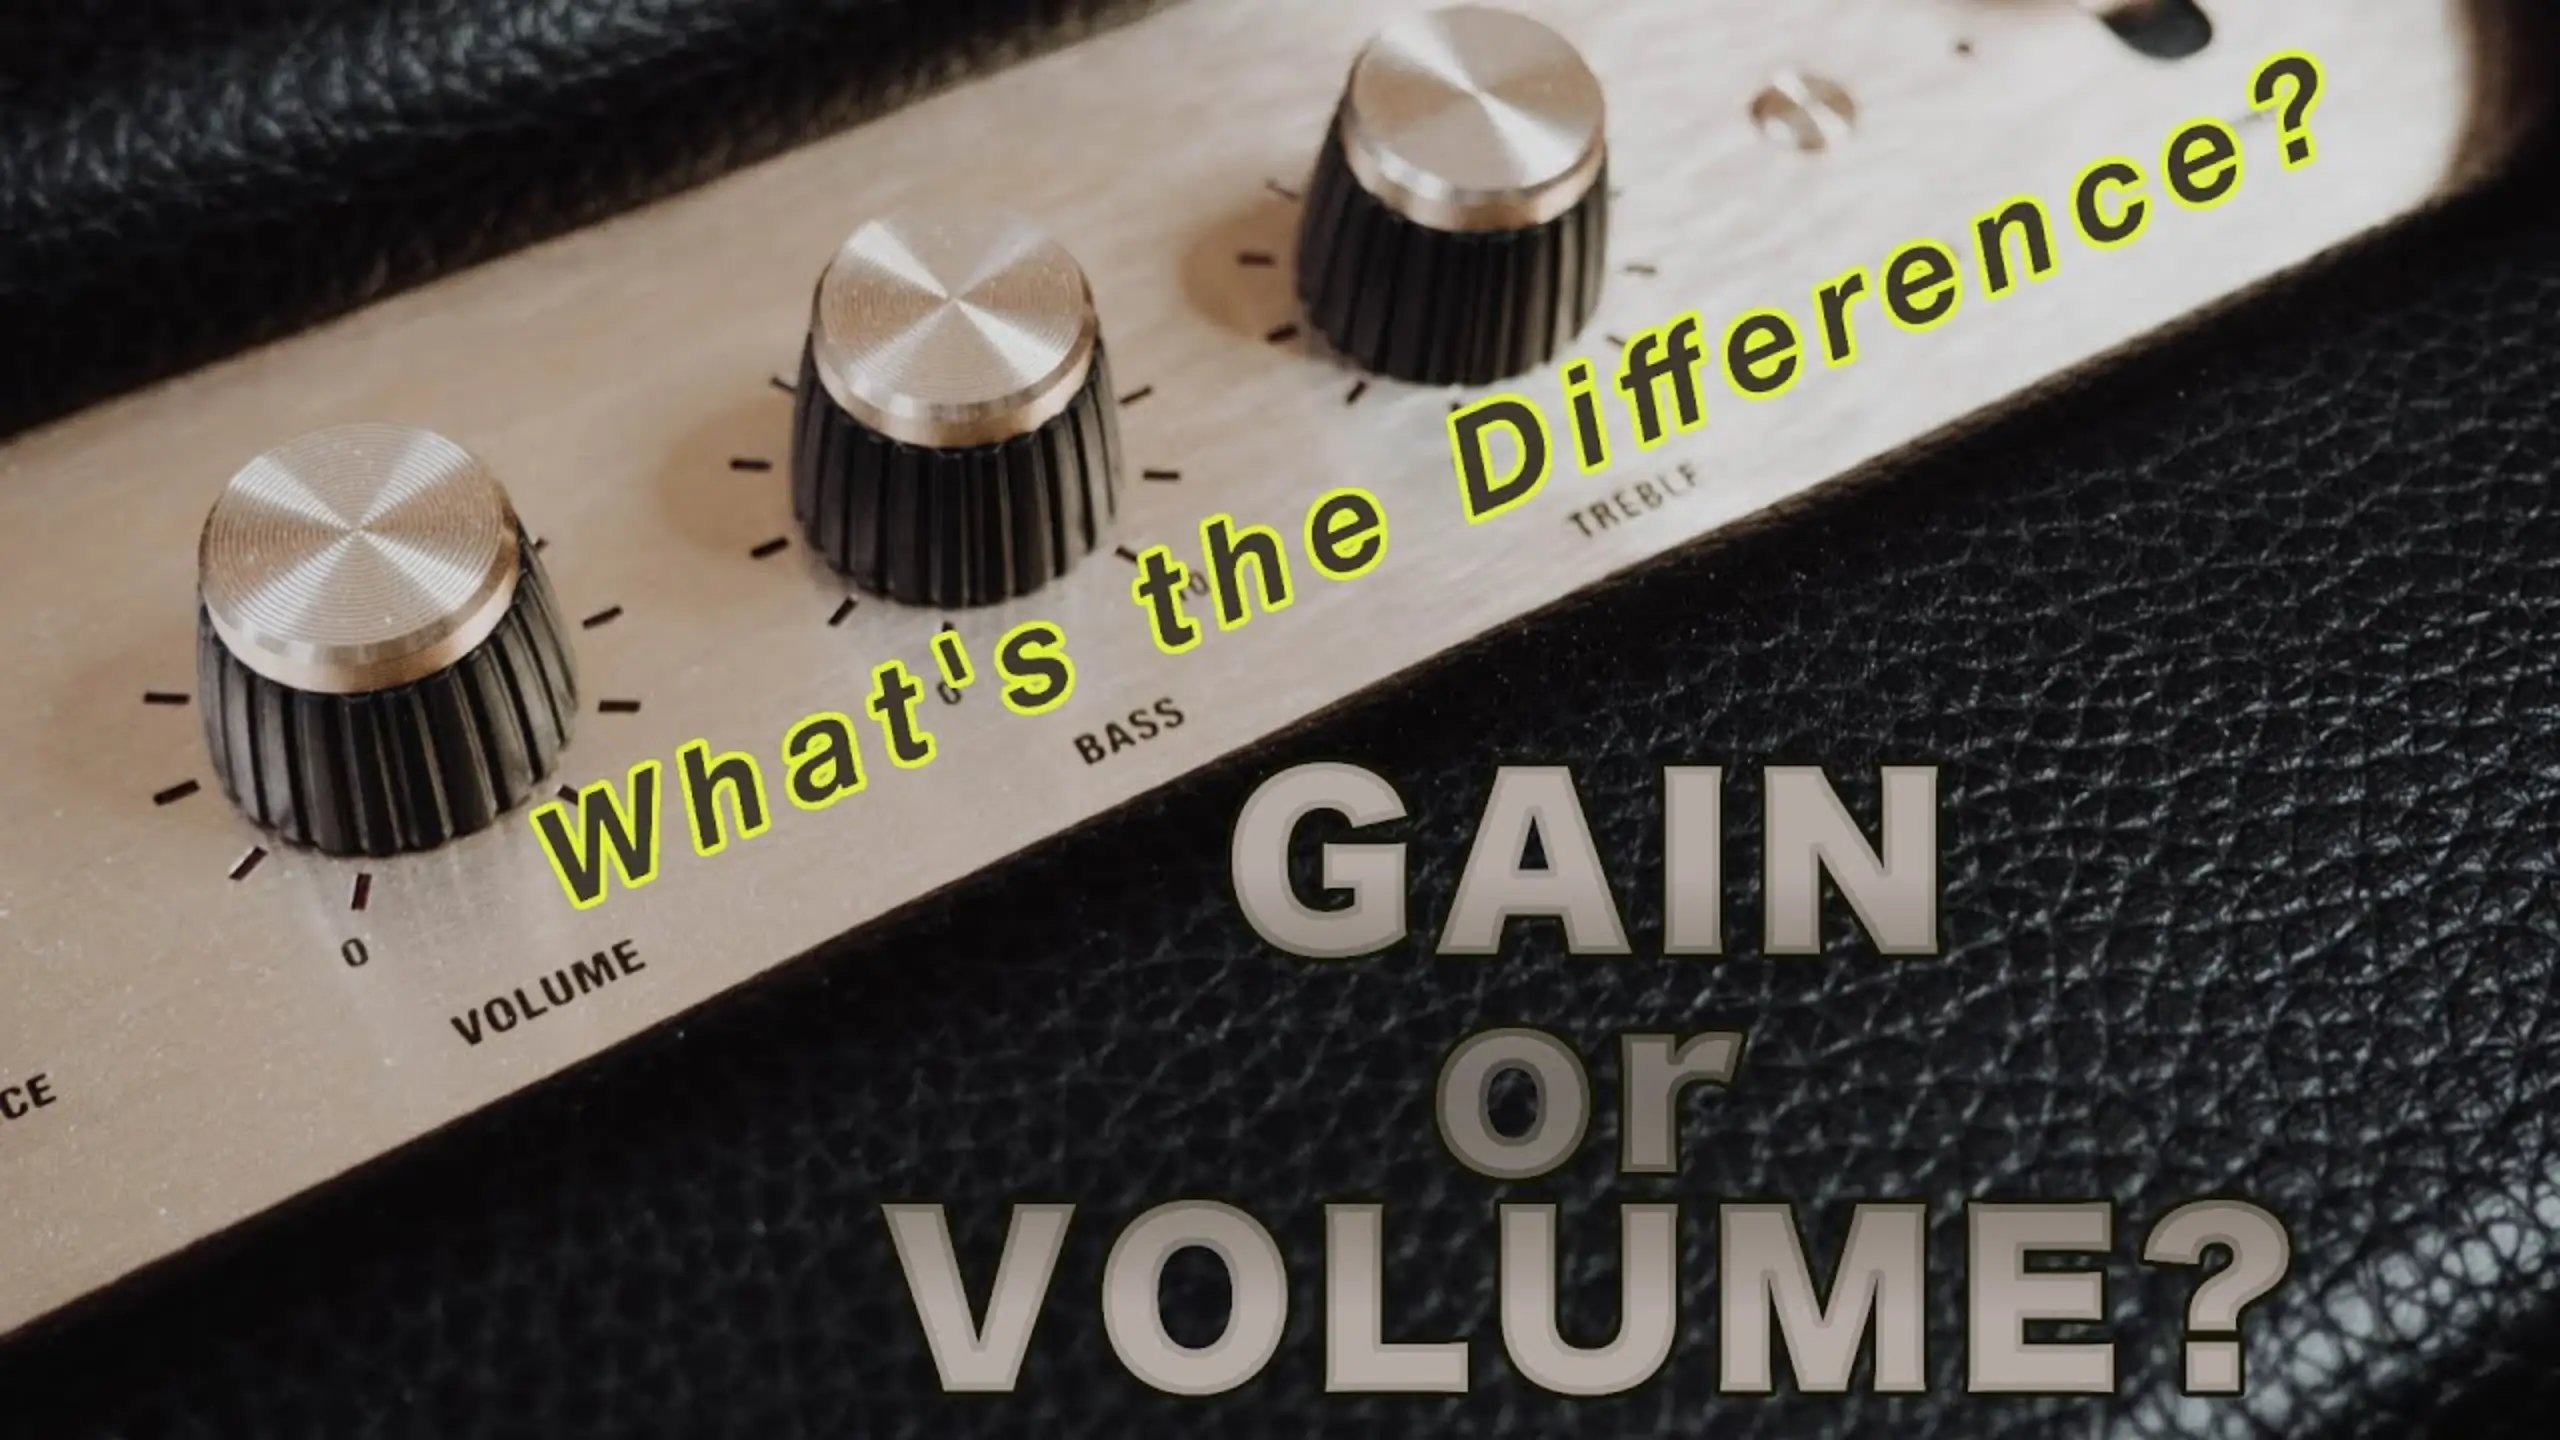
Microphone Gain vs. Volume: What You Should Know in 2026
Here’s why gain and volume trip people up: both of them make things louder. But actually, they aren’t doing the same job. Gain sets the foundation of your entire audio signal. Volume just decides how much of that signal reaches your ears.
Microphone gain vs. volume? Here, we’ll break down exactly what they are, what the differences are, and how to set each one properly, whether you’re recording vocals or mixing a full band.
Quick Check on Microphone Gain vs Volume
| Dimension | Gain | Volume |
|---|---|---|
| Definition | The amount of signal amplification at the input stage, before processing | The level of the output signal sent to speakers or headphones |
| Core Characteristics | Controls input sensitivity, affects tone and signal quality | Controls loudness of the final output without altering tone |
| Best Used For | Preamp knobs on mixers, audio interfaces, and microphone preamps | Adjusting how loud the final mix sounds to the listener |
| Common Applications | Preamp knobs on mixers, audio interfaces, microphone preamps | Master faders, monitor knobs, speaker volume controls |
What Is Gain?
Gain is the input level of your audio signal. It controls how much your mic or instrument’s signal gets amplified before it hits the processing stage of your device.
Every mic and instrument outputs a different signal strength. A sensitive mic like the Rode NTG3 pumps out a stronger signal than a dynamic mic that needs 15 dB more gain just to hit the same level. Gain is what lets you compensate for those differences and bring every source to a consistent, workable level inside your device.
What Gain Does to Your Sound
Gain doesn’t just make things louder; it can change your tone. In a tube amp, pushing more gain into the preamp stage drives the tubes harder and introduces harmonic distortion. That’s exactly how guitarists get that overdriven crunch. For vocals and clean recordings, though, too much gain means clipping, distortion, and a signal you can’t fix in post.
Pros of Proper Gain Setting
- Better signal-to-noise ratio. The correct gain means your actual audio (voice, instrument) is much louder than the background noise, leading to a cleaner recording with less hiss.
- More headroom. A well-set gain level leaves room for louder moments, like a singer belting a chorus or a guitarist hitting a big chord, without clipping.
- Cleaner processing downstream. EQ, compression, and effects all work better when they receive a properly gained signal.
Cons of Getting Gain Wrong
- Too high: Clipping, distortion, and potential feedback loops. Once your signal clips at the input stage, no amount of mixing fixes it.
- Too low: A weak signal that forces you to boost volume later, which amplifies all the background noise right along with it. You end up with a hissy, thin recording.
What Is Volume?
Volume is the output level, the amount of sound that reaches your speakers, headphones, or monitors after all the processing and mixing has happened. The simplest analogy: it’s the knob on your car stereo. Volume just makes the whole thing louder or quieter. It doesn’t change the mix, the tone, or the balance between instruments.
Where Volume Shows
- On a mixing console, the master fader is your volume control.
- On an amp, it’s the knob that drives the power amplifier section and pushes sound to the speaker.
- On your audio interface, it’s the monitor or headphone knob.
What Volume Does to Your Sound
Unlike gain, it doesn’t color your tone in any meaningful way. It just scales the loudness of whatever signal has already been shaped by gain, EQ, compression, and effects.
That said, pushing volume to extremes on powered speakers or amps can introduce its own distortion, because you’re asking the hardware to deliver more power than it can handle cleanly.
Pros of Proper Volume Setting
- Comfortable listening levels. You can tailor loudness to your room, your audience, or your monitoring needs without touching your carefully set gain structure.
- Preserves your mix. Adjusting volume doesn’t change the balance between channels or the quality of your input signal.
Cons of Getting Volume Wrong
- Too high: Speaker distortion, hearing fatigue, and potential hardware damage over time.
- Too low: You can’t hear details in your mix, which leads to poor mixing decisions — especially when monitoring during a recording session.
Microphone Gain vs Volume: Differences Exploration
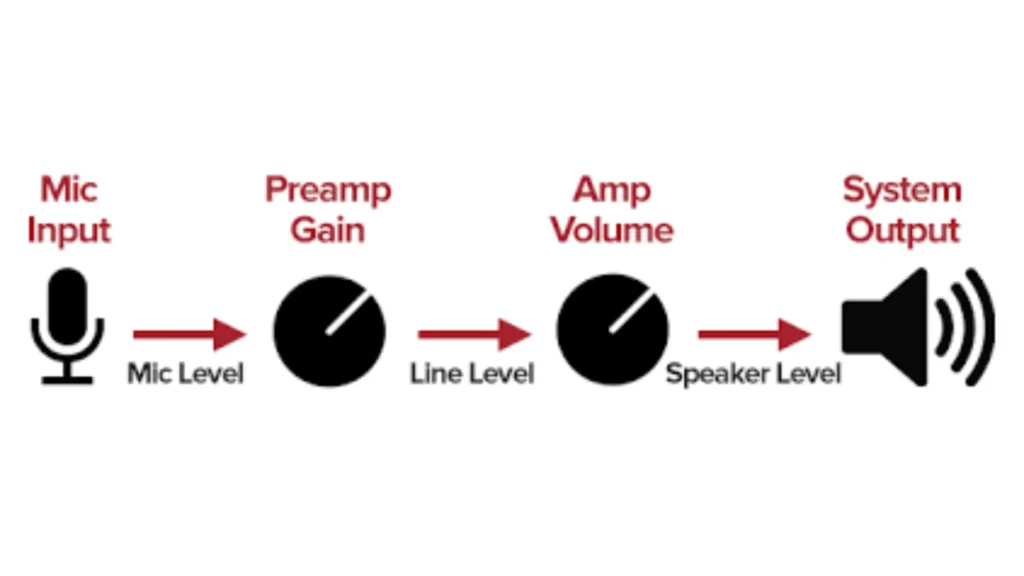
1. Where They Sit in the Signal Chain
Gain lives at the very beginning. It’s the first thing that happens to your audio signal when it enters your device. On a mixer, the gain or trim knob sits at the top of each channel strip for exactly this reason. It’s step one.
Volume lives at the end. It controls what goes out to speakers, monitors, or a recording bus after the signal has passed through EQ, effects, and dynamics processing.
Verdict: If you’re troubleshooting a weak or distorted signal, check the gain first. If the mix sounds fine but the room is too loud or too quiet, adjust volume.
2. How They Affect Tone
Gain can change your tone. Driving a preamp harder introduces saturation and harmonic character — desirable on a guitar amp, not so much on a podcast mic. Volume, for the most part, just scales loudness without coloring the sound.
Verdict: For tone shaping, gain is your tool. For loudness adjustments that leave your sound untouched, use volume.
3. Their Relationship to Background Noise
This is where the biggest misconception lives. Many people believe that lowering gain reduces background noise. It doesn’t, at least not the way they think. Gain amplifies everything proportionally: your voice, the air conditioner, the dog barking down the hall. Lowering the gain reduces all of it equally. The ratio between your desired signal and the unwanted noise stays the same.
The real way to reduce background noise relative to your voice is to get closer to the mic and use proper recording technique. A strong signal at the source means you need less gain, which means the noise floor stays low relative to your voice.
Verdict: Don’t rely on gain adjustments to “fix” a noisy room. Fix your mic technique and acoustic environment instead, then set the gain to capture a strong, clean signal.
4. Common Misconceptions
Does turning up the gain make your microphone more sensitive?
No. Sensitivity is a fixed physical property of the microphone. It’s determined by the diaphragm and internal electronics at the factory. It never changes (and actually decreases slightly over time as dust and moisture accumulate on the diaphragm). Gain amplifies the signal after it leaves the mic, not changes how the mic captures sound.
Do you always keep the gain super low during recording and then boost the level in post-production (“less gain = less noise, right?”)?
It looks logical, but actually counterproductive. You end up with a tiny signal buried in noise, and when you boost it later, all that noise comes right up with it. You also lose headroom and dynamic range.
Verdict: Gain amplifies. Sensitivity captures. They’re different processes entirely. And “fix it in post” is rarely the answer for a poorly gained signal.
How to Set Your Microphone Gain
Getting gain right is all about finding the sweet spot — enough signal to work with, but not so much that you clip.
- Step 1: Position your mic correctly. For vocals, keep the mic about 1–2 inches from your mouth. This maximizes the signal your mic picks up and minimizes background noise before gain even enters the picture.
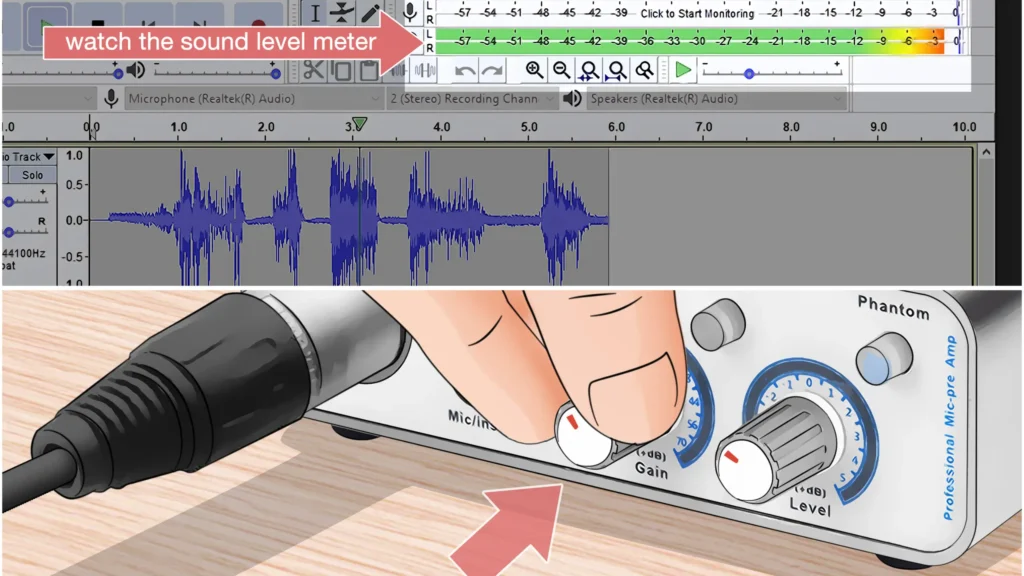
- Step 2: Start with a gain of zero. Don’t crank anything before you have a signal running through the system.
- Step 3: Speak or play at your normal performance level. Watch your input meters while you do this.
- Step 4: Bring the gain up gradually. On a digital console, hit the level between -18 dB and -12 dB on your input meters. On an analog console, target -12 dB to -8 dB. A general rule of thumb for simpler setups is around 50–60% of the gain knob’s range.
- Step 5: Leave headroom. Once you hit your target level, back off just slightly. This gives you room for louder moments without clipping.
- Step 6: Enable a low-cut filter if available. Most vocals don’t produce useful content below 80–200 Hz, so rolling off those low frequencies keeps rumble and handling noise out of your signal from the start.

How to Set Your Microphone Volume
- Step 1: Start with your master fader or volume knob at zero.
- Step 2: Bring it up slowly until the output level is comfortable for your monitoring environment.
- Step 3: Listen for distortion or strain. If you hear the speakers struggling, you’re pushing too hard. Back off.
- Step 4: Check individual channel faders. If one channel needs to be significantly louder than the others, resist the urge to just push the master up. Check whether that channel’s gain is set properly first.
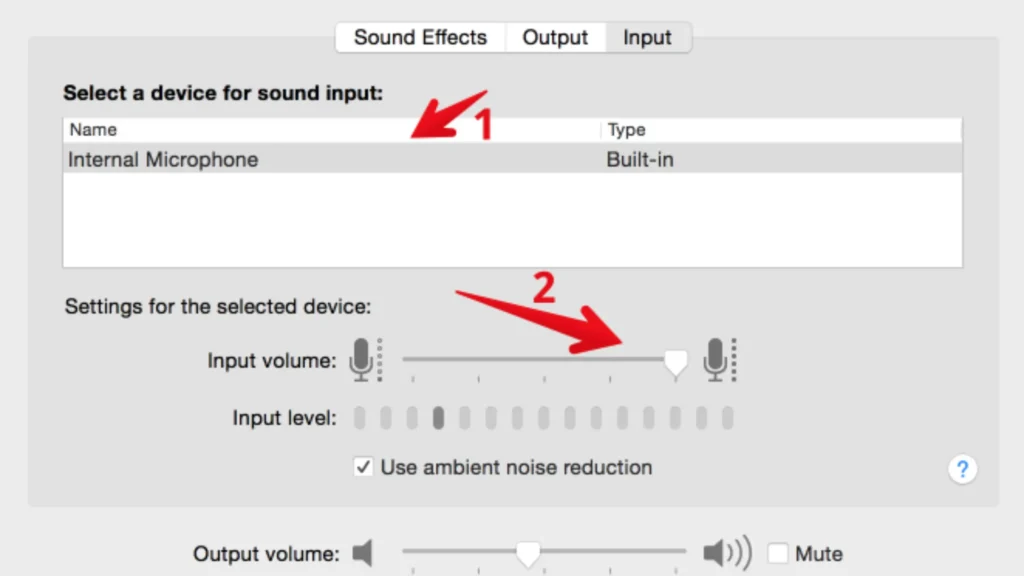
The Key Principle: Your master fader should sit near unity (0 dB) during mixing, with individual channel faders doing the balancing work. If you find yourself maxing out the master fader to get enough volume, that’s a sign your gain structure needs attention upstream.
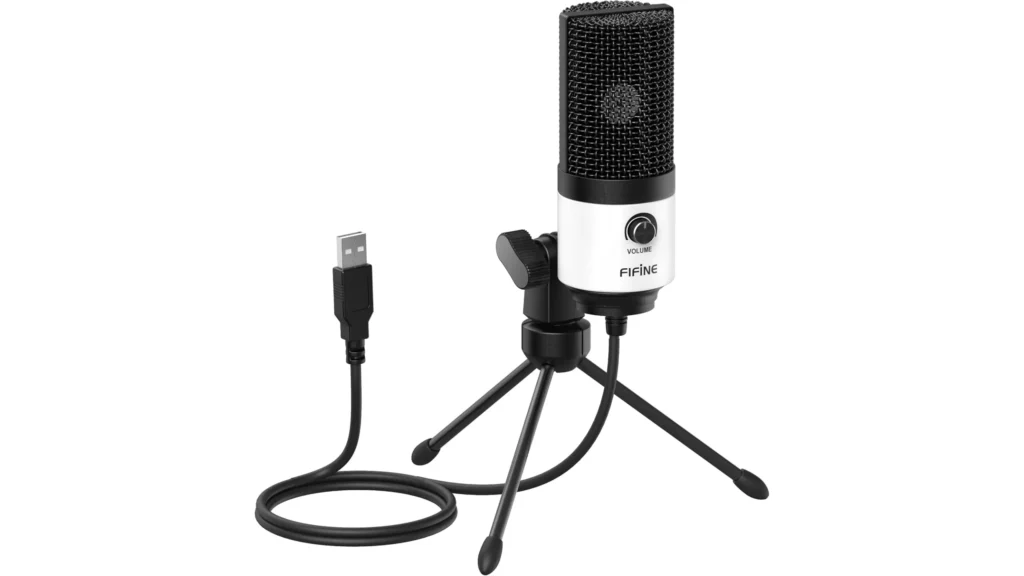
Why USB Microphones Feature a Single Knob
If you’ve used a USB microphone — like the FIFINE K688 or AM8 — you’ve probably noticed there’s only one control on the body: a volume knob. No separate gain dial. No master fader. That’s because a FIFINE USB microphone features a built-in audio interface, so the preamp and output stages are packed inside one device.
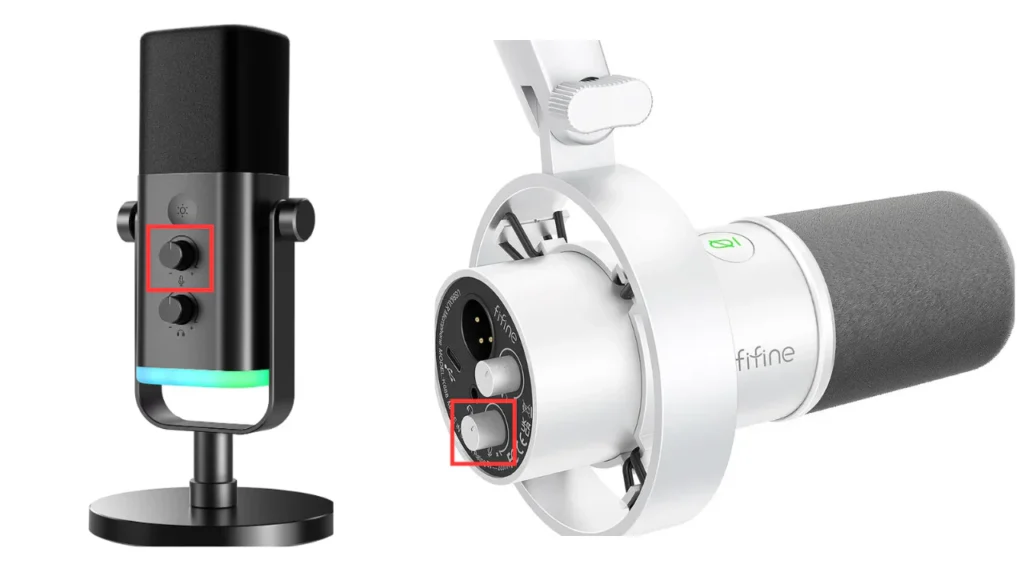
That single knob controls how strong the signal is when it reaches your recording software. Functionally, it acts more like a gain control. It sets the input level your DAW receives. The actual “volume” (how loud you hear things) gets handled by your computer’s system settings or your software’s output slider.
To set it right, start around 50%, speak at your normal level, and watch the meters in your recording software. Aim for peaks between -18 dB and -12 dB, just like any other gain setting. If you need to hear yourself louder while recording, adjust your monitoring volume.
Final Words on Microphone Gain vs Volume
Gain shapes the raw input signal entering your device, affects tone, and determines your signal-to-noise ratio. Volume controls the final output level without altering the character of your sound.
Usually, focus on nailing your gain first when you’re recording, and leave your volume for comfortable monitoring. The gain shapes your tone, while volume is how loud that tone sounds. Get the order right, gain first, volume second, and everything downstream falls into place.
FAQ
Does turning up the gain make my microphone more sensitive?
No. Microphone sensitivity is a fixed physical property determined by the diaphragm and internal electronics. It doesn’t change based on your gain settings. Gain amplifies the signal after it leaves the microphone. It doesn’t change how the microphone captures sound in the first place.
Should I keep the gain low and boost the signal in post-production?
No. Recording with very low gain gives you a weak signal with poor headroom. When you boost it later, all the background noise comes up with it, leaving you with a hissy recording. The correct gain will help capture a strong, clean signal from the start.
What’s the ideal gain level for recording vocals?
On a digital system, aim for input levels peaking between -18 dB and -12 dB. On analog gear, target -12 dB to -8 dB. The goal is a signal strong enough to give you a healthy signal-to-noise ratio while leaving enough headroom for louder moments like vocal peaks.
Can I use gain and volume interchangeably?
No. They operate at different points in your signal chain and serve different purposes. Gain adjusts the input level and can affect tone and signal quality. Volume adjusts the output level and primarily controls loudness. Using one to compensate for the other leads to problems like distortion, feedback, or noisy recordings.
Why is there so much background noise even with the low gain?
Because gain amplifies everything proportionally, your voice and the background noise rise and fall together. The key to reducing background noise is improving your signal-to-noise ratio by getting closer to the microphone and using proper recording technique.