Best Lighting Setup for Streaming: A Beginner to Advanced Guide
Here’s a truth that saves you money: lighting matters more than your camera. Proper diffusion and placement can make budget webcams look like mirrorless camera footage.
The best lighting setup for streaming? You’ll learn how to use the affordable lights to level up your streaming scene. No complex steps. Just one adjustable LED panel or softbox light, a stand or desk clamp, and a camera with manual exposure controls.
Head-to-Head: The Three Core Lights
| Light | Role | Position | Priority | Budget Range |
| Key Light | Lights your face; the primary light source in any setup | 45° angle, slightly above eye level, arm’s length away | Essential (start here) | $50–$400+ |
| Edge/Rim Light | Separates you from the background with a subtle halo on your hair and shoulders | Behind you, opposite side of the key light, just out of frame | Highly recommended | $20–$130 |
| Background/Room Light | Fills in the dark space behind you, adds color and visual interest | Behind you, aimed at the wall or backdrop | Recommended | $15–$60 |
Quick rule of thumb: If you can only afford one light, get a key light. If you can add a second, go for an edge light. The background light is the cherry on top.
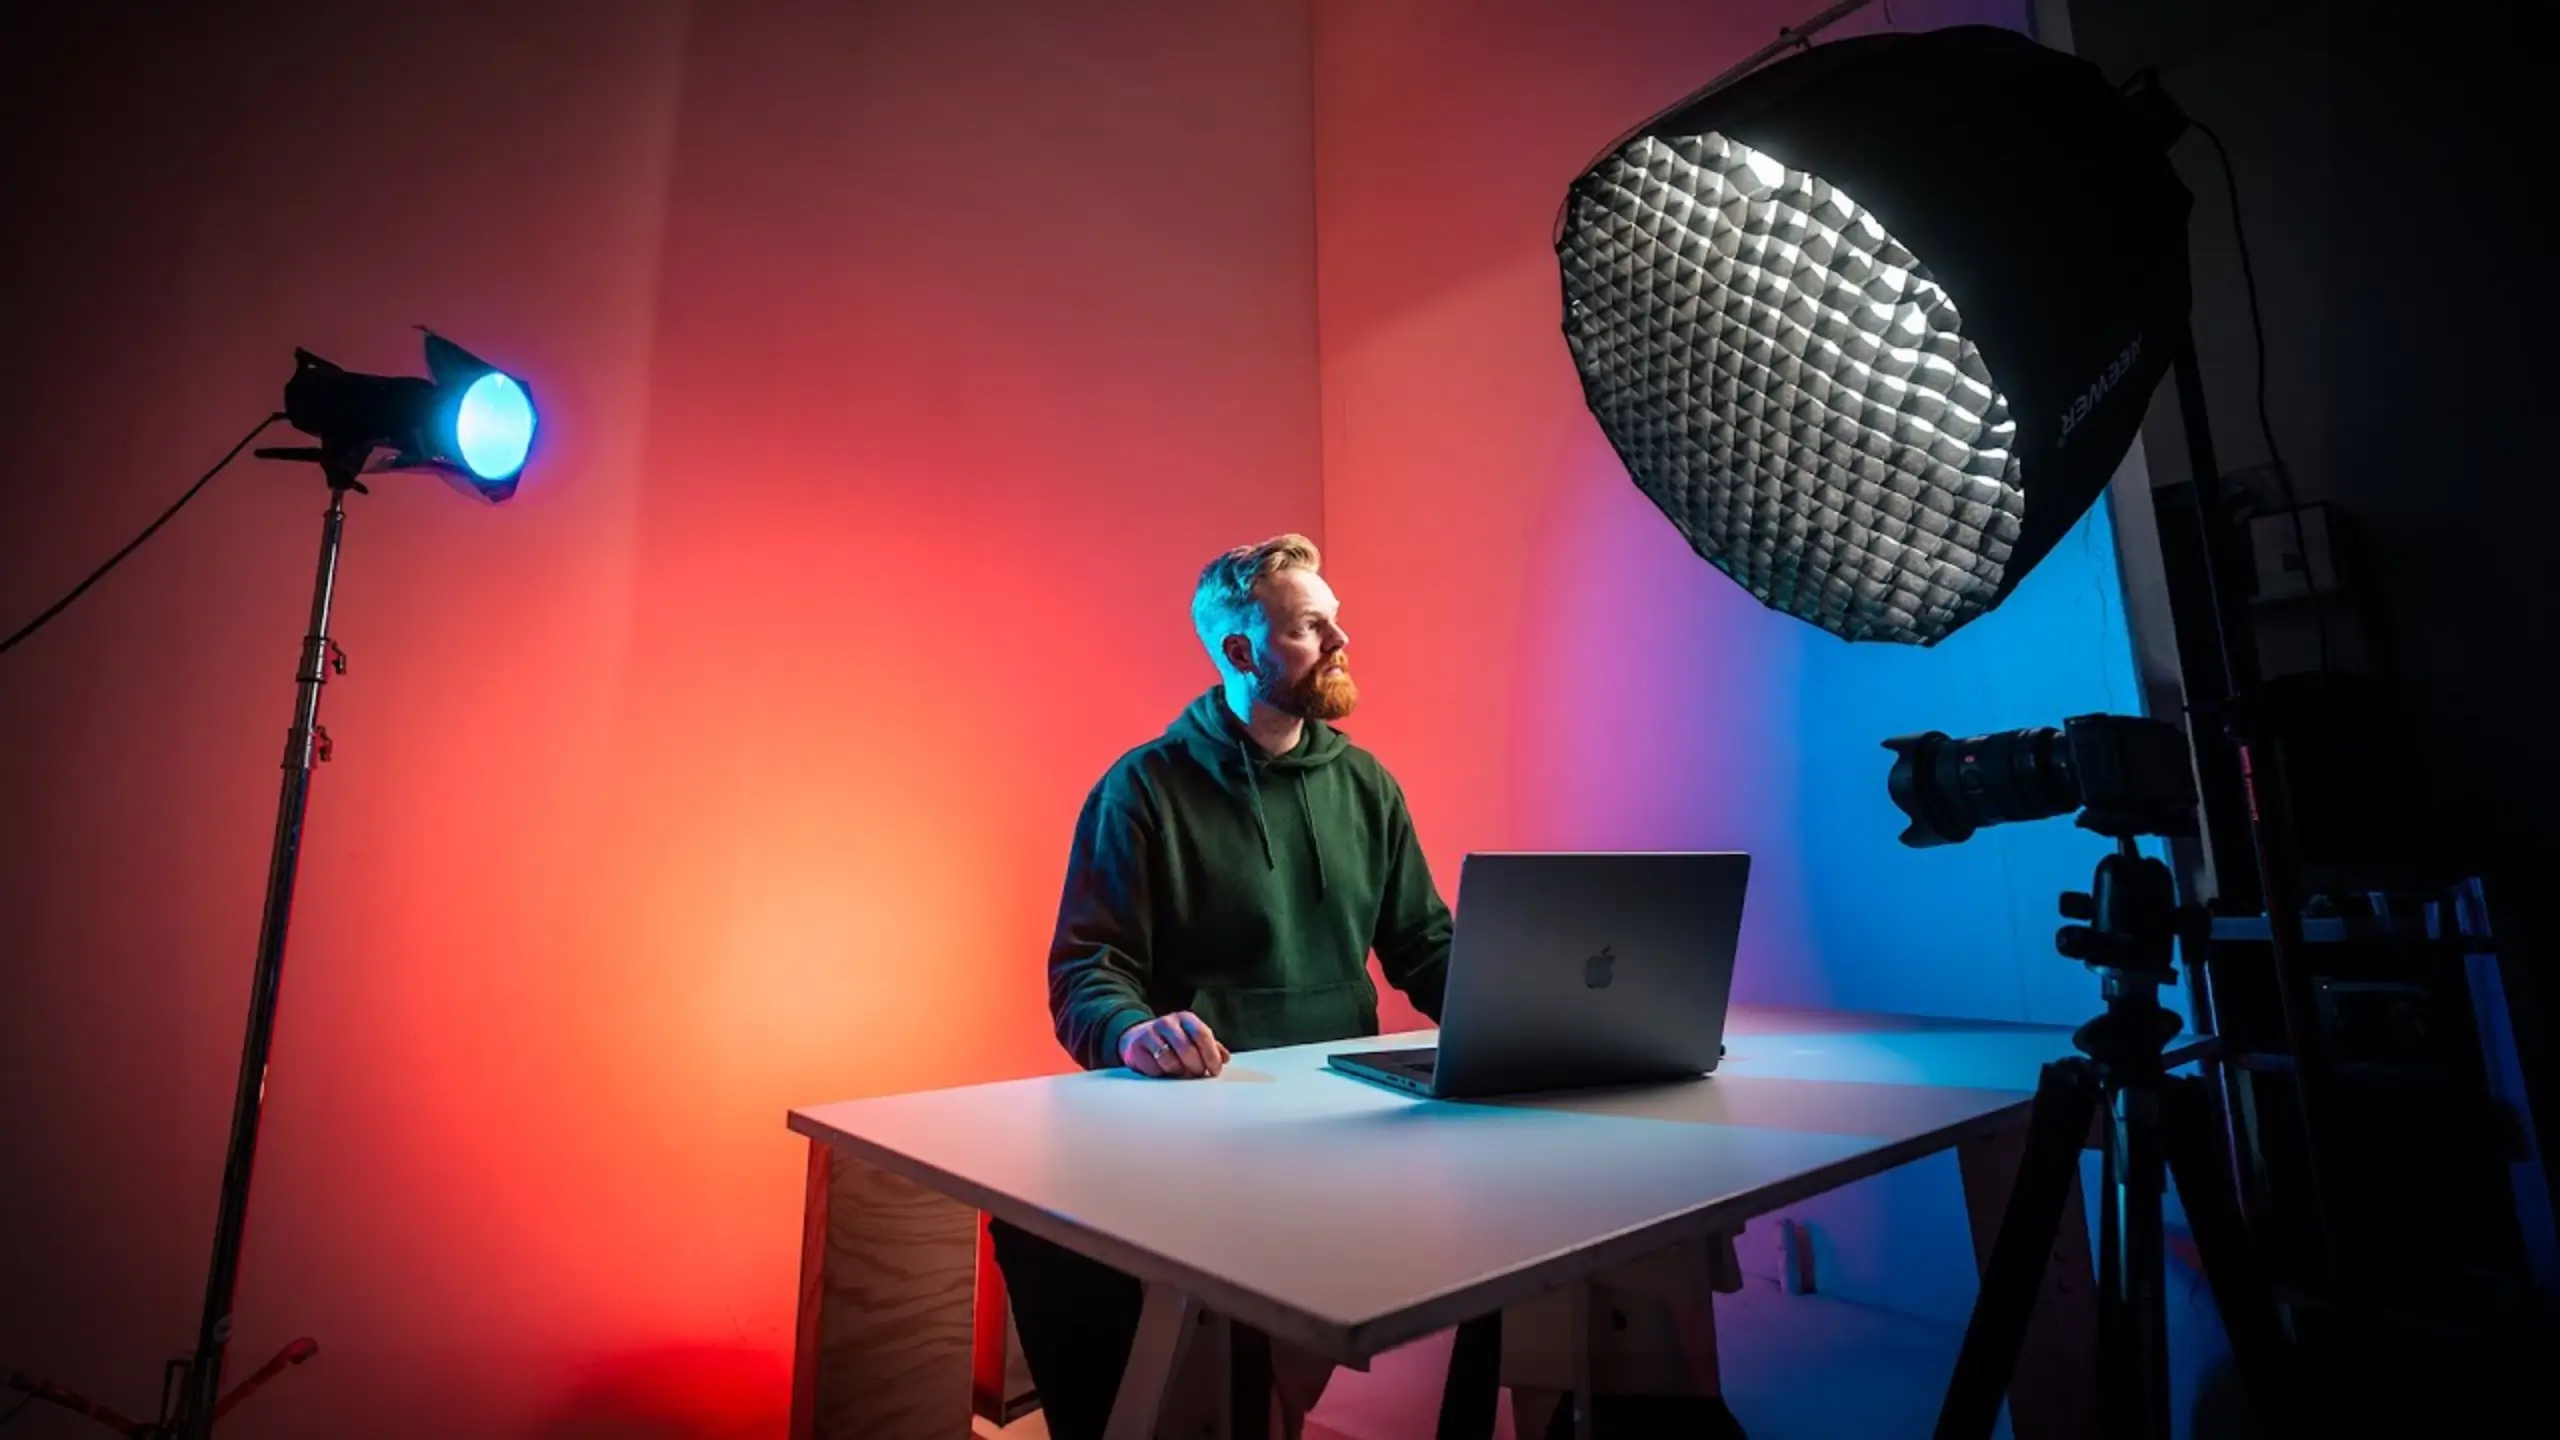
Tip 1: Nail Your Key Light — It Does 80% of the Work
The key light is the single biggest factor in how you look on camera. Get this one right, and you’re already ahead of most creators. Get it wrong — too harsh, too far away, wrong angle — and no amount of editing will save the shot.
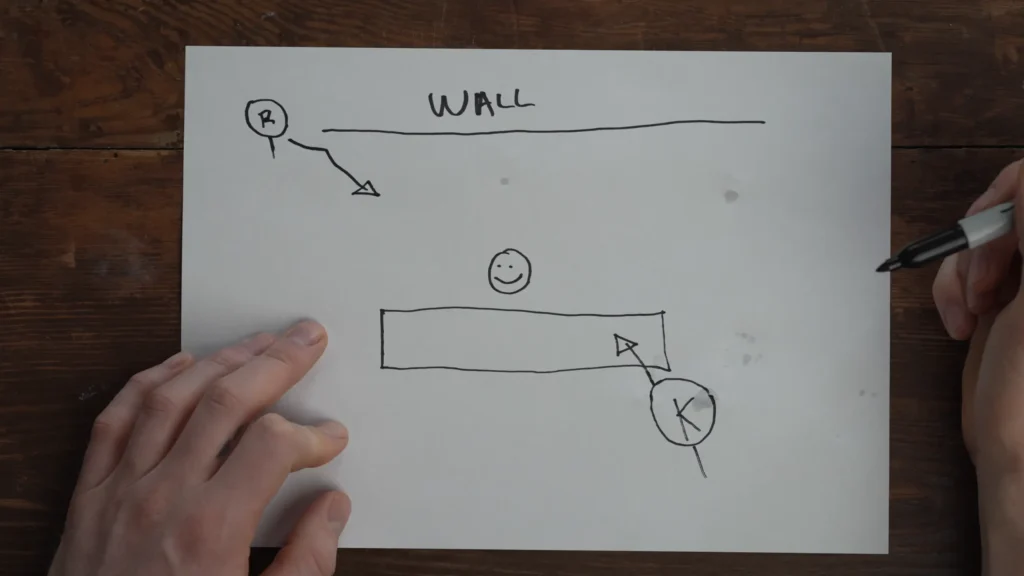
Place your key light at roughly a 45-degree angle from your face, slightly above eye level, and as close to you as possible. @thaticelandicguy puts it that “It creates a really nice shadow on my face, making more contrast.” Also, the closer the light, the larger it appears relative to your face. You’ll get a softer, more flattering result.

Position it between 10 and 11 o’clock if you imagine yourself at the center of a clock face with 12 o’clock being your camera. This creates natural shadows that add dimension without looking overly dramatic.
Pro tips
- Diffuse matters a lot! Attach a softbox or silicone diffuser to your LED panel. A honeycomb grid on top helps direct light toward you and prevents spill onto your background.
- The wall-bounce hack: Turn your light around and bounce it off a white wall behind it. Just note: reflected light picks up your wall color, so green walls mean green skin tones.
- Start at low intensity. Run your key light at 15–20% brightness and adjust your camera settings to match. Running lights too hot will create hard lines on your face
Tip 2: Add an Edge Light for Background Separation
Without an edge light, your outline blends into whatever’s behind you. This creates a “floating head” effect.
An edge light (also called a rim light or hair light) puts a subtle halo along your shoulders, hair, and the side of your head. You might not notice it when it’s on. But “it ends up just helping me to stand out for my background”, as @Nightowl said, “If you’re like me and you’re in a moody studio for someone, that’s in a bright.”

Position a second light behind you, on the opposite side from your key light, just out of frame. Raise it high so the fixture doesn’t appear in your shot. Aim it at the back of your head and shoulders so it clips your outline. On the clock model, this light sits at roughly 4 or 5 o’clock.
Pro tips
- Play with color temperature. Set your edge light a little warmer (more orange/tungsten) than your daylight key light. This color contrast adds visual interest without looking unnatural.
- Use a flag or cardboard blocker on the side of your rim light facing the wall to prevent spill onto your background.
- RGB tube lights work great here. A small LED tube or RGB flood light gets the job done — placement matters more than price.
Tip 3: Light Your Background (Without Overpowering Yourself)
Background is important. But having a distracting background is kind of the art.
A completely dark background causes two problems. First, you look like a floating head in a void. Second, cameras introduce grain and noise in very dark areas, making footage look cheap.
It doesn’t work well if your background is too light. @Senpai puts it, “A lot of people who don’t like lights on their face. It ends up making them shadowed while their background is very lit. Your brain is drawn away from the subject, and it looks a little weird.”
How to do:
Place a third light behind you, aimed at the wall or backdrop. This can be an RGB light set to a brand color, a desk lamp, or a cheap LED flood light. Set it dimmer than your key light. You should always be the brightest element in the frame.

Pro tips
- Use color strategically. Complementary colors create a cinematic contrast that makes your setup look intentional. Eg, If your rim light is blue, try orange for the background.
- Practical lights count. A visible lamp, LED strip, or neon sign in your background adds life and personality without requiring a dedicated fixture.
- Hide your fixtures. Tuck RGB tubes behind your monitor, desk, or a shelf so the glow is visible, but the source isn’t.
Tip 4: Expose Your Image Correctly
You can own the best lights in the world, but wrong camera exposure ruins everything. Proper exposure ensures your face looks natural, your background has detail, and nothing is blown out or lost in shadow.
Expose for your background first. Turn off your key light and adjust your camera’s exposure until background lights look correct — bright enough to see detail, but not glowing white. Then turn your key light on and raise its intensity until your face is properly lit. Your face should be the brightest part of the frame.
Pro tips
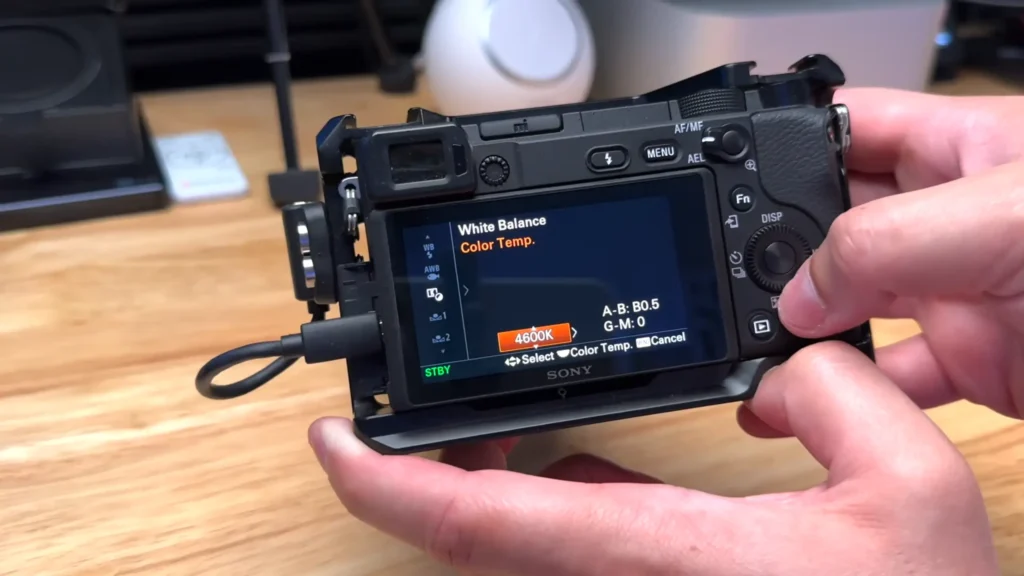
- Match the color temperature across all lights. Set every light to the same Kelvin value (around 4400K is a solid starting point) and manually white balance your camera to match.
- Avoid auto white balance. Manual white balance prevents your camera from readjusting and creating color shifts mid-stream.
- Watch for glasses reflections. Raise your key light above eye level and angle it downward at 45 degrees to push reflections out of your lenses.
Lighting by Scene: Setups for Various Streaming Scenarios
Not every stream calls for the same lighting. Here’s how to adapt the core principles to specific use cases.
Gaming Streams
Your key challenge: you don’t want a bright light blasting your face while you’re staring at a monitor for hours.
- Use short lighting. Place your key light at 3 or 4 o’clock to light the side of your face turned away from the camera.
- Add a colored edge light behind you for separation, and let your monitor’s glow fill in the rest.
- Keep overall brightness modest so your eyes stay comfortable during marathon sessions.
Talking Head / YouTube Videos
This is where the classic key-plus-edge setup shines. The key is to make your viewer focus entirely on you and what you’re saying.
- Key light at 10–11 o’clock for flattering facial shadows.
- edge light at 4–5 o’clock for background separation.
- Add a single colored background light for a simple backdrop.
IRL / Product Demos
When you’re showing products or moving around, you need broader, more even coverage.
- Move your key light closer to 12 o’clock (just above the camera) for even illumination across your hands and the items you’re holding.
- Add a butterfly lighting setup: the overhead angle reduces harsh side shadows on products while still keeping your face well-lit.
- Add a second light behind you so products catch a rim highlight — it makes physical items pop on screen.
Podcast / Interview Setup
Two people, two key lights. Keep the conversation focused.
- Each person gets their own key light positioned at 45 degrees on their respective sides.
- Put a shared edge light between and behind both subjects.
- Match color temperatures across all lights to avoid one person looking warmer than the other.
- Keep background lighting subtle.
Advanced Lighting Knowledge
Once your basic setup is working, these concepts will take your image from good to polished.
The Three Elements of Light
Every lighting decision you make boils down to three variables. These three elements help you make deliberate choices.
- Brightness (Intensity): How strong the light is. Too bright and you’ll squint with harsh shadows on your face. Too dim, and your camera compensates with noisy, grainy footage. Ideal level? 15–20% power.
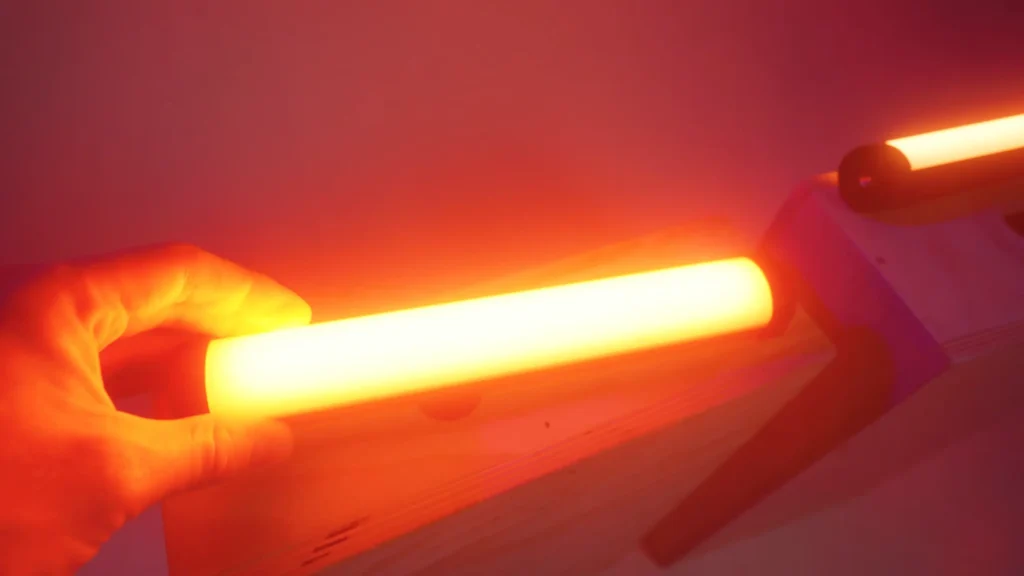
- Color Temperature (Kelvin): How warm or cool your light appears. For most YouTube and corporate content, the 5600K will give you a cool, daylight-colored light that reads as clean and professional. When it comes to evening streams or moody setups, 3200K will provide warm, tungsten-toned light that creates a cozy, atmospheric feel.
- Direction (Angle): Where the light hits you from. Front-on lighting flattens your face. Side lighting adds drama and depth. Overhead lighting casts unflattering shadows under your eyes.
Once you can name which element is off, you can fix any lighting problem in seconds.
Soft Light vs. Hard Light
Light “quality” is about how focused or spread out the beam is. Hard light comes from small, direct sources (a bare bulb, the sun on a clear day). It creates sharp-edged shadows and high contrast. Soft light comes from large, diffused sources. It wraps around your face, smooths skin texture, and minimizes blemishes. For streaming or YouTube, soft light wins almost every time.
Three ways to get it:
- Buy a softbox. The most reliable option. Attach it to your key light, and the diffusion panel does the work.
- DIY with white fabric. Hang a white bedsheet or shower curtain between your light and your face. It spreads the beam across a wider area.
- Bounce off a wall. Turn your light toward a white wall and let the reflected light hit you. The wall becomes a massive, soft source.
The further away a diffused light is, the harder it becomes again — so keep diffused sources as close to you as practical.
RGB Atmosphere Lights: Less Is More
RGB lights are the fastest way to add personality to a stream setup. But too much makes it look cheap. The difference comes down to restraint.
Stick to one or two colors max. Blue and orange (complementary colors) are a classic combination that creates cinematic contrast. Purple and teal work for gaming. A single warm amber behind you can add depth without screaming for attention.
Avoid full-spectrum rainbow cycling. It looks chaotic on camera and distracts from you. Set your RGB lights to a static color, keep them at low-to-medium intensity, and tuck the fixtures out of sight.
Final Words
With some lighting setups, your streaming or video will be upgraded easily. The best lighting setup for streaming starts with a single well-placed, diffused key light. Then add an edge light, light your background to taste. That’s all it takes.
Got your lights dialed in? Set up your lights and start your streaming! For more streaming tips, like the microphone guide for streaming? We’re here to help!
FAQs
Can I use natural window light as my key light?
Yes, but it’s unpredictable. Cloud cover and time of day change the quality constantly. Hang a white sheet over the window to diffuse harsh sunlight for a more consistent look.
What if my room has colored walls?
Colored walls tint any light bounced off them. For the wall-bounce technique, you need white or off-white walls for accurate skin tones. A white sheet pinned to the wall is a quick fix.
Should I use a ring light?
Ring lights provide flat, even illumination that eliminates shadows. That works for some beauty content, but won’t give you the depth of an angled key light. If you own one, try using it off to the side at 45 degrees instead of centered behind your camera.
How do I prevent lights from hurting my eyes during long streams?
Diffusion is the answer. A softbox, diffuser panel, or bouncing light off a wall all soften the beam. Keep intensity at the lowest level that still produces a good image — most creators run lights at only 10–20% brightness.
What color temperature should I set my lights to?
Around 4400–5600K produces neutral, natural-looking skin tones for most content. Drop to 3200K if you want a warmer, more atmospheric vibe. The important thing is consistency: set all your main lights to the same temperature and manually white balance your camera to match.