
How to Live Stream on YouTube: From First Setup to Going Live
How to live stream on YouTube used be a struggle for many new streamers. Here’s the good news: you don’t need any of that to get started. This guide walks you through every step — from enabling live streaming on your channel, to going live on desktop and mobile, to leveling up your production with third-party software and the right audio gear. Whether you’re hosting your first Q&A or building a weekly show, you’ll have a clear path forward by the end.
Step 1: Verify Your Channel for Live Streaming
Before you can go live on YouTube, there’s a verification you have to handle first. Why? YouTube just wants to know you’re a real person and not some spam account trying to blast random streams all over the platform.
Here’s how you sort it out.
- Open YouTube and click your profile icon in the top right corner. From there, jump into YouTube Studio. Once you’re inside, look down to the bottom left and click Settings.
- Now go to Channel, then Feature Eligibility. You’ll notice YouTube splits features into three levels. Standard, intermediate, and advanced. Live streaming sits in the intermediate tier. So that’s the one you need.
- If your phone number isn’t verified yet, YouTube will show you an option right there to verify it. Just follow the prompt, enter your number, confirm the code they send you, and that’s pretty much it.
Once that’s done, YouTube marks your account as a legitimate creator.
One critical detail: if this is your first time verifying, YouTube makes you wait 24 hours before your first live stream. Get verified a day or two before you actually want to go live, so you’re not stuck waiting when inspiration strikes.
Step 2: Go Live From Your Desktop (No Extra Software Needed)
Once your channel is verified, you can start your YouTube live streaming by clicking the Create button in YouTube Studio and selecting Go Live. Here, we’re going to see how to live stream on a desktop.
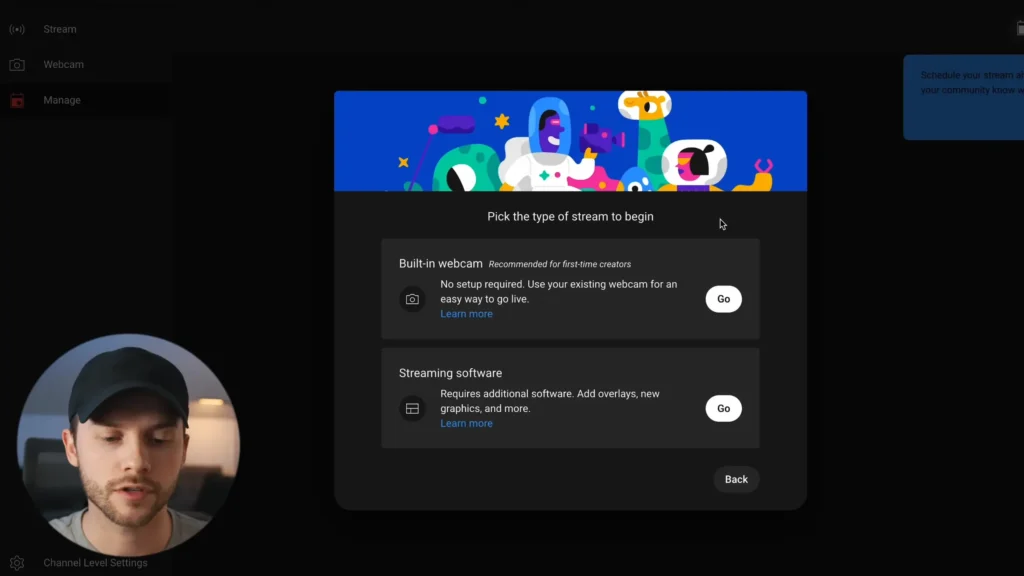
You’ll see two options: go live immediately or schedule a stream for later. For your first test, going live now is the fastest way to get familiar with the interface. If you choose the built-in webcam option, you can skip all the encoder and software complexity and let you broadcast directly from your browser.
Fill In Your Stream Details
There’s a setup form, which you should fill out with your title, a description with any relevant links, and a custom thumbnail. Unlike standard video uploads, where you can A/B test up to three thumbnails, live streams only accept one.
Select a category that fits your content. Add the stream to a playlist if you have one set up, and specify whether the content is made for kids. If you expand the “Show More” section, you’ll find options for tagging the stream as a paid promotion, adding video tags, and specifying the language. Most of them are set as default, but you can change them as you need.
Configure Monetization and Chat
If you’re in the YouTube Partner Program, you can turn monetization on for your stream. YouTube will place midroll ads automatically, or you can trigger ads manually during breaks.
In the Customization tab, set up live chat. You can enable chat, turn on chat replay, and control who can comment. Options include anyone, subscribers only, or subscribers who’ve been subscribed for a set time, like 30 days.
Tips: To reduce spam, you can add a message delay, such as 60 seconds between comments.
You can also add a stream trailer that plays before you go live and set a redirect so viewers are sent to another video or stream when yours ends.
Set Your Visibility and Go Live
Choose your stream visibility first. You can set it to private, unlisted, members only, or public on YouTube. For your first stream, private works best so you can test your camera, mic, and settings without an audience.
After clicking Done, you’ll see the preview screen. Pick your webcam and microphone from the dropdowns, then hit Go Live. There’s only about a two to three-second delay, so be ready to start talking.
While streaming, the dashboard shows your duration, viewer count, likes, and the live chat panel. You can share your screen, grab a shareable link, or mute your mic. Your own chat messages are highlighted so viewers can easily spot them.
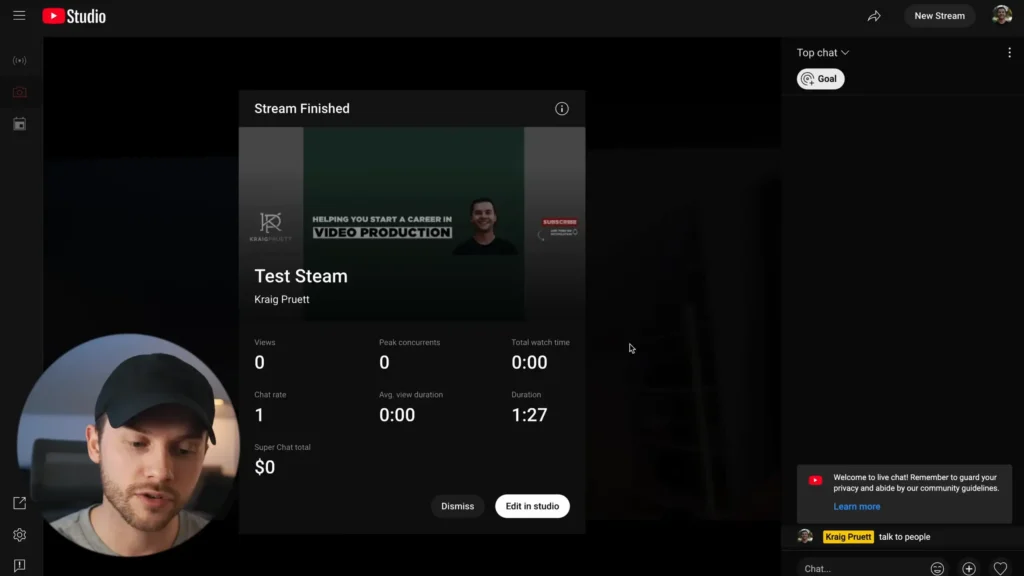
When you finish, click End Stream. You’ll get a quick summary with views, average watch time, and any Super Chat earnings.
Step 3: Go Live From Your Phone
The mobile process mirrors the desktop, but you need at least 50 subscribers to go live from the YouTube app. If you have fewer than 1,000 subscribers, YouTube may also limit your viewer count as a safety measure. One workaround: third-party apps like Prism Live let you bypass the 50-subscriber requirement entirely.
- Before Live Streaming: Open the YouTube app and tap the plus button at the bottom center of the screen. Select Live Stream. You’ll configure your title, description, visibility, and thumbnail right from your phone. Also, decide on portrait or landscape orientation. Whichever you pick locks in for the entire stream. Usually, landscape works better for most content.
- During Live Streaming: You can control cameras, mute your mic, toggle a beauty/retouch filter, and even activate a green screen effect. If you’re streaming in portrait mode, you can flag moments to automatically create YouTube Shorts from your live content.
- After live: YouTube uploads a higher-quality version of the recording to your channel automatically.
A standout mobile feature: you can invite a guest to go live with you directly from the app, which is not available on the desktop. This co-streaming option on the desktop typically requires third-party software.

Level Up Your Live Streams: Helpful Software Tool
If you want more control over your stream, dedicated software helps a lot. YouTube’s built-in tools work, sure. But they’re pretty basic.
Tools like StreamYard let you do much more. You can stream to multiple platforms at once, bring guests on screen with their own cameras, show viewer comments, and switch layouts live. It also adds things like countdown timers, branded overlays, and background music.

Mac users often go with Ecamm Live. It’s beginner-friendly but still powerful enough for more polished productions. As YouTuber Justin Brown from @Justin Brown – Primal Video explains, Ecamm Live makes it easy to switch camera angles, add titles, or bring guests on screen with a single button. No complicated shortcuts needed.
Bonus: streaming through tools like StreamYard also bypasses YouTube’s 50-subscriber mobile requirement and the viewer throttling that affects newer channels.
Audio Gear That Makes a Real Difference
Your audience will forgive a mediocre camera. They won’t forgive bad audio. Whether you’re streaming from a desk setup or your living room, investing in a decent microphone is the single fastest upgrade you can make.
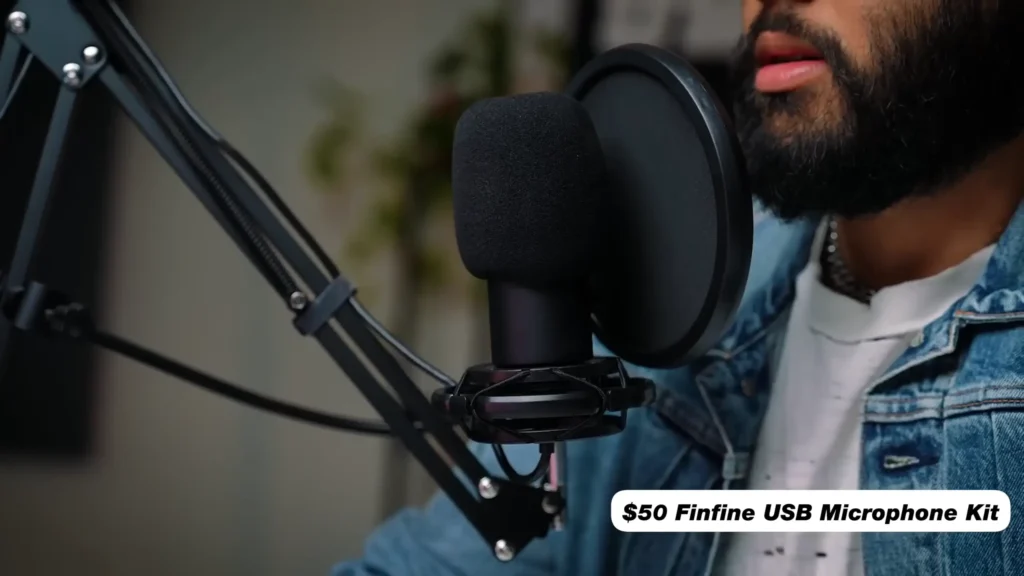
Budget-friendly USB option: If you’re just starting and need something plug-and-play, a FIFINE T669 USB microphone kit is hard to beat. Options around $50 often include the mic, a boom arm, a pop filter, and a USB cable — everything you need in one box. The sound quality punches well above the price, and setup takes about two minutes.
Pro-level XLR setup: When you’re ready to step up, a K688 USB/XLR microphone with a SC8 audio mixer delivers richer, fuller sound with better reliability. This combo gives you physical controls for gain, monitoring, and mixing — useful when you’re managing live audio on the fly.
Wireless lavalier option: A wireless lavalier mic is a smart pick for streamers who move around or prefer a minimal on-camera look. Clip the transmitter to your shirt, plug the USB receiver into your computer, and you’re set. No cables, no visible mic, clean audio.
Whichever route you take, a dedicated microphone beats your laptop’s built-in mic or webcam audio by a wide margin. Your viewers will notice.
Desk Setup Extras Worth Considering
Beyond your microphone, a few accessories can make your streaming experience smoother and your video quality noticeably better.
Lighting: Good lighting improves any camera. A desk-mounted LED light with adjustable brightness and color temperature gives you a clean, well-lit look without taking up floor space. Accent lights — like color-changing LED bars placed behind you — add visual depth to your background without costing much.

Secondary monitor: When you’re screen-sharing slides or tutorials, a second display lets you control what your audience sees without accidentally showing your desktop. Monitors powered by a single Thunderbolt cable keep your desk clean.
Stream controller: A programmable controller like the Elgato Stream Deck lets you switch camera angles, trigger titles, mute your mic, and launch websites at the press of a button. It eliminates fumbling with keyboard shortcuts while you’re live.
HDMI capture card: If you already own a mirrorless or DSLR camera, an HDMI capture card turns it into a high-quality webcam. Pair it with an HDMI cable and a continuous power adapter so your camera doesn’t die mid-stream.
Pro Tips Before You Hit “Go Live”
Run a speed test. Head to speedtest.net and check your upload speed. You need at least 2.5 to 3 Mbps for a stable stream. If your connection is inconsistent, expect dropouts and frustrated viewers.
Write a sticky note cheat sheet. Jot down three things on a sticky note and stick it near your camera: your opening sentence, the main goal of the stream, and your closing call to action. When the nerves hit (and they will), one glance gets you back on track.
Edit after the fact. YouTube’s built-in editor lets you trim your stream recording after it ends. Cut out awkward openings, dead air, or technical hiccups so the replay version feels tighter. One heads-up: editing your stream removes the live chat comments from the replay.
Start private, then go public. Do a private test stream to check your camera angle, audio levels, and lighting before going live for real. It takes two minutes and saves you from discovering problems in front of your audience.
Final Words: Start Simple, Then Build
Starting live streaming on YouTube doesn’t need a professional studio. Verify your channel, plug in a decent microphone, and go live from your browser or phone.
As you get comfortable, layer in upgrades: better lighting, streaming software, a stream controller, and guest panels. Each addition builds on the last, and none of them require you to start over from scratch.
The hardest part of how to live stream on YouTube is pressing the button. So, get your first YouTube live stream, and everything after that gets easier.
FAQS
Do I need special software to live stream on YouTube?
No. YouTube has a built-in webcam streaming option that works directly in your browser. You can also go live from the YouTube mobile app. Third-party software like StreamYard or Ecamm Live is only needed if you want extras like guest panels, graphic overlays, or multi-platform streaming.
Can I live stream on YouTube from my phone?
Yes, but you need at least 50 subscribers to use the YouTube app’s built-in live streaming feature. If you have fewer than 50, third-party apps like Prism Live or browser-based tools like StreamYard can get you around that requirement.
What internet speed do I need to live stream?
You need a minimum upload speed of 2.5 to 3 Mbps for a stable stream. Run a test at speedtest.net before going live. A consistent connection matters more than raw speed – if your upload fluctuates, expect dropouts.
What’s the best budget microphone for live streaming?
A FIFINE T669 USB microphone kit in the $50 range gives you solid audio quality with a mic, boom arm, pop filter, and cable included. It’s plug-and-play, sounds far better than any built-in laptop mic, and sets up in minutes.
Can I edit my live stream after it ends?
Yes. YouTube’s built-in editor lets you trim sections, cut out mistakes, and add blur effects after your stream wraps up. Keep in mind that editing removes the live chat comments from your reply.